HINGE
o o
0 0
3/8"
piece of sandpaper held with your fingers, rather than a
sanding block. Do not sand the centerline of the hinge
material.
TEMPORARILY INSTALL HINGES (Do not glue the hinges at
this time).
1. You'll need eight of the hinges you just made, plus
an Xacto knife with a No. 11 blade.
D
D
2. If you have not already done so, draw an accurate
centerline on the trailing edge of the fin and stabilizer.
D
D
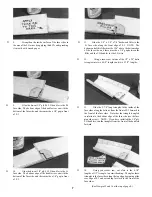
3. Using a ruler and a ball point pen, draw lines
dividing the hinge material into sixteen 3/8"-wide seg-
ments.
4. Drill four 1/16" holes in each of the hinge seg-
ments as shown on the plan. Use a wood block as a backing
when drilling these holes. After drilling, lightly sand the
hinges again to remove any rough edges caused by drilling.
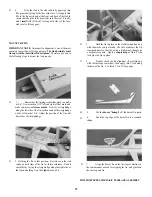
6. Cut the hinges apart with a scissors on the lines
you previously drew. Also snip off a small piece of each
comer.
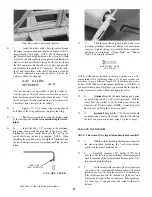
(See sketch at top of next column.)
D 5. Fold the hinge material back and forth a few times
to "condition" the hinges.
D
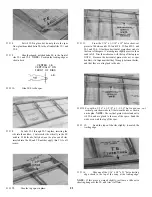
3. Lay the fin and stabilizer on the plan and mark the
hinge locations on the trailing edges.
D
4. Now, while holding the elevators in place against
the stabilizer trailing edge, transfer the hinge locations over
to the elevator leading edge. Repeat this process to mark
the hinge locations on the rudder.
D
NOTE: The hinges supplied with this kit are thin enough that they
can be inserted into a slot made with an Xacto knife. Most other
hinges require you to use a hinge slotting tool. The following steps
describe how to easily cut the hinge slots with an Xacto knife.
CAUTION!!!: You must use extreme care when cutting hinge
slots with an Xacto knife, to avoid cutting yourself! If the
balsa part breaks while you are pushing on the knife, the blade
could go into your hand before you know it! A good precau-
tion is to wear leather gloves while performing the following
steps.
16


