6
PREPARATIONS
❏
1. If you have not done so already, remove the major
parts of the kit from the box and inspect for damage. If any
parts are damaged or missing, contact Product Support at
the address or telephone number listed in the “Kit Inspection”
section on page 5.
❏
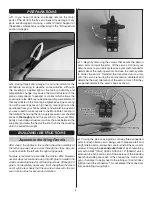
2. During transit and storage, it is not uncommon for the
MonoKote covering to develop some wrinkles. Although
the covering is applied tight at the factory, humidity and
temperature change may cause the wood structure of the
plane’s components to expand or contract which allows the
covering to relax. Before you begin assembly, we recommend
that any wrinkles in the covering be tightened using a covering
iron with a covering sock on high heat. A covering iron can be
purchased from your hobby retailer and will also be useful if
you ever need to make repairs to the MonoKote covering in
the future. When using the iron, apply pressure over sheeted
areas to
thoroughly
bond the covering to the wood. Work
gently around open structure (such as the area between the
wing ribs) and allow the heat of the iron to shrink the covering
until it is pulled drum tight.
BUILDING INSTRUCTIONS
Assemble the Wing Panels
After step 2, the photos in this section show the assembly of
the left wing panel. As you work through the steps, be sure
to work on both the left and the right wing panels.
No glue is required to assemble the Avistar Elite. However,
several steps recommend using thin CA glue to harden the
wood surrounding holes for self-tapping screws. Although CA
glue is not absolutely necessary, it will strengthen the wood
and it will be less likely that these screw holes will strip out
over time from fuel exposure and vibration.
❏
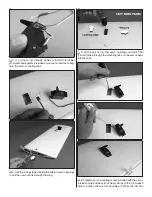
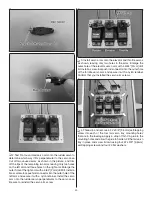
1. Begin by removing the screws that secure the aileron
servo arms and pull the arms off the servos. Connect your
aileron servos to your radio system (see your radio manual for
details about the radio operation) and use the radio system
to center the servos. Reinstall the four-armed servo arms
onto the servos (ensuring the servos remain centered) and
determine the best orientation of the servo arms so that they
are perpendicular to the servo cases as shown.
❏
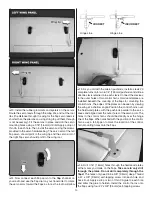
2. Using the picture as a guide, cut away three unneeded
arms for each aileron servo, being sure to prepare a left and
a right aileron servo (always be sure to reinstall the servo arm
screws). Enlarge the
second outer hole
of each remaining
arm with a 5/64" [2mm] drill bit. Attach a 12" [305mm] servo
extension to each aileron servo. Slide a piece of the included
heat shrink tubing over each of the connections. Use a heat
gun or hair dryer to apply heat to the tubing so that it shrinks
tightly around the connectors. This will prevent the connectors
from separating during fl ight.

