34
to be built up to make the pilot sit tall enough in the cockpit.
We used the Great Planes sport pilot and added a block of
balsa to the base and sanded it to match the shape of the
pilot. Then we painted it to match the pilot. Because most of
the pilot base is below the window lines the overall effect is
good and the added balsa base does not take away the look
of the finished pilot. Once you have the pilot at the proper
height you will need to make a mounting plate. We used a
piece of light plywood (not included) and made it wide enough
to reach the rails on both sides of the fuselage. To make the
base less obvious we painted it flat black to match the floor.
❏
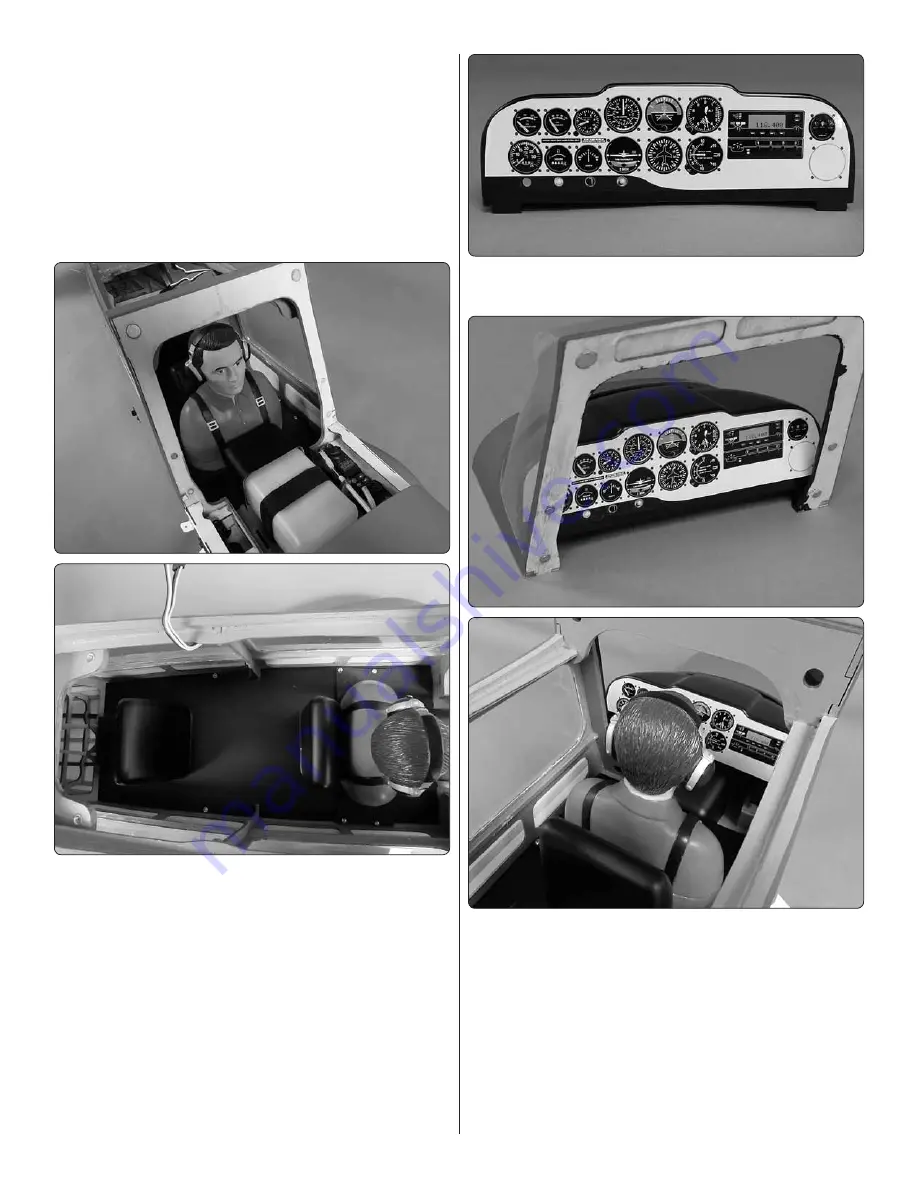
7. The pilot was then screwed through the cockpit floor
and into the rails on the inside of the fuselage. This secures
the pilot as well as securing the front half of the cockpit floor
to the fuselage.
❏
8. If you choose not to install a pilot, secure the floor to the
rails in the fuselage by drilling four 1/16" [1.6mm] holes through
the floor and the mounting rails. Secure the floor with four
#2 x 3/8" [10mm] screws and #2 flat washers. Refer to the
above photo to see the location of the screws we installed.
❏
9. Apply the instrument panel decal to the instrument panel
shroud.
❏
10. Install the instrument panel shroud into the front of
the windshield. You will notice the bottom of the shroud is cut
to allow clearance for the fuel tank. You will also notice that
there is room for the shroud to move inside the windshield.
This wiggle room will allow you to position the shroud exactly
where it needs to be. If you are doing the electric installation
you should install your batteries before gluing the shroud in
place to be sure you leave clearance room. Apply 5-minute
epoxy inside of the windshield where the shroud will make
contact. Install the windshield to the fuselage and then
position the shroud over your fuel tank or batteries. Allow the
glue to harden.


