26
❏
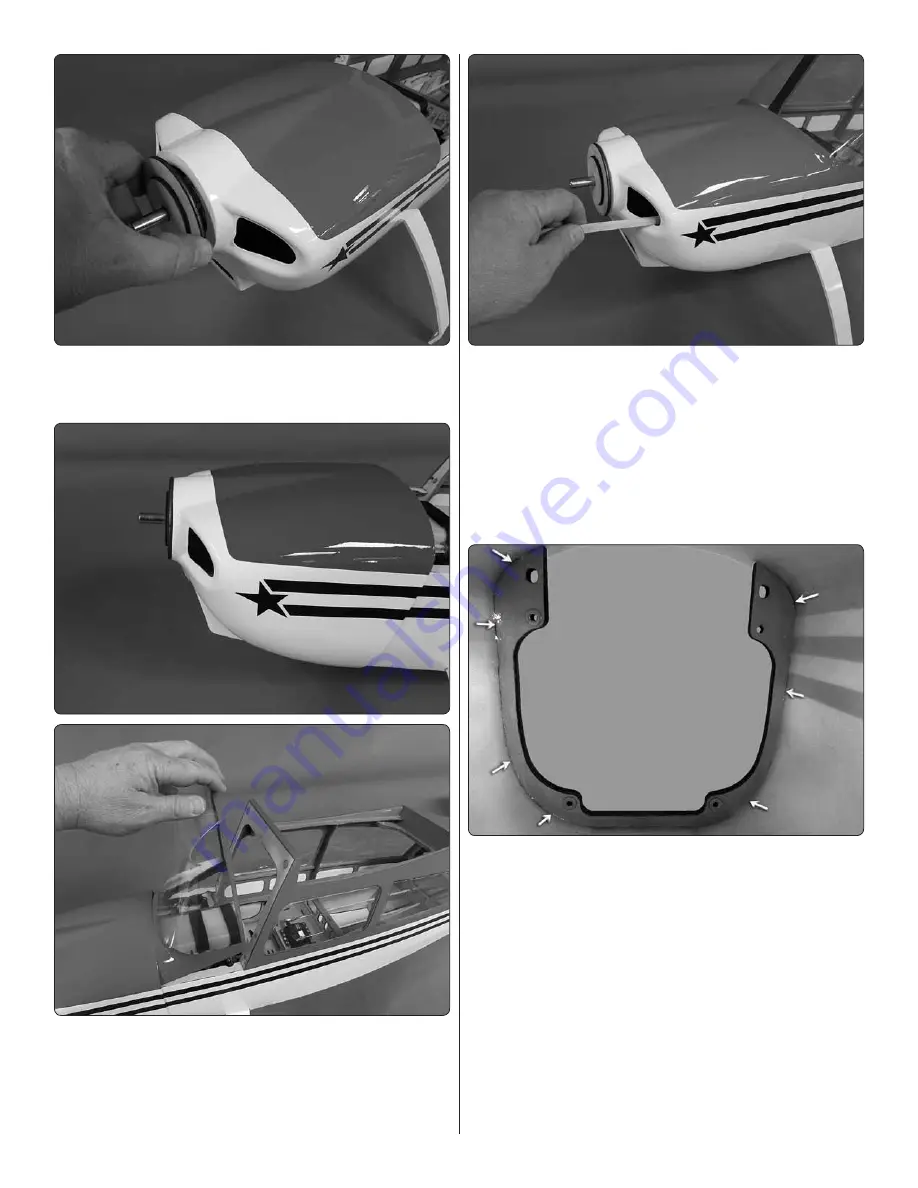
4. Slide the cowl over the engine and then slide the ring
assembly onto the engine. Be sure the ring assembly fits tight
against the face of the engine drive washer.
❏
5. Slide the cowl forward, fitting it tight to disk #2. Be
sure the black trim on the cowl and fuselage align. Slide
the windshield onto the fuselage. This will assure you have
adequate clearance once the cowl is glued in place.
❏
6. Mix approximately 1/2 ounce of 30-minute epoxy and
a small amount of micro balloons to thicken the glue. Use a
long stick or rod and apply a small amount of epoxy to the
cowl ring and the cowl. Apply the glue in four to six spots to
tack glue the cowl to the cowl ring. Allow the glue to harden.
❏
7. Remove the disk assembly from the front of the cowl.
Use a long handled ball wrench and remove the bolts holding
the cowl in place. Remove the cowl, being careful not to break
the cowl ring from the cowl where you glued them together.
❏
8. Glue the cowl to the cowl ring by applying a fillet of Shoe
Goo
®
or good quality silicone glue to the front of the cowl ring.
A Popsicle stick works well for spreading the glue. Set the
cowl aside and allow the glue to cure.


