72
LDX 86 High Frame Rate/HD/3G/4K Camera Platform User’s Guide (v2.0)
Chapter 4 - Video setup
4.
Push the navigation button to enter
COLCORR
(color correction) menu. The color corrector
menu is displayed. There are two pages that can be accessed by using the
NEXT
and
PREV
buttons.
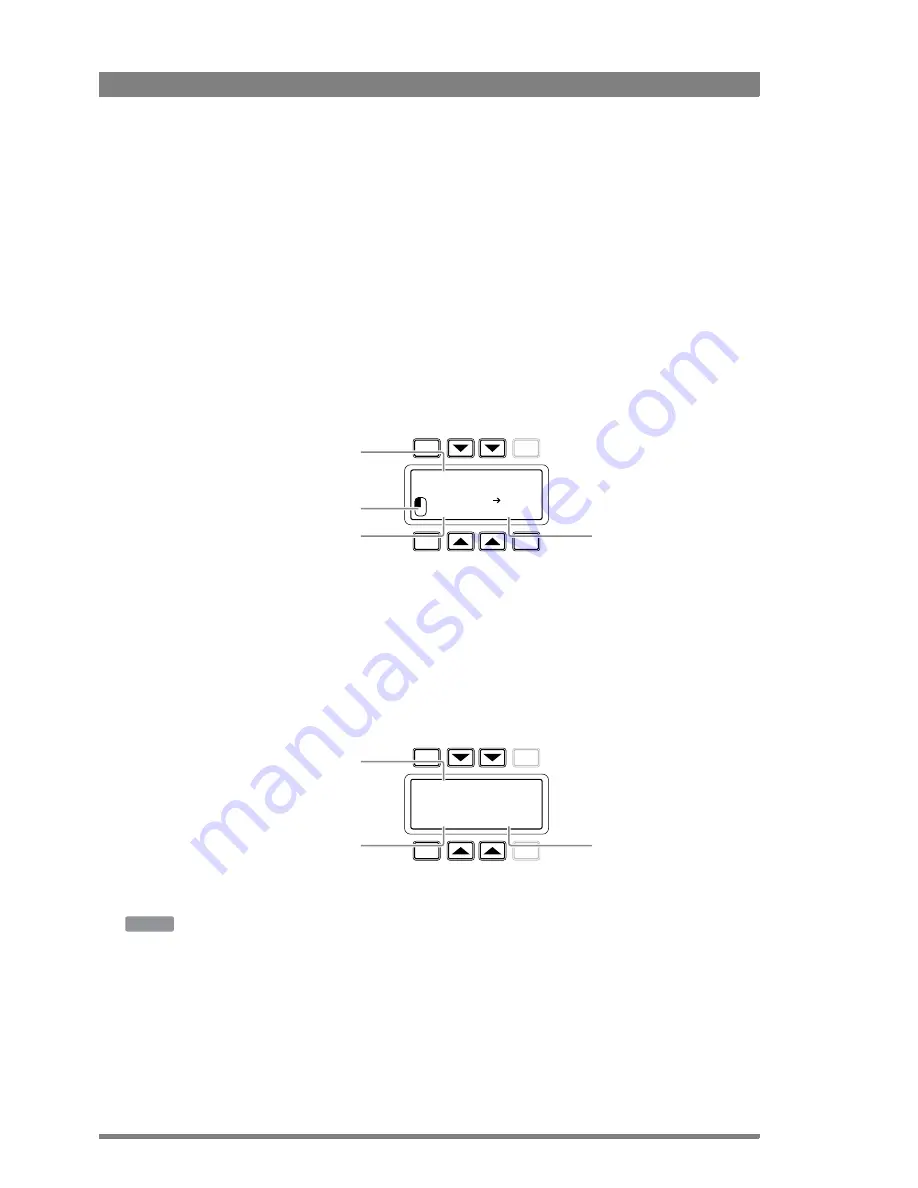
The first page contains the setup items. Use the navigation buttons to scroll through the
different setup items.
1.
Select a color correction set with the
CC
SET
item at the top left of the screen.
2.
Activate the selected set using the top right selection button. When a set is not activated,
all items are blocked.
3.
Select a color area by changing the
COLOR
and
WIDTH
. Select the parameter with the
navigation button and change its value with the rotary
control. A preview of the color
selection is shown on the bottom left of the screen.
4.
Adjust
HUE
,
SATURATION
an
LUMINANCE
of the selected color range. Select the
parameter with the navigation button and change its value with the rotary control.
Use the
NEXT
button to go to the second page.
1.
Switch the
CC
VIEW
item on the view the color area selection.
2.
Select a transition style using the
SMOOTHING
item.
3.
You can reset all color correction sets to their default values with the
RESET
CC
item.
4.
Leave this page by pressing the
PREV
button.
Setup using the camera menu
Carry out the following steps to set up the color corrector in the camera menu:
1.
In the
CREATIVE
CONTROL
>
COLOR
ADJUSTMENT
>
COL
CORR
menu, switch the item
COL
CORR
on.
2.
Go to the item
SET
and select a color correction set.
3.
Switch on the item
SET
ON/OFF
to activate the selected set.
TOGGLE
PREV
NEXT
EXIT
CC SET:1 ON
SAT:50
HUE:76
LUM:50
COLOR:280
YL-
WIDTH:225
Color selection
preview
Select color
correction set
Color/ Color
width settings
Hue/Saturation/
Luminance settings
TOGGLE
PREV.
NEXT
EXIT
CC View
Sharp
Off
Smoothing
Reset CC
Color correction
set view
Smoothing
selection
Reset color
correction settings
CAM


