2 – 4
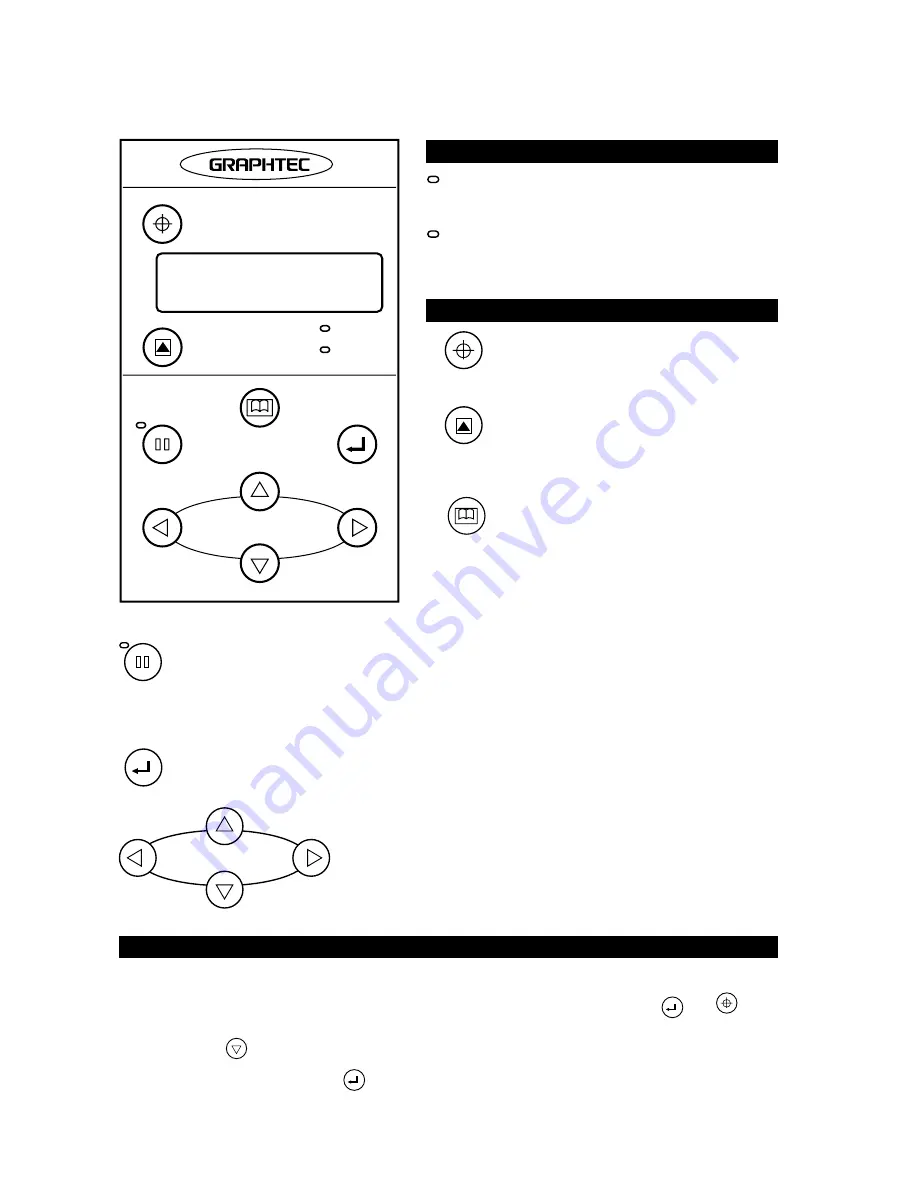
2.3 Control Panel
Lamps
POWER
: Remains lit while the cutting plotter is being
supplied with power.
PROMPT
: Lights upon the receipt of plot data speci-
fying a coordinate point outside of the ef-
fective plotting area.
Panel Keys
F1/ORIGIN
: Press this function key to reposi-
tion the origin point or to select
a menu function in PAUSE status.
F2/TEST
: Press this function key to run a
cutting test for checking the cut-
ting conditions or to select a menu
function in PAUSE status.
NEXT PAGE
: Press this function key to switch
through COND1 to COND4. When
a menu is being displayed in
PAUSE status, press this key to
proceed to the next menu.
PAUSE
: This key functions differently according to the current operating status.
Press it once to enter the PAUSE status and light up the PAUSE lamp. Press it again to cancel
the PAUSE status and turn off the PAUSE lamp.
Press this key when you wish to discontinue cutting or plotting or set functions at menus on
the display panel.
ENTER
: After setting a cutting or plotting condition, press this key to register the setting.
POSITION
: These keys function differently according to the current operating
status.
When the cutting plotter is not in PAUSE status, they are used
to move the pen carriage.
When the cutting plotter is in PAUSE status, they are used to
change the settings of functions at menus on the display panel.
Setting the Multilingual Display
Your cutting plotter’s display can be set to one of six different languages: English, French, German,
Italian, Japanese, or Spanish. To access the language selection menu, hold down the
ENTER
and
F1/ORIGIN
keys while turning on the power. Hold down the keys until a two-line language display menu appears.
Next, press the
POSITION key to move through the six language selections. When the desired
language is displayed, press the
ENTER
key to register your selection.
F1 / ORIGIN
F2 / TEST
PAUSE
ENTER
POWER
PROMPT
NEXT PAGE
POSITION


