Wireless Autofocus Intraoral Camera with Mouse
Installation
5
12
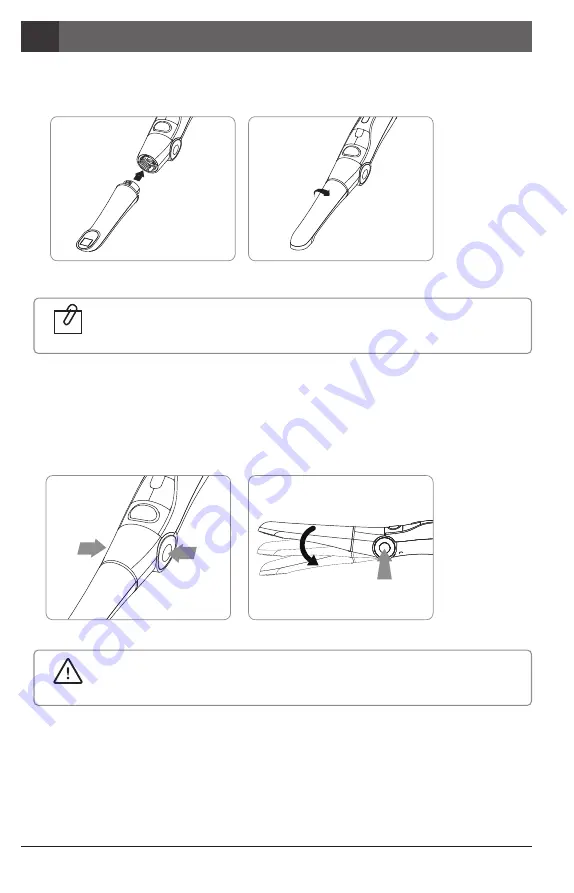
2. Camera head connection
Connect the camera head with body. Be careful and do not force much when connect the head.
Place the camera head to body
Spin the camera head for arrow direction.
The camera head should be placed upside down to connect it.
Reference
①
②
3. Change the camera head angle
Push the both cramp and change the camera head angle.
①
②
①
①
Should use cramp when change the angle. If don’t the durability will be weaker.
Caution
Summary of Contents for Whicam Story 3 CS
Page 2: ......
Page 22: ......
Page 24: ......
Page 25: ...25 3 31 4 32 5 33 6 37 7 39 8 40 9 41 10 42 11 42 12 43 2 27 1 26...
Page 26: ...1 280 LED OLED DrsViewer2 3 26 Wireless Autofocus Intraoral Camera with Mouse 1 2 OLED...
Page 27: ...27 2...
Page 28: ...Wireless Autofocus Intraoral Camera with Mouse 2 28...
Page 29: ...29 2...
Page 30: ...Wireless Autofocus Intraoral Camera with Mouse 2 30...
Page 31: ...31 3 2ea 100 CD...
Page 33: ...1 1 CD 33 5 3 2 PC USB 4 Wireless USB Manager...
Page 34: ...Wireless Autofocus Intraoral Camera with Mouse 5 34 2 3...
Page 35: ...2 1 1 35 5 OLED 5 DrsViewer2 DrsViewer2 DrsViewer2 4 1 PC Windows XP 64 bit...
Page 37: ...1 LED 37 6 5 LED 1 2 3 3 2 DrsViewer2 4 Original Warm Cool...
Page 38: ...Wireless Autofocus Intraoral Camera with Mouse 6 38 6 LED 7 3 5 6 8 3 5 10 15 20 25 30 2 9...
Page 39: ...39 7...
Page 41: ...41 9 IC WHT60 Whicam Story3 283 B 208 403 911 032 424 6325 2341 14 668 1 SET...
Page 42: ...Wireless Autofocus Intraoral Camera with Mouse 42 10 11 1 100 S N WHT 07140001...
Page 44: ......


