


27
27
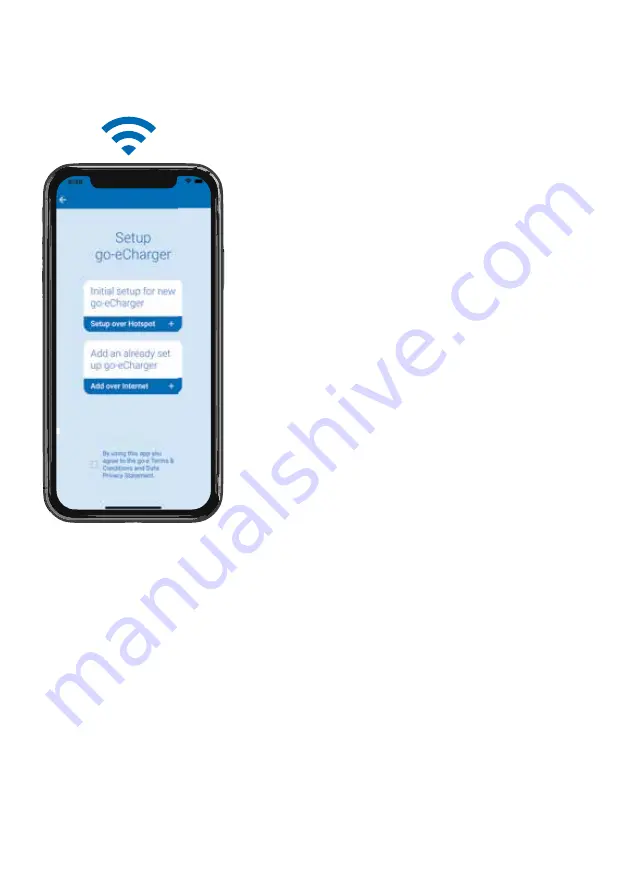
12. App - connection setup
Set up connection via WiFi
For remote control of the charger and for some
comfort functions, a WiFi connection of the
charger is essential.
1. To connect to the WiFi network, you have
to establish an active hotspot connection to
the Charger (as described above).
2. Then tap the „+“ icon in the app.
3. On the following screen, select „Initial setup
for new go-e Charger“. As soon as the hot-
spot connection has been detected, tap on
„Next“. On the next screen, the connection
to WiFi needs to be activated.
4. Enter the name of your WiFi („SSID“) or se-
lect your WiFi (if displayed). You also need to
enter the „password“ of this WiFi network.
As soon as the connection has been esta-
blished, a „Next“ button appears, which you
have to tap. Follow the subsequent instruc-
tions of the app until the „Done“ button ap-
pears. Tap this button.
5. Check whether the connection to the go-e
Cloud is allowed under „Advanced settings“
(in the „Internet“ tab of the go-e Charger
app).
6. Disconnect from the Charger‘s hotspot. Ac-
tivate your mobile data or connect to a WiFi
network. Tap the „+“ icon in the go-e Char-
ger app again. Select „Add an already set up
go-e Charger“. Now enter the serial number
and the password you assigned yourself.
The Charger can then be controlled remote-
ly via mobile data or WiFi.
3.
3.
3.
6.
Summary of Contents for Gemini flex
Page 1: ...go e Charger Gemini flex 11 22 kW Installation and operating guide V 1 0...
Page 2: ...2 2 Content...
Page 34: ......