PA G E 2 2 I n s t r u c t I o n m A n uA l
t X 4 5 0 0 s
the frequency or to the left to decrease the
frequency. the display will show the frequency to
the nearest 10 khz.
e.g. 468.425 will display as:
Display
46840
46841
46842
46843
46845
46846
46847
46848
46850
Frequency
468.40
00
468.41
25
468.42
50
468.43
75
468.45
00
468.46
25
468.47
50
468.48
75
468.50
00
4
6
8
4
2
10 kHz
100 kHz
1 MHz
10 MHz
100 MHz
4. to advance through the frequencies more quickly,
briefly press the
channel
control. the frequency
will now adjust in 1 mhz steps. As you approach
the desired frequency, briefly press the
channel
control again to return the original 25 khz/12.5
khz steps.
5. once your desired frequency is displayed, press
and hold the
channel
control until the radio
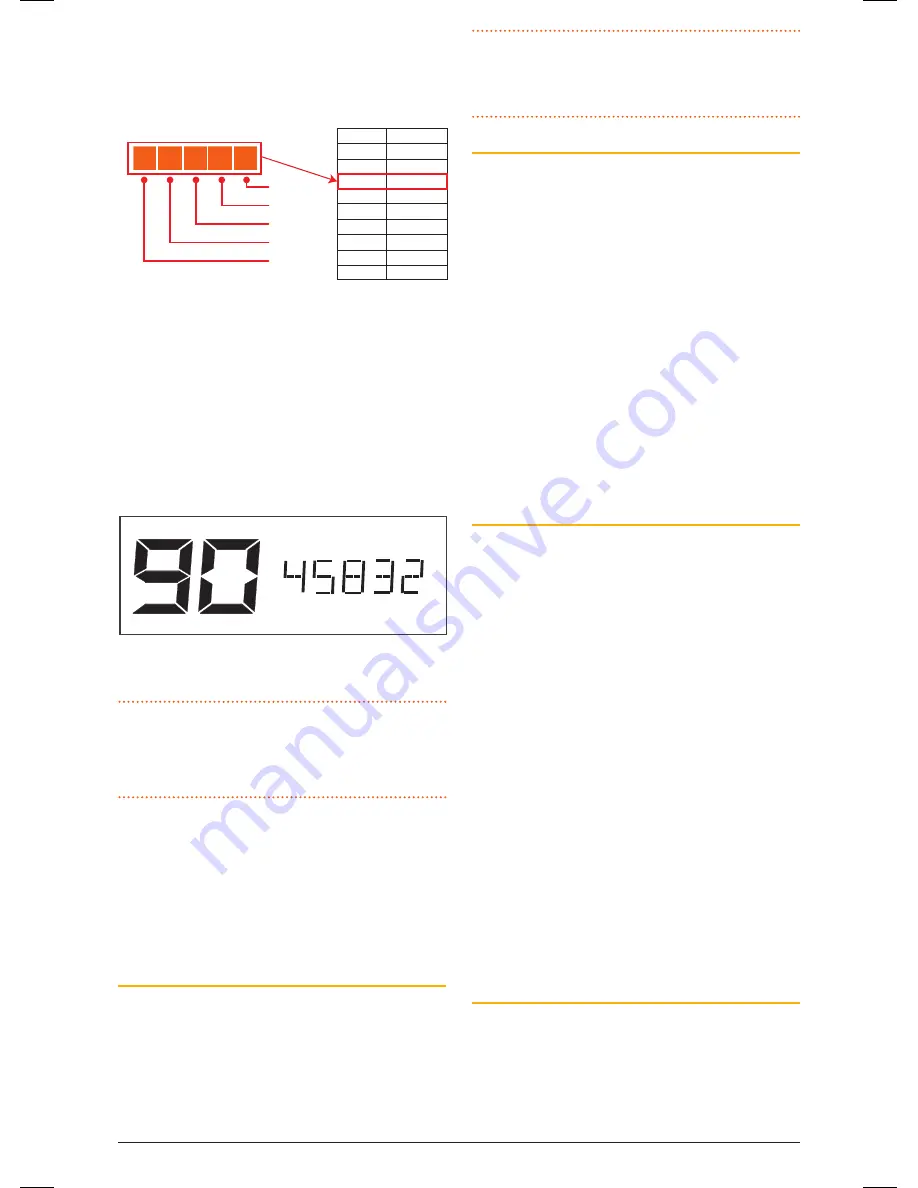
beeps. the frequency is now stored under your
selected channel number.
e.g. 458.325 MHz stored under CH 90
6. repeat steps 1 – 5 to program other channels.
NOTE:
the frequency tuning is live which means
the radio is actually listening to the frequencies you
are selecting. You can use this feature to locate and
store active frequencies while you are tuning.
to program more than 19 channels, you will need
to switch to another channel bank. simply press the
MENU
key repeatedly until the
RX-
channel Bank
option appears then select another channel Bank.
once selected, press the
MENU
key repeatedly to
return to the frequency programming option and
continue programming your preferred frequencies.
To close the channel Editor
switch the radio oFF then on again to close the
channel editor and restore normal operation. Your
programmed frequencies will now be accessible from
the
channel
control
above ch80. remember, if you
have stored channels into different channel banks,
you will need to select the appropriate channel bank
to access them.
NOTE:
under normal operation, only those channels
that have been programmed with frequencies will
be visible. channels that were marked with –oFF- in
the channel editor will no longer be visible.
Deleting an RX-only channel
to delete an rX-only channel;
1. Enable the channel Editor.
2. select the channel you wish to delete.
3. Press and hold the
MENU
key until the radio
beeps.
4. rotate the
channel
control all the way to the
left until –oFF– is displayed.
5. Press and hold the
channel
control to store the
new setting.
6. switch the radio oFF then on again to restore
normal operation.
the deleted channel will no longer be visible.
Displaying the RX-only channel’s Frequency
or Alpha Label
By default the radio displays the signal strength
meter to the right of the channel number. You can
configure the display to show the Frequency or the
Alpha name of the selected channel.
Before starting, ensure the radio is in the numeric
mode (press
F
then
ALPHA
so that ‘numEr’ is
displayed).
1. select an rX-only channel (the following menu
option is only available when an rX-only channel
is selected).
2. Press and hold
MENU
until the radio beeps.
3. Briefly press
MENU
repeatedly until
S-MET
appears.
4. rotate the
channel
control to the right until
‘AlPhA’ is displayed.
5. Press the
PTT
to exit the menu.
the radio will now display the channel frequency to
the right of the channel number whenever an rX-only
channel is selected.
To Display the channel’s ALPHA Label
Briefly press
F
then
ALPHA
. ‘AlPhA’ will appear
briefly then the channel’s Alpha label will be
displayed to the left of the channel number. If the
Alpha label is blank, then an Alpha label has not yet
been set for this channel. use the following steps to
enter your preferred Alpha label.
46885-4_TX4500S_IM.indd 22
4/06/14 3:08 PM


