34
ENGLISH
A. Short press power button to turn on the device. If use alternating current, make sure that the power
supply line is connected accurately.
B. Do not shake the finger and keep the patient in a stable state during the process.
C. The data can be read directly from the screen in the measure interface.
Note: Fingernails and the luminescent tube should be at the same side.
Note: If the alarm function is on, the device will provide alarm signal when probe or finger is out.
5.2 Measurement interface
A. Alarm including the alarm of measure data’s going beyond the limits, the alarm of low-voltage, the
alarm of finger out, the alarm of sensor off, the alarm of sensor fault.
B. When alarm is on, short press the alarm pause button to make the alarm pause, it can renew alarm
after period of time, alarm pause time can be set by menu. Long press it to confirm the alarm, and
there will be no alarm this time.
5.3 Menu operation
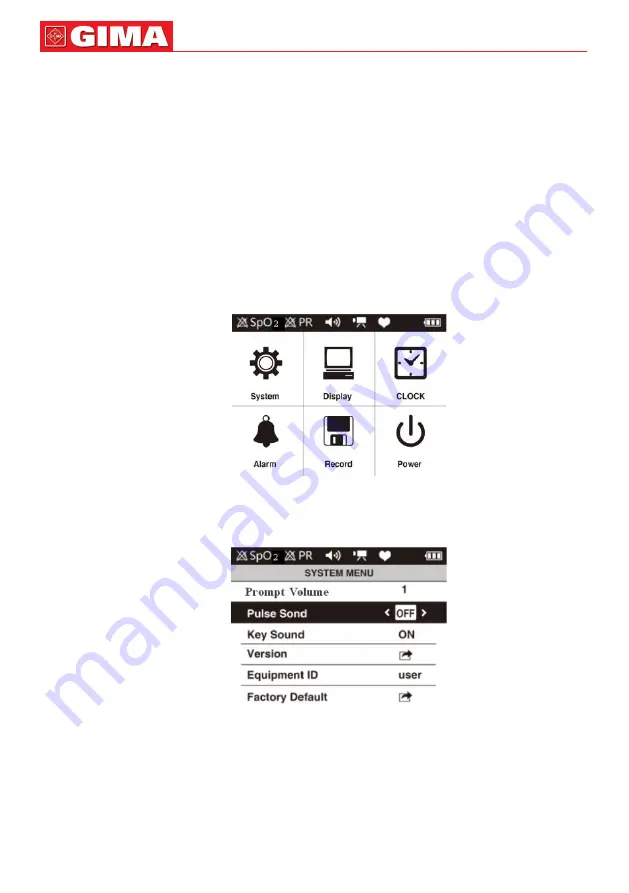
Under the measurement interface, press the menu button to enter the main menu interface as shown in
Figure 5, system, display, clock, alarm and recond , etc. can be set, methods are as followings:
Figure 5. Main menu
5.3.1 System setting
In the main menu interface, choose “System” item, then press menu button to enter the System setting
menu as figure 6:
Figure 6. System setting menu
A. Prompt volume: move the choice bar to the “Volume” item, then press left/right button to set the vol-
ume (three levels).
B. Pulse sound: move the choice bar to the “Pulse sound” item, then press left/right button to set pulse
sound.
C. key sound: move the choice bar to the “key sound” item, then press left/right button to set key sound.
D. Version: move the choice bar to the “Version” item, then press the menu button to see the edition in-
formation of hardware and software, and return to the system setting menu interface after 2 seconds.
E. Equipment ID: see the ID information of device. The ID of the device can be set by the PC software.
Please refer to <Smart Device Assistant> for detail.


