- 31 -
System Hardware Installation
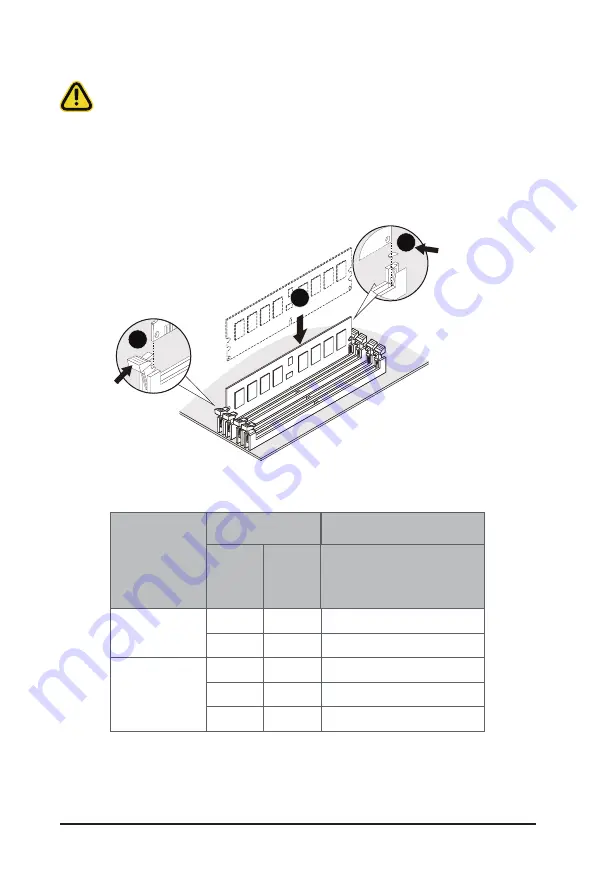
3-7-2 Installing the Memory
3-7-3 DIMM Population Table
Before installing a memory module, make sure to turn off the computer and unplug the power
cord from the power outlet to prevent damage to the memory module.
Be sure to install DDR4 DIMMs on this motherboard.
Follow these instructions to install the Memory:
1. Insert the DIMM memory module vertically into the DIMM slot, and push it down.
2. Close the plastic clip at both edges of the DIMM slots to lock the DIMM module.
3. Reverse the installation steps when you want to remove the DIMM module.
1
2
2
RDIMM Maximum Frequency Supported Tablel
2R
2
1
DIMMs
Populated
DIMM
1R
--
1
1
--
--
2
2
1
--
1
2DR
3200
3200
2933
2933
2933
1.2V
Frequency (MT/s)
Summary of Contents for H252-Z10
Page 1: ...H252 Z10 AMD EPYC 7002 UP Server System 2U 4 nodes User Manual Rev 1 0 ...
Page 10: ...This page left intentionally blank ...
Page 16: ... 16 Hardware Installation 1 3 System Block Diagram ...
Page 22: ...System Appearance 22 This page left intentionally blank ...
Page 34: ...System Hardware Installation 34 1 2 4 3 5 ...
Page 40: ...System Hardware Installation 40 HDD Back Plane Board Signal On Board SATA Top ...
Page 41: ... 41 System Hardware Installation SATA1 SATA3 On Board SATA Bottom SATA2 SATA4 NVMe Top ...
Page 42: ...System Hardware Installation 42 N1B N1A N3B N3A NVMe Bottom N2B N2A N4B N4A ...
Page 54: ...BIOS Setup 54 5 2 4 1 Serial Port 1 2 Configuration ...
Page 60: ...BIOS Setup 60 5 2 7 1 CPU 0 Information ...
Page 66: ...BIOS Setup 66 5 2 11 SATA Configuration ...
Page 71: ... 71 BIOS Setup 5 2 16 AVAGO MegaRAID Configuration Utility ...
Page 73: ... 73 BIOS Setup 5 2 17 Intel R I350 Gigabit Network Connection ...
Page 75: ... 75 BIOS Setup 5 2 18 VLAN Configuration ...
Page 86: ...BIOS Setup 86 5 3 3 3 NVDIMM ...


