5
8
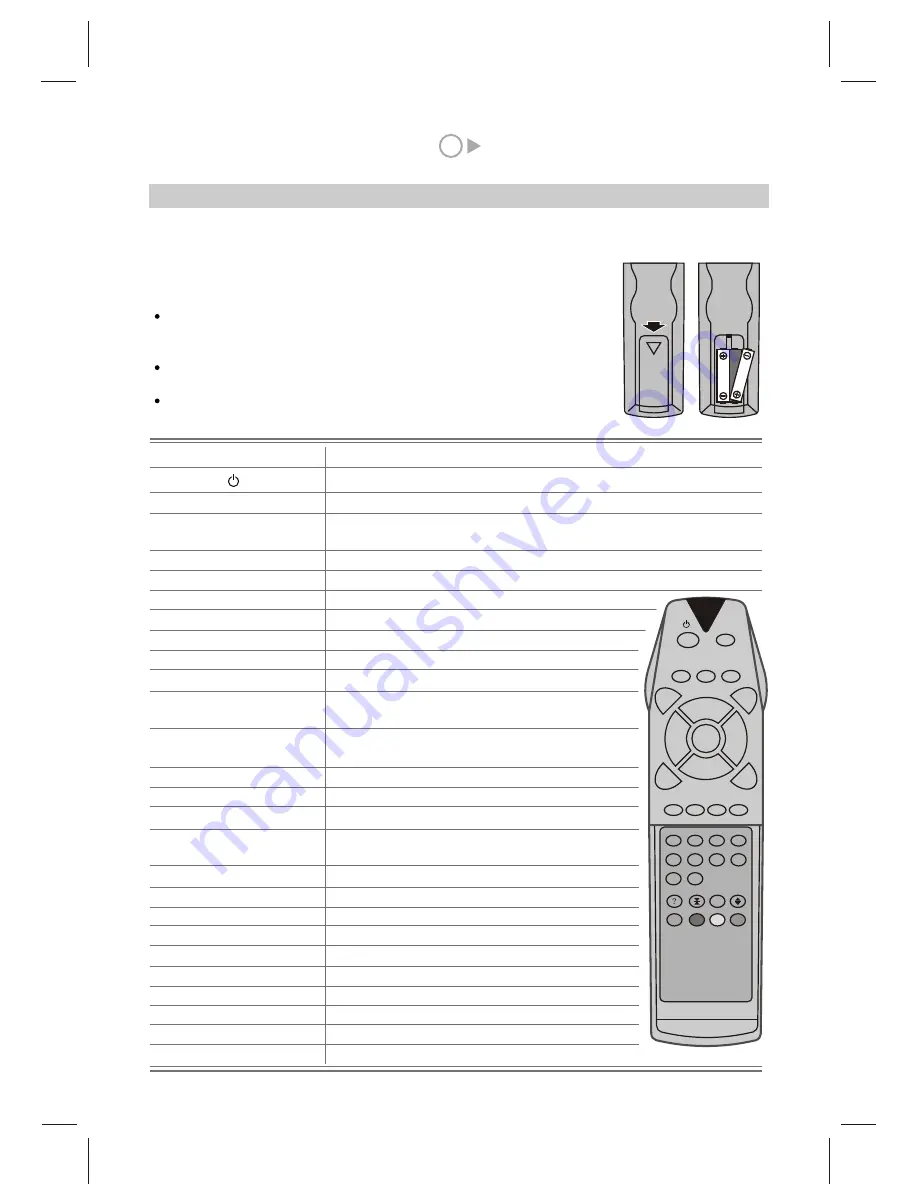
1.Install the battery for the remote controller
a. Press the cover of the battery compartment on the back of the remote controller and remove it.
b. Insert 2 AAA batteries, make sure the polarity (+) or (-) of batteries conforms to the polarity marks in the
battery compartment.
c. Slide the cover of the battery compartment to the original place.
VIII. Preparation for switch on
Please do not mix the new and old batteries. Do not mix manganese and
alkali batteries. Please use the remote controller carefully to avoid to
drop, wet or dismantle it .
In case the controller is not in use for a long time, take out the batteries
to avoid liquid leakage.
The used up batteries should be disposed in an environment-protection way.
Note:
Name
Function
MUTE
TV/AV
SLEEP
PICTURE
PIP
EXIT
MENU
P+
P-
V+
V-
V-SIZE
MTS
SWAP
STILL
1234567890
CALL
TIME
TEXT
SOUND
BRIGHT
ERASE
SKIP
INSERT
REPLACE
Stand-by / On
Channel information display
Time display (TIME menu should be set at first)
MUTE On/Off
TV/AV Scart/AV 1/AV 2/S-Video/Component/Analog RGB/
Sleep time setting
Shortcut button for adjusting picture
Exit menu
Next stored channel/previous menu/previous item
Previous stored channel/next menu/next item
Volume increase/ item value increase
/ item content selection
Volume decrease/ item value decrease
/ item content selection
Adjustment of image size
Selection button of sound mode
DUAL/MONO/STEREO
Channel playback
Still image
Digit selection
Change of bright / dark image
Menu selection/confirmation
function of teletext
Shortcut button for adjusting Sound mode
Delete program
Skip program
Store program for manual scan
Replace program
TV/AV
PICTURE
P-
P+
MENU
V+
V-
MUTE
SLEEP
SWAP
PI
P
EX
IT
1
2
3
4
5
6
7
8
9
0
TE
XT
ST
IL
L
V-SIZE
MTS
CALL
SOUND SLEEP
i
TIME BRIGHT
ERASE SKIP
INSERT REPLACE
Picture-in-picture selection under PC/DTV input status
2.Description of remote controller buttons
DTV YPbPr
Summary of Contents for GTV3203
Page 1: ...Operating Instructions 32 LCD DISPLAY...
Page 18: ...SPW2 025 347 SS...


