34
English
Paper Path
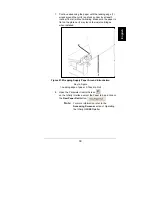
1. Disengage and lower the nipbar arm. Do this by pulling
the spring-loaded pin in the nipbar arm from the hole.
2. Verify that the pinch rollers are spaced evenly along the
length of the rubber drive roll.
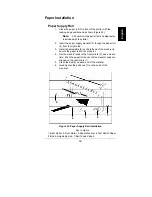
3. Thread the paper through the paper path following the
sequence 1 through 6 as shown (Figure 23).
Note:
The final steps of take-up roll
installation and advancing the paper
onto the take-up roll are covered later
in this manual.
Figure 23. Paper Path
Key to Figure
1-Paper Supply Mandrel, 2-Back Tension Bar, 3-Platen, 4-Drive
Roll, 5-Nip Bar, 6-Nip Bar Arm
3
4
5
6
1
2
Paper
Path
Cartridge
Holder
Inkjet
Cartridge
Paper
Take-Up
Mandrel


