12
English
4. Temporarily remove the plotter mounting bolts and
washers from the top inside of each support column (6
places each support column)
CAUTION:
Use care to avoid damaging the
two connectors illustrated in
Figure 5 during installation of the
plotter on the support columns.
5. Lift the plotter from the shipping container using the wood
handles. Carefully set the plotter on the two support
columns.
Detail A
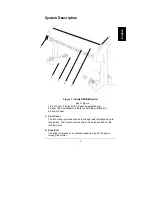
Figure 5. Plotter Assembly
Key to Figure
1-M6 x 25 Bolts, 2-Split Washers, 3-Flat Washers, 4-M6 x 50 Bolts,
5-Connectors
See
Detail A
1, 2, 3
(2 bottom
holes)
2, 3, 4
(4 top holes)
5


