ENGLISH
12
SETTING DADO CUTS
This saw can be used to cut grooves (dados) in the workpiece, rather than
cut right through. The saw head is lowered only part way and while held in
that position, a cut is made.
1.
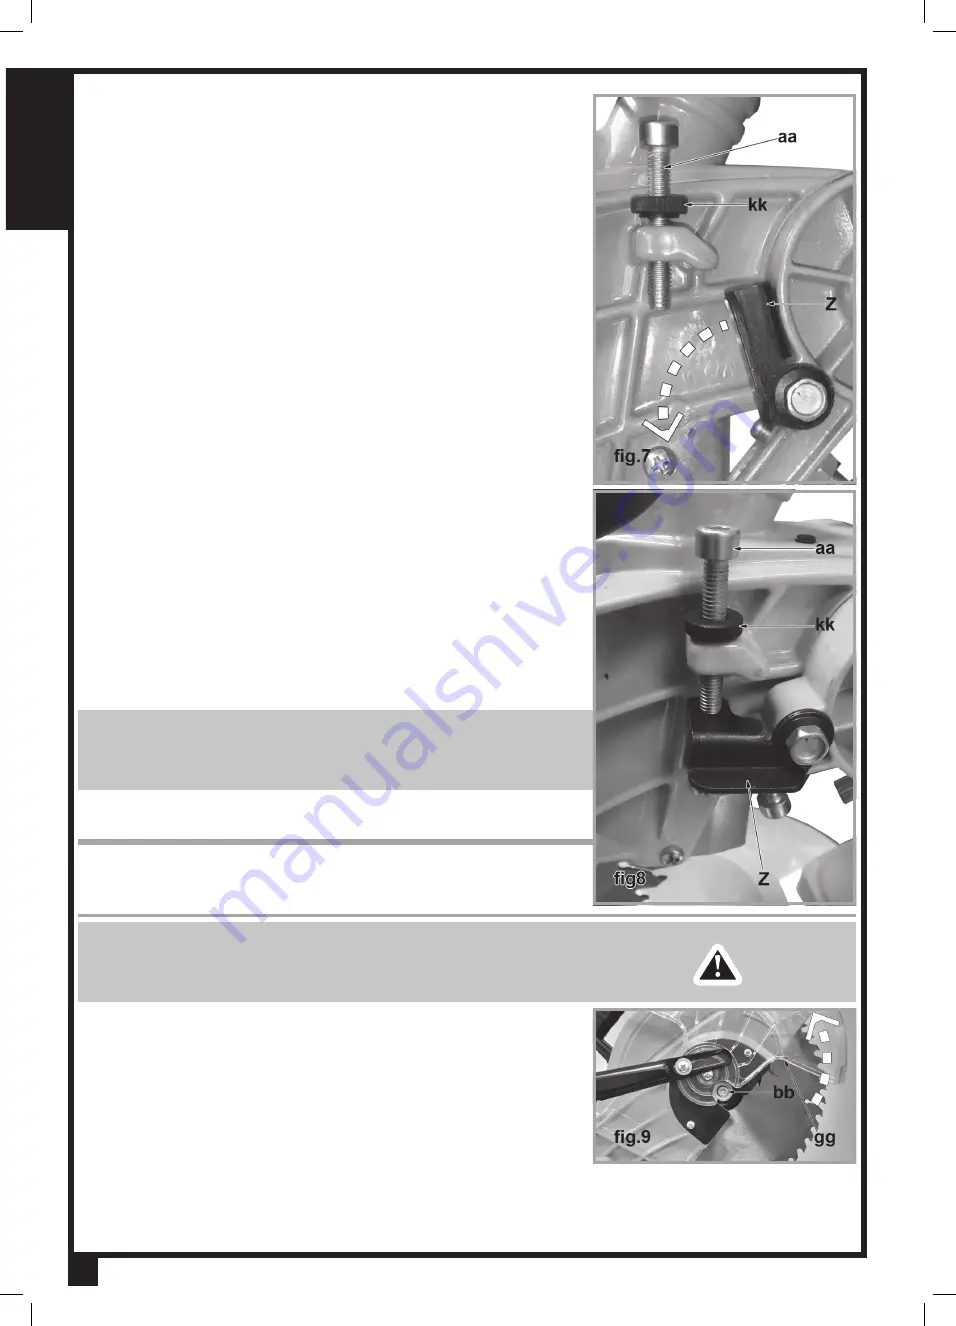
This dado depth is engaged when the dado stopper plate (Z, fig 7 & 8) is
swung down and engages the dado depth adjust screw (da, fig.7 & 8).
2. To set the depth to which the blade will cut during this operation, pull the
dado stopper plate down from its resting position. (fig.8)
3. Push the handle down completely, to its lowest position, and notice that
now the dado depth adjustment screw is what limits the downward travel
of the sawhead.
4. Turn the dado depth adjustment screw with a 5 mm hex wrench so that
the saw blade teeth at their lowest point are above the table surface at a
height corresponding with the desired depth of the dado.
5.
Tighten the knurled locking nut (kk, fig.7 & 8) on the shank of the dado
depth adjustment screw to lock its setting.
6. Test the depth of the dado by making a trial cut in a piece of scrap
material.
7. Adjust as necessary.
NOTE:
This saw is
not
designed to be used with a true dado blade. In
order to make wide dado cuts, use a standard (1/8” thick) blade and
make multiple adjacent cuts at the set depth or make a cut on each side
and remove the material in between manually.
MAINTENANCE
MOUNTING AND REMOVING THE
BLADE
WARNING:
Before replacing the saw blade always unplug the tool.
Make sure that the spindle speed diameter and saw blade bore match.
Only use sharp and undamaged saw blades. Cracked or bent saw
blades must be replaced immediately.
1. Lock the head of the machine in its highest, upright position.
2. From the left side of the saw, rotate the lower saw blade guard (gg,
fig.9) counter-clockwise until the hex socket head blade bolt (bb, fig.9)
that holds the blade is exposed.
Summary of Contents for MS3003
Page 16: ...ENGLISH 16...


