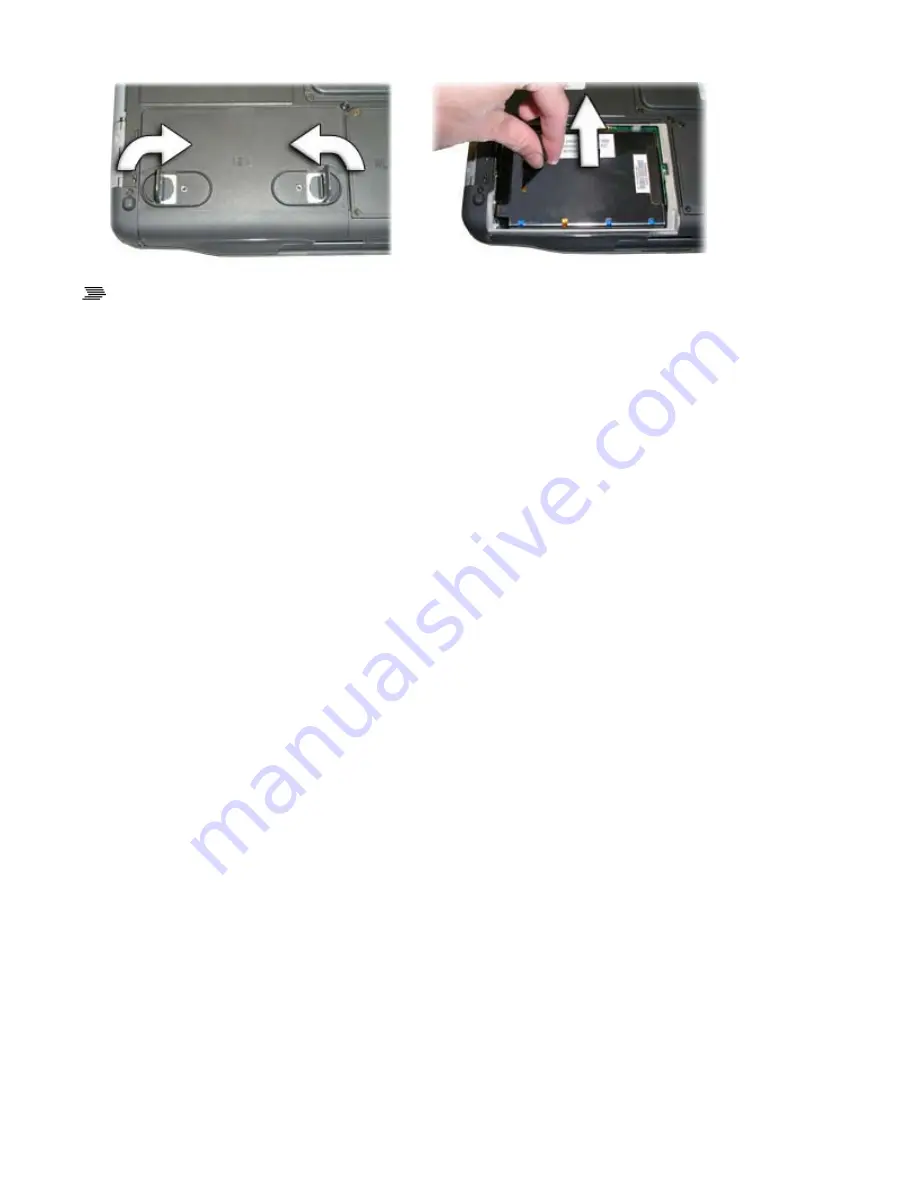
To install the hard disk drive
1. You should print these instructions before continuing. They will not be available after you shut
down the computer in step two.
2. Shut down the computer and remove external power.
3. Turn the computer over so you are looking at the bottom.
4. If installed, use a Philips screwdriver to remove the two optional screws in the hard disk drive
cover.
5. Flip open the HDD locks and turn both of them toward the center of the computer.
6. Line up the connectors and insert the HDD in the computer.
7. Replace the door and turn the HDD locks toward the outside of the computer to lock it.
8. If desired, install the optional HDD screws.
Hard Disk Drive Heater
The hard disk drive heater warms the HDD before spinning up in temperatures below 5°C, the minimum
safe operating temperature of the HDD. The heater is built into the removable HDD module and
operates as needed when the computer is turned on or is in an operational state. If the temperature is
below 5°C when booting or resuming you will see the message "Warming internal hard drive. Please
wait...". The unit will continue booting when it detects the HDD is warm enough to operate safely.
NOTE If you are using the computer in a cold temperature environment and the battery level is too low
for the heater to operate, you will see the error message "Battery too low to warm the hard drive.
Shutting down..." and the computer will shut down. Apply external power and reboot.
The Media Bay
Depending on your configuration, your computer may have an optional DVD-ROM/CD-RW, DVD-
RW/CD-RW combo drive or media bay battery. The combo drive allows you to read data from DVDs
and CDs, including audio or video CDs and enables you to burn your data onto a CD recordable disc. If
you have the DVD-RW/CD-RW drive, you can also burn data onto a recordable DVD disc. Please refer
to the recording software online help for more information.
Page 31 of 92
GoBook XR-1 Help
8/3/2006
file://C:\Documents and Settings\harwoodm\Local Settings\Temp\~hh2D1C.htm


