42
07/30/2014
Capturing 3DPM Images
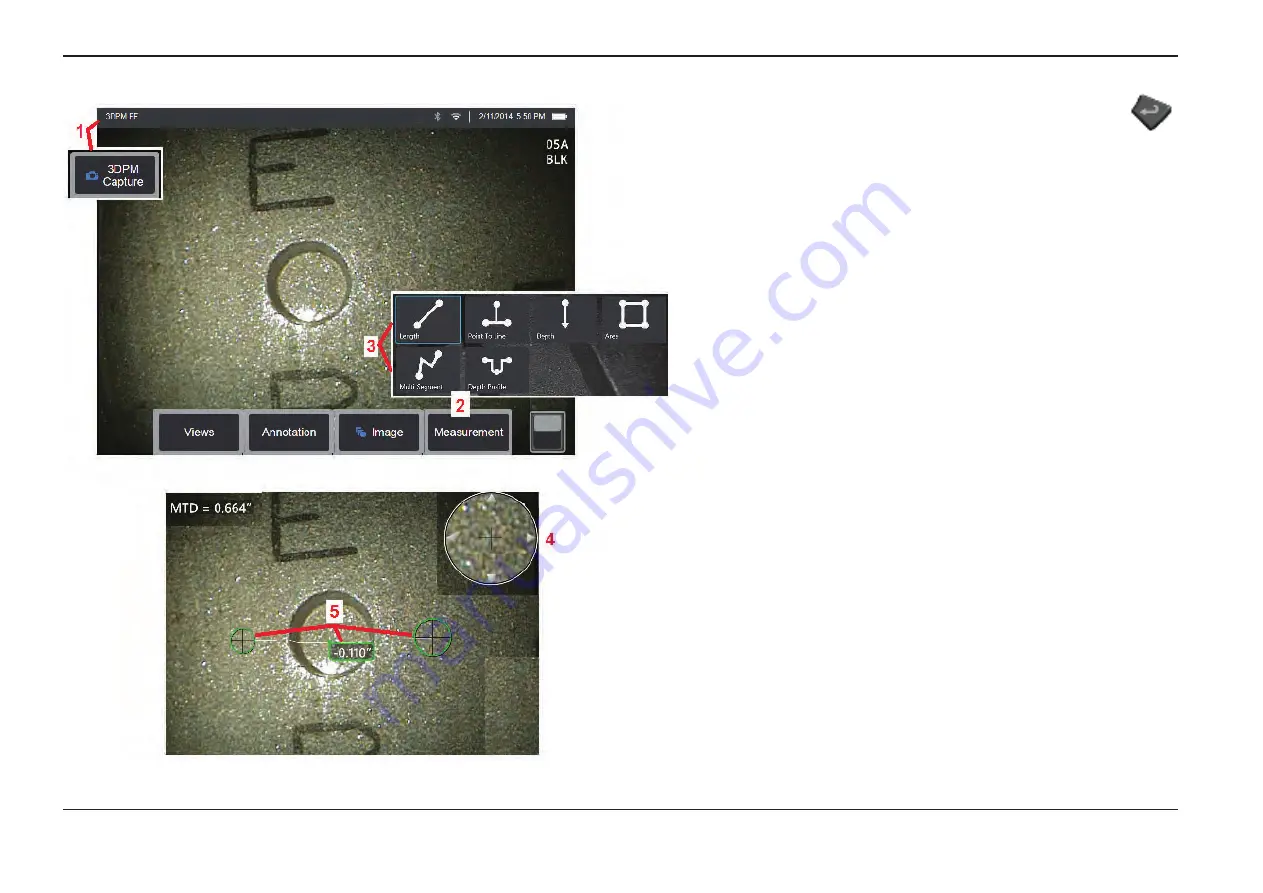
1
– When the target is in position, select this soft key (or long hold
).
The 3D Phase Measurement scan will begin.
Note:
Hold the probe still for approximately one second during the surface
scan. Multiple images are taken to complete the scan, and the probe must
be held still during this sequence. Do not move the probe until the
Capturing
images... keep probe
still
caution disappears.
2
– Select to begin the measurement process.
3
– Choose the type of phase measurement.
4
– The
Patented Zoom Window
automatically opens allowing for precise
positioning of the active cursor. Tap the window’s edges (or tap on the cursor,
then control with the joystick)to adjust the active cursor position.
Click here
to learn about turning the Zoom Window on or off.
5
– Place cursors on the desired feature. Up to five measurements may be
placed on each image.
Note: The system will wait up to 1.5 seconds for movement to stop
before starting a 3DPM capture. If movement does not stop, a message
displays and the capture is not attempted. If movement begins during the
capture, the system pauses the capturing process, waits for movement
to stop, and attempts a second capture. If either attempt allows enough
frames to be captured without movement to provide sufficient surface
coverage, measurement is allowed. If neither attempt is completed without
movement, a message indicating that the capture was affected by motion
is displayed. This may result in more un-measurable (red) pixels or a slightly
higher noise level than would be achieved with no movement. The system
does not allow measurement if the movement was sufficient to substantially
degrade 3D data quality.


