36
07/30/2014
Annotating with Text and Arrows
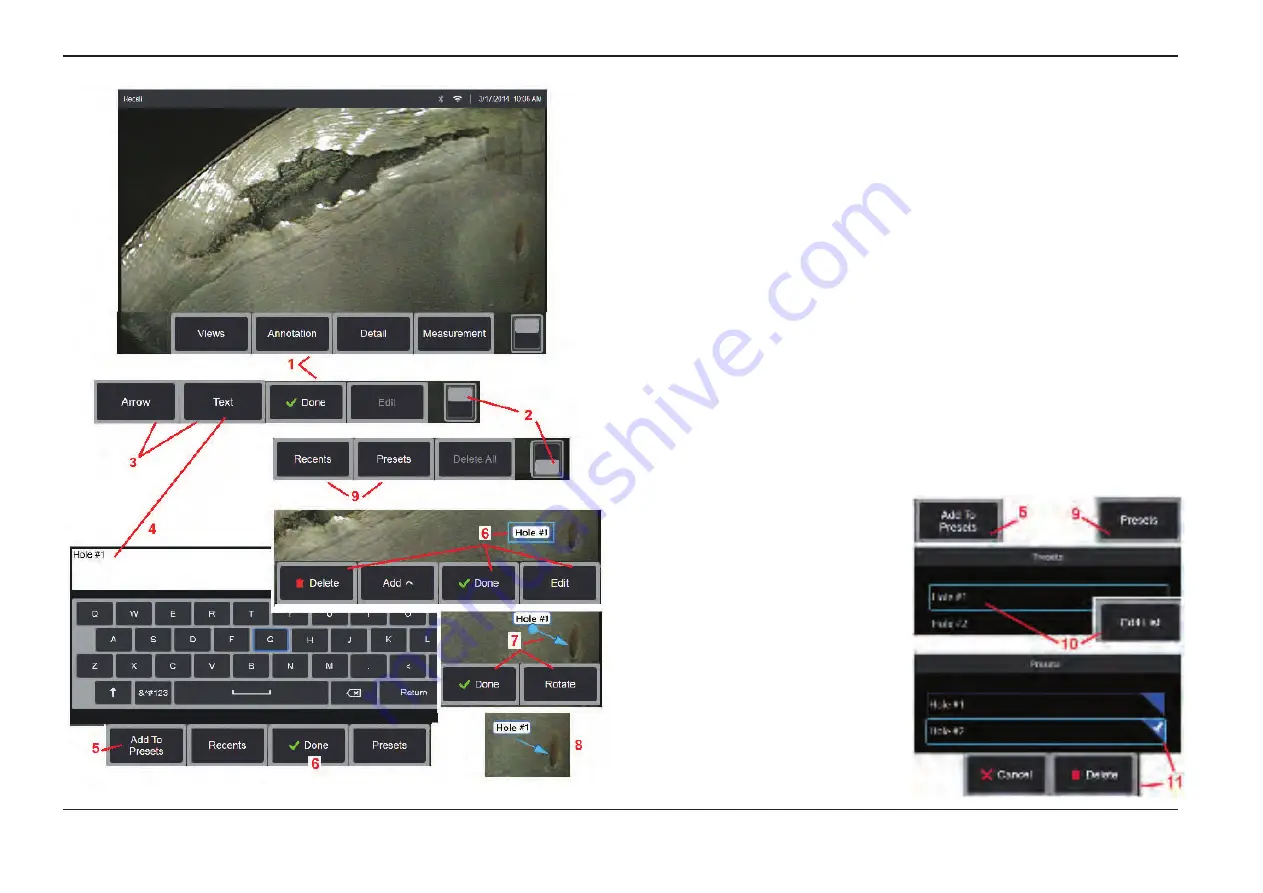
Annotating an image means adding text or arrows to point out areas of interest: cracks,
indications, etc. You can annotate live, frozen, and recalled images.
1
– Select to launch the
Annotation
feature.
2
– Tap to switch between the
Soft Key Bar’s
top and bottom row. Double tapping in
this location hides or displays the soft keys and status bar.
3
– Adding annotation begins by selecting
Text
or
Arrow
.
4
– Selecting
Text
opens the
Virtual Keyboard
. Enter the desired note.
5
– Select to add the entered note to a list of up to 100
Preset
notes, which can be
repeatedly used without typing.
6
– Select
Done
when finished typing the note, which will appear on the image
surrounded by a blue box indicating it is selected. While in this selected state, the note
can be moved (by dragging with your finger or using the joystick),
Edited
, or
Deleted
.
Select
Done
again to de-select the note.
7
– A selected
Arrow
(added in the same way as a note) appears with a ball at one end.
Move the arrow around the display by dragging with your finger (near the arrowhead)
or using the joystick. The arrow may also
be rotated by moving the ball with your
finger or with the
Rotate
soft key.
8
– Select
Done
to de-select the arrow.
Note: Any note or arrow can be selected
by simply tapping its position on the
display.
9
– Opens the list of user-created
Preset
notes (annotation).
Recents
shows all
recently typed notes, including presets.
10
– Once open, select and
Add
a
Preset
note or select it for
Editing
.
11
– Tap in this corner (white check
appears) to identify a note for deletion.


