background image

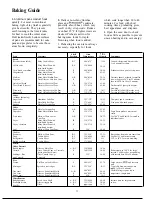
Baking Guide

1. 

Aluminum pans conduct heat

2. Dark or non-shiny finishes,

which cook longer than 30 to 40

quickly. For most conventional

glass and 

 cookware,

minutes. For food with short

baking, light, shiny finishes generally

generally absorb heat, which may

cooking times, preheating gives

give best results. They prevent

result in dry, crisp crusts. Reduce

best appearance and crispness.

overbrowning in the time it takes

oven heat 25”F. if lighter crusts are

for heat to cook the center areas.

desired. Preheat cast iron for

4. Open the oven door to check

food as little as possible to prevent

Dull (satin-finish) bottom surfaces

baking some foods for rapid

of pans are recommended for cake

browning when food is added.

uneven heating and to save energy.

pans and pie plates to be sure those

3. Preheating the oven is not always

areas brown completely.

necessary, especially for foods

Shelf

Oven

Time,

Food

Container

Position

Temperature

Minutes

Comments

Bread
Biscuits 

 thick)

Shiny Cookie Sheet

B, C

400°-475”

15-20

Canned, refrigerated biscuits take

Coffee cake

2 to 4 minutes less time.

Shiny Metal Pan with

B, A

350°-4000

20-30

satin-finish bottom

Corn bread or muffins

Cast Iron or Glass

B

400°-4500

20-40

Preheat cast iron pan for crisp crust.

Gingerbread

Shiny Metal Pan with

B

350°

45-55

satin-finish bottom

Muffins

Shiny Metal Muffin Pans

A, B

400°-4250

20-30

Decrease about 5 minutes for muffin

Popovers

Deep Glass or Cast Iron Cups

B

375°

45-60

mix, or bake at 450”F. for 25 minutes,
then at 

 for 10 to 15 minutes.

Quick loaf bread

Metal or Glass Loaf Pans

B

350°-3750

45-60

Yeast bread (2 loaves)

Metal or Glass Loaf Pans

A, B

375°-4250

45-60

Dark metal or glass give deepest

Plain rolls

Shiny Oblong or Muffin Pans

browning.

Sweet rolls

A, B

375” -425°

Shiny Oblong or Muffin Pans

10-25

For thin rolls, Shelf B maybe used.

B, A

350°-3750

20-30

For thin rolls, Shelf B maybe used.

Cakes
(without shortening)
Angel food

Aluminum Tube Pan

Jelly roll

A

325” -375°

30-55

Two-piece pan is convenient.

Metal Jelly Roll Pan

Sponge

B

375”-400°

10-15

Line pan with waxed paper,

Metal or Ceramic Pan

A

325°-350”

45-60

Cakes
Bundt cakes

Metal or Ceramic Pan

Cupcakes

A, B

325°-3500

45-65

Shiny Metal Muffin Pans

B

350°-3750

20-25

Paper liners produce more moist

Fruit cakes

Metal or Glass Loaf or

crusts.

A, B

275°-3000

2-4 

Tube Pan

Use 300”F. and Shelf B for small or

Layer

Shiny Metal Pan with

individual cakes.

350°-3750

20-35

satin-finish bottom

Layer, chocolate

Shiny Metal Pan with

B

350°-3750

25-30

satin-finish bottom

Loaf

Metal or Glass Loaf Pans

B

350°

40-60

Cookies
Brownies

Metal or Glass Pans

B, C

325°-350”

25-35

Drop

Bar cookies from mix use same time.

Cookie Sheet

Refrigerator

B, C

350°-4000

10-20

Cookie Sheet

Use Shelf C and increase temp.

B, C

400°-425”

6-12

Rolled or sliced

25”F. to 50”F. for more browning.

Cookie Sheet

B, C

375°-4000

7-12

Fruits,
Other Desserts
Baked apples

Glass or Metal Pan

A, B, C

350°-4000

Custard

30-60

Glass Custard Cups or Casserole

B

300°-3500

30-60

Reduce temp. to 300”F. for large

(set in pan of hot water)

custard. Cook bread or rice pudding

Puddings, Rice

Glass Custard Cups 

B

325°

50-90

and Custard

with custard base 80 to 90 minutes.

Casserole

Pies
Frozen

Foil Pan on Cookie Sheet

A

400°-425”

45-70

Large pies use 

 and increase

Meringue

Spread to crust edges

time.

B, A

325”-350”

15-25

To quickly brown meringue, use

One crust

 for 8 to 10 minutes.

Glass or Satin-finish Metal

A, B

400”-425°

Two crust

Glass or Satin-finish Metal

40-60

Custard fillings require lower

 shell

B

400”-425°

Glass or Satin-finish Metal

40-60

temperature, longer time.

B

450°

12-15

Miscellaneous
Baked potatoes

Set on Oven Shelf

A, B, C

325°-4000

Scalloped dishes

Glass or 

 Pan

60-90

Increase time for large amount

A, B, C

325°-3750

Souffles

30-60

or size.

Glass

B

30-75

12

Summary of Contents for JKP46G

Page 1: ...ning Operation 21 Time Bake 10 11 Shelves 9 Broiling Broiling Guide 16 18 Warranty Back Cover Care and Cleaning 23 24 Clock 7 8 Consumer Services 27 Electronic Touch Control Panel 6 Energy Saving Tips 4 Features 5 Light Bulb Replacement 9 23 Meat Thermometer 14 17 Minute Second Timer 7 8 Model and Serial Numbers 2 Preheating 12 GEAnswer Centerm Problem Solver 25 26 80L162 i2000 Model JKP46G GEAppi...

Page 2: ...ervices page in the back of this book We re proud of our service and want you to be pleased If for some reason you are not happy with the service you receive here are three steps to follow for further help FIRST contact the people who serviced your appliance Explain why you are not pleased In most cases this will solve the problem NEXT if you are still not pleased write all the details including y...

Page 3: ...s in the oven Keep hood and grease filters clean to maintain good venting and to avoid grease fires Do not let cooking grease or other flammable materials accumulate in or near the oven Do not use water on grease fires Flame in oven can be smothered by completely closing door and touching CLEAWOFF pad Do not touch heating elements or interior surface of oven These surfaces may be hot enough to bur...

Page 4: ...he oven only when necessary Most foods will cook satisfactorily without preheating If you find preheating is necessary keep an eye on the indicator light and put food in the oven promptly after the light goes out Always turn oven OFF before removing food During baking avoid frequent door openings Keep door open as short a time as possible Be sure to wipe up excess spillage before self cleaning ope...

Page 5: ...ven Shelves 7 Bake Unit 8 Model and Serial Numbers 9 Oven Interior Light Comes on automatically when door is opened 10 Oven Shelf Supports Letters A B C and D indicate cooking positions for shelves as recommended on cooking guides 11 Oven Door Gasket 12 Broiler Panand Rack Do not clean in self clean oven Explained on page 6 21 16 14 17 19 9 10 2 9 23 9 21 16 Model JKP46G with two self cleaning ove...

Page 6: ...ashes if door is not latched 7 OVEN LIGHT Touch this pad to turn oven light on and off 8 BAKE TIME Use to enter amount of time required for automatic baking or roasting See page 10 9 SllJP TIME Use when baking or cleaning to enter the time of day you want oven to turn off 10 CLOCK Touch this pad to enter time of day or check time of day when display is showing other information 11 MIN SEC TIMER Le...

Page 7: ...on the numbers to the left of the colon are the minutes and the numbers to the right of the colon are the seconds For example to enter 10 minutes and 45 seconds touch Number Pads 1 0 4 and 5 in that order You may program the timer for up to 99 minutes 99 seconds If you make a mistake touch MIN SEC TIMER pad and start again E CL MIN TIM ìÜ Ü e ÜO è 4 ON OFt BAKE TIME the lower o en as well as the u...

Page 8: ...ing function You can check but not change the time of day by merely touching the CLOCK pad Q How can I use my Minute Timer to make my surface cooking easier A Your Minute Timer will help time total cooking which includes time to boil food and change temperatures Do not judge cooking time by visible steam only Food will cook in covered containers even though you can t see any steam Q If I start to ...

Page 9: ...e closed Oven Shelves The shelves are designed with stop locks When you place them correctly on the supports they ll stop before coming completely out of the oven What s more they will not tilt when you re removing food or when you are placing food on them To remove shelves from the oven make sure they re cool Then lift up the rear of the shelf and pull it forward with the stop locks along the top...

Page 10: ...E B E B ENT MP LO 2 i FOOD STOP TEMP TIME d BA 4 TI c Step 2 Make sure the oven door is closed Then touch BAKE pad Display shows BAKE and a flashing indicator points to OVEN TEMP IL T DOORI IGME Step 3 Touch the number pads in the order that you read them to enter the temperature called for in your recipe The temperature you set shows on the display I I II LATCH DOOR I ON OFF Step 4 Touch START pa...

Page 11: ... oven temperature as oven heats Step 3 Pour brownie batter into greased pan Step 4 When preset temperature is reached oven signals Center the pan on the oven shelf Step 5 Touch MIN SEC TIMER and number pads 2 5 0 and O to enter 25 minutes cooking time Timing begins automatically in six seconds Step 6 When oven signals touch MIN SEC TIMER pad to stop signal Check to make sure brownies are done Remo...

Page 12: ...5 For thin rolls Shelf B maybe used B A 350 3750 20 30 For thin rolls Shelf B maybe used Cakes without shortening Angel food Aluminum Tube Pan Jelly roll A 325 375 30 55 Two piece pan is convenient Metal Jelly Roll Pan Sponge B 375 400 10 15 Line pan with waxed paper Metal or Ceramic Pan A 325 350 45 60 Cakes Bundt cakes Metal or Ceramic Pan Cupcakes A B 325 3500 45 65 Shiny Metal Muffin Pans B 35...

Page 13: ... 2 Place meat inside the oven and close the door Step 3 Touch BAKE pad Display shows BAKE and a flashing indicator light points to OVEN TEMP l W w r Step 4 Touch number pads 3 2 and 5 to enter 325 F oven temperature The exception is small poultry which is roasted at 375 F I J I Step 5 Touch START pad to begin roasting Display shows oven temperature as it rises and signal sounds when desired temper...

Page 14: ...t of Ham or Lamb Insert probe into cut end meatiest part of ham or lamb without a bone For bone in ham or lamb insert probe into center of lowest large muscle or joint Questions and Answers Q When buying a roast are there any special tips that would help me cook it more evenly A Yes Buy a roast as even in inner high from below an parallel thickness as possible or buy a to the leg of a whole turkey...

Page 15: ... refrigerated roasts 10 minutes per pound for roasts under 5 pounds Defrost poultry before roasting Oven Approximate Roasting Time Internal Type Temperature Dnneness in Minutes per Pound Temperature F Meat 3 to 5 lbs 6 to 8 lbs Tender cuts rib high quality sirloin tip 325 Rare 24 30 18 22 130 1400 rump or top round Medium 30 35 22 25 150 1600 Well Done 35 45 28 33 170 1850 Lamb Leg or bone in shou...

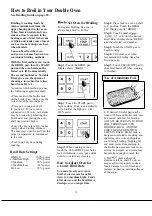
Page 16: ...always been used to do this Step 1 Touch the BROIL pad Display shows BROILV 1 Step 2 Touch the START pad to begin cooking Oven is automatically set to broil at the high rate with 100 power Step 3 When cooking is done touch the CLEAR OFF pad Serve food immediately Leave pan outside oven to cool for easy cleaning How to Adjust Oven for a Lower Broil Rate You can also set your oven to broil at a lowe...

Page 17: ...sition C and place pan in middle of shelf Plug other end of probe into receptacle on oven wall Leave door ajar about 3 inches I I J j LATCH DOOR I ON OFF m L 90 Step 7 Touch START pad to begin cooking For six seconds display shows BROILJ selected variable broil power level and programmed finished food temperature TURN LATCH OVEN START MEAT DOOR TEMP TIME m m mm tep d rstkin Step 4 Touch BROIL pad ...

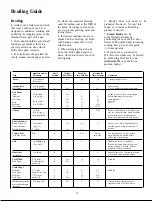
Page 18: ...b 4 patties Space evenly Well Done 1 2 to Y1 in thick c LO 7 4 5 Up to 8 patties take about same time Beef Steaks Rare l inch thick c HI Medium 1 to 1 lbs 7 7 Steaks less than 1 inch cook through c 3 9 9 before browning Pan frying is Well Done c LO 13 13 recommended Rare I in thick c HI Medium 2 to 2Yz lbs 10 7 8 Slash fat c 3 15 14 16 Well Done c LO 25 20 25 Chicken 1 whole A HI 2 to 2 lbs 35 10 ...

Page 19: ...rbrowning 3 Touch ROTISS pad and then START pad This starts broil unit and rotisserie motor operating Spit can be inserted and removed more easily when motor is operating NOTE Make certain when touching spit that no part of body or pot holder touches coils of broil unit 4 Insert spit into motor Grasp handle on spit Using point of spit move to one side the cover over motor outlet in rear of oven pu...

Page 20: ...volve to within 1 2 hour of doneness time then brush every 10 minutes with barbecue sauce Cornish Hen 1 lb 45 60 t Brush with butter or butter and lemon juice mixed Thread hens on spit either lengthwise or crosswise Duckling 4 5 Ibs 15 21 185 190 Do not brush with fat Turkey 8 12 lbs 14 20 180 185 Cook without brushing witb fat or brush with butter or margarine as desired When cooked press CLEAR O...

Page 21: ...r latch all the way to the right as far as it will go If temperature probe is accidentally lefl plu ed into the oven receptacle display shows PROB until you remove it Touch CLEAR OFF pad unlatch door and remove probe Repeat steps 1 and 2 to reset Step 3 Touch START to begin cleaning immediately Cleaning cycle takes three hours and Display Panel shows Stop Time To change cleaning time to as little ...

Page 22: ...unctions makes this sound Q What causes the hair like lines on the enameled surface of my oven A Heating and cooling during cleaning It s common The hair like lines don t affect your oven s performance Q Why do I have ash left in my oven after cleaning A Some types of soil leave a deposit of ash You can remove it with a damp sponge or cloth Q My oven shelves do not slide easily What s the matter A...

Page 23: ... cleaning suggestions Lamp Replacement CAUTION BEFORE REPLACING ANY LAMP DISCONNECT ELECTRIC POWER K OVEN AT THE MAIN FUSE OR CIRCUIT BREAKER PANEL LET LAMP OR BULB AND LAMP COVER COOL COMPLETELY The oven lamp bulb is covered To remove Hold hand under cover so it doesn t fall when released With fingers of same hand firmly push back wire bail until it clears cover Lift off cover DO N REMOVE ANY SCR...

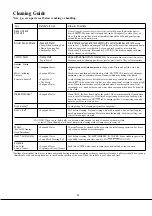
Page 24: ...oth to wipe up right Soap and Water away When the surface has cooled wash and rinse For other spills such as fat smatterings etc wash with soap and water when cooled and then rinse Polish with a dry cloth Inside Oven Door Soap and Water Clean ONLY the door liner outside the gasket Door is automatically cleaned when oven is in self cleaning cycle If spillover or spattering occurs when cooking wipe ...

Page 25: ...ur residence has cal DISPLAY PANEL interference signals on the main power line Disconnect your oven at the main t s GOES BLANK circuit breaker panel Wait one minute and reconnect power Reset clock on both OR BLINKS display panels FOOD DOES N YI BROIL and START pads not touched BROIL PROPERLY If using a lower broil rate the correct setting from LO to HI was not touched after BROIL Probe not fully i...

Page 26: ...Latch is not in CLEAN position Excessive spills spatters and soil deposits are not being cleaned up prior to self cleaning CLEAN pad not touched START pad not touched OVEN WON T Oven hasn t cooled to a safe temperature UNLOCK If you need more help call toll free The GE Answer Center 800 626 2000 consumer information service 26 ...

Page 27: ...ase a GE contract while your war ranty is still in effect and you ll receive a substantial discount With a muhiple year contract you re assured of fhture service at today s prices Telecommunication Device for the Deaf P andAccessoriw 8M 6U 6 2W 2 Individuals qualified to service their own appliances can have needed parts or accessories sent directly to their home free of shipping charge The GE par...

Page 28: ...ou how to use the product Read your Use and Care material If you then have any questions about operating the product please contact your dealer or our Consumer Affairs office at the address below or call toll free GE Answer Center 800 626 2000 consumer information service Replacement of house fuses or resetting of circuit breakers Failure of the product if it is used for other than its intended pu...

Reviews: