I
NSTALLATION
REV7
/REV7
OI 250 (EN)
6.9.2
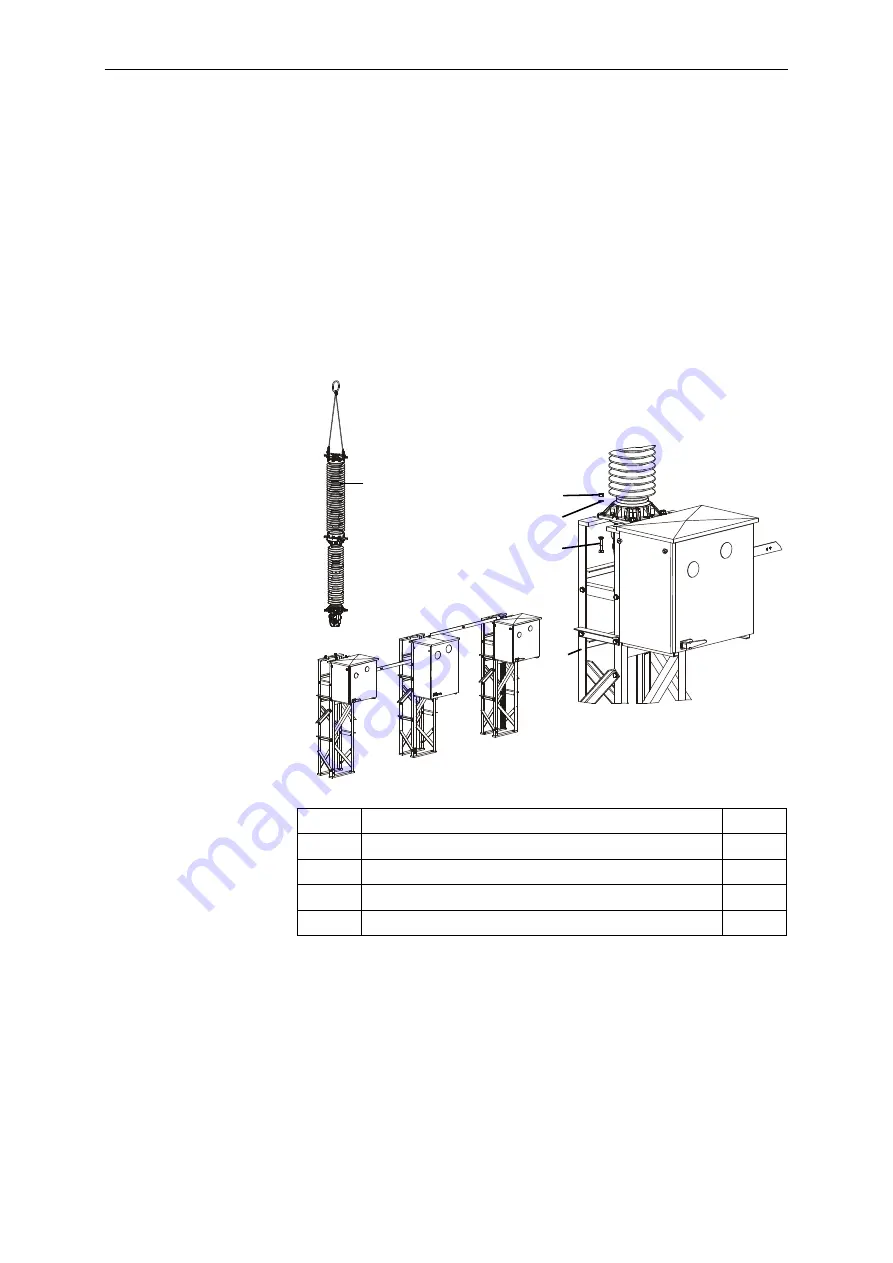
Positioning the Pole Columns
• Find the proper pole position (A, B or C as viewed from the
mechanism side; see illustration) and place the pole column in
this position above the lattice support.
• Slowly lower the pole column. While lowering the pole column,
turn it slightly on its axis in order to avoid damage. Pay special
attention to the gas piping.
• Lubricate the four pole column mounting bolts (4) as per L1 and
insert them from below. Screw on the nuts to the end of the
thread and then loosen them again one half revolution. Do not
tighten the nuts yet. The pole columns will be moved again on the
lattice support during later alignment operations.
The opening springs are located in the crankcases of the pole co-
lumns. The opening springs fix the pole columns in open position.
All other installation steps are based on this open position of the
pole columns.
1
Pole column
1x
2
Lattice support
1x
3
Washer, 16 A2
8x
4
Hexagon bolt, M16x70 8.8 TZN
4x
5
Hexagon nut, M16 A2-70
4x
A
B
C
1
2
3
4
5
B
A
-P
-ST
-F
3
-V
E
-PO
L-HE
BE
N
Summary of Contents for GL 311 F3/4031 P/VE
Page 2: ......
Page 10: ...INTRODUCTION 10 146 OI 250 EN REV7 REV6...
Page 12: ...SAFETY 12 146 OI 250 EN REV7 REV3...
Page 48: ...INSTALLATION 48 146 OI 250 EN REV7 REV7...
Page 80: ...INSPECTION AND MAINTENANCE 80 146 OI 250 EN REV7 REV3...
Page 102: ...RECONDITIONING 102 146 OI 250 EN REV7 REV7...
Page 104: ...END OF LIFE MANAGEMENT 104 146 OI 250 EN REV7 REV2a...
Page 114: ...SPECIAL EQUIPMENT OPTIONAL 114 146 OI 250 EN REV7 REV0...
Page 128: ...REPLACEMENT PARTS AND ACCESSORIES 128 146 OI 250 EN REV7 REV6...
Page 130: ...HANDLING USED SULFUR HEXAFLUORIDE 130 146 OI 250 EN REV7 REV2...


