background image

Oven Controls (Non-Self-Clean)

Operating Instructions for Non-Self Clean Oven with Electronic Range Control

Clock

The clock tells the time of day and must be set for the
automatic oven timing functions to work properly.

To set the clock

1. Press and hold (approx. 3 seconds) the 

CLOCK/TIMER

button until a time with a flashing colon appears (i.e.
12:00).

2. Press the 

UP/DOWN ARROW

buttons until the correct

time is set (i.e. 12:30).

3. Five seconds after the 

UP/DOWN ARROW

button has

been pressed for the last time, the colon will stop
flashing and the time will be set.

Power failure

If the display is flashing 

“12:00”,

there has been a power

failure. Reset the clock to the correct time as described
above.

Minute Timer

You may set the 

MINUTE TIMER

to time cooking or other

household activities for up to 11 hours and 59 minutes.

The timer counts down (with the colon flashing), one
minute at a time until the last minute is reached. It then
counts down in seconds (without the colon flashing) for
the last minute. The timer will display 

‘END’

and beep

once, followed by one beep every 30 seconds for the next
10 minutes (or until the 

CLOCK/TIMER

button is pressed).

The ‘BEEP EVERY 30 SECONDS FEATURE’ can be
cancelled as described under SPECIAL FEATURES OF
THE OVEN CONTROL.

How to set the MINUTE TIMER

1. Press the 

CLOCK/TIMER

button. (

“:00”

and a flashing

hour glass will be displayed.)

2. Press the 

UP/DOWN ARROW

buttons to enter the

desired time (i.e. 1:30 for one hour and 30 minutes
countdown).

3. 5 seconds after the 

UP/DOWN ARROW

buttons have

been pressed for the last time, the countdown will
begin (and the hour glass will stop flashing).

4. When the countdown time reaches 

“:00”

, the timer will

beep and 

“END”

will be displayed.

5. Press the 

CLOCK/TIMER

button to cancel the beeping,

and return to the clock display.

6. To cancel the timer before the set time is up, press the

DOWN ARROW

button until 

“0:00”

is displayed. After

five seconds, the control will return to the clock
display.

Baking

The oven can be set to bake at temperatures between
170˚F and 550˚F (80˚C and 290˚C). The display will
show the changing oven temperature, starting at 75˚F
(24˚C). When the oven reaches the selected temperature,
the control will beep indicating the oven has been pre-
heated. The control will maintain this temperature until
the baking operation is cancelled by pressing the 

OFF

button. An automatic shut-off of the oven after 12 hours
of cooking can be selected as described under SPECIAL
FEATURES OF THE OVEN CONTROL.

How to set your oven for baking

1. Press the 

BAKE

button. (“000°” will be displayed and a

‘BAKE INDICATOR’

will flash).

2. Press the 

UP/DOWN ARROW

buttons. (

“350°”

will be

displayed.)

3. Continue to press the 

UP/DOWN ARROW

buttons until

the desired baking temperature is shown (i.e. 375°).

4. 5 seconds after the 

UP/DOWN ARROW

buttons have

been pressed for the last time, the 

‘BAKE INDICATOR’

will stop flashing, and the minimum displayed oven
temperature of 

“75°”

will be shown. (

“24°”

if celsius is

used.)

5. As the oven heats, the display will show the rising

oven temperature.

6. When the oven reaches the selected temperature (i.e.

375°), the control will beep once to indicate that the
oven has been pre-heated.

14

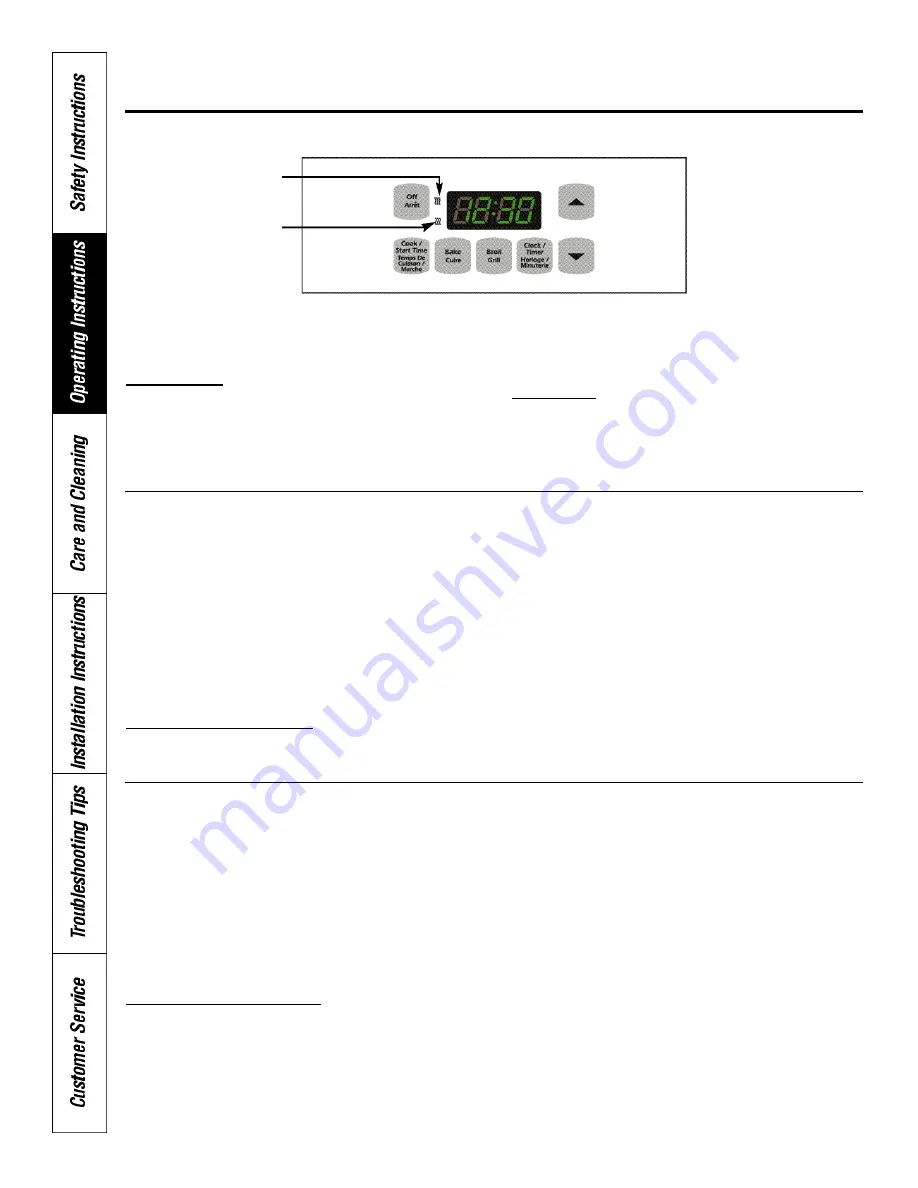
BROIL 

Symbol

BAKE 

Symbol

Summary of Contents for 30M06AAG

Page 1: ...on 7 Selection and Use of Pots and Pans 8 Home Canning Tips 9 Operating Instructions Stovetop Cooking 10 Oven Broiling 12 Oven Baking 13 Non Self Clean Oven with Electronic Time of Day Clock 13 Non Self Clean Oven with Electronic Range Control 14 Self Clean Oven with Electronic Range Control 18 Oven Self Cleaning 21 Care and Cleaning 23 Cleaning Summary Guide 28 Problem Solver 29 30 Part No 350A45...

Page 2: ...u intend to install it 2 Remove storage drawer by pulling it all the way out then lifting the front of the drawer to allow the wheels to come out of their tracks See Use Care Guide 3 Slide the anti tip bracket over one of the rear leveling feet as shown Fig 1 4 Mark its location on the floor with a pencil 5 Pull the range out of the way and reposition the bracket using your pencil marks from step ...

Page 3: ...3 ...

Page 4: ...4 ...

Page 5: ...ishes are cooked Use cookware with tight fitting lids and flat bottoms which completely cover the heated portion of the element Watch foods when bringing them to cooking temperatures at high heat When foods reach cooking temperature reduce heat to the lowest setting that will keep the food cooking When boiling water for tea or coffee heat only the amount needed Do not use a wire trivet or any othe...

Page 6: ...ic Cooktop 10 Oven Light Fluorescent Light Switch 11 Broil Element Feature Index 12 Oven Interior Light 13 Oven Racks 14 Oven Rack Supports 15 Broiler Pan and Grid 16 Oven Liner 17 Bake Element May be lifted gently for wiping oven floor 18 Storage Drawer 19 Door Latch Self Clean Model 20 Door Gasket Self Clean Model 21 Oven Vent 22 Coil Element Feature Index 23 Electronic Clock Timer Oven Control ...

Page 7: ...e the receptacle and pull it out of the stovetop receptacle To replace reverse the procedure The drip bowls may be removed for cleaning The round centre disc of the element can be replaced Caution Drip bowls should be used at all times Caution Do not immerse elements in water Simmer Element on some models When set at minimum heat the simmer element provides temperatures low enough for melting butt...

Page 8: ...8 ...

Page 9: ...ur stove or its location does not allow the canner to be centred on the element use smaller diameter containers for good canning results When canning use recipes from reputable sources Reliable recipes are available from the manufacturer of your canner manufacturers of canning jars and the Department of Agriculture Remember that canning generates large amounts of steam Use care to prevent burns No...

Page 10: ...e stop position This will eliminate reaching into the hot oven Place the cookware on the centre of the shelf as placing heavy cookware towards the back of the rack could cause the rack to tip when fully extended Placing the food in the centre of the rack will also allow better air circulation for more uniform cooking When loaded slide the shelf to the back of the oven To remove the rack from the o...

Page 11: ...ood cake Biscuits or muffins Cookies or cupcakes Brownies Layer cakes Bundt or pound cakes Pies or pie shells Frozen pies Casseroles Roasting Shelf Position A B or C B or C B or C C B B or C A on cookie sheet B or C A or B ROASTING GUIDE Meat 3 to 5 lbs 6 to 8 lbs Tender cuts rib high quality 325 Rare 24 33 18 22 140 150 sirloin tip rump or top round Medium 35 39 22 29 150 160 Well Done 40 45 30 3...

Page 12: ... However you must mold he foil tightly to the grid and cut slits in it just like the grid Without the slits the foil will prevent fat and meat juices from draining into the broiler pan The juices could become hot enough to catch on fire If you do not cut the slits you are essentially frying not broiling Do not use aluminum foil on the bottom of the oven Never entirely cover a shelf with aluminum f...

Page 13: ...can be used to time cooking or other household activities from 1 minute to 12 hours The timer counts down in one minute increments and beeps when there is one minute remaining on the countdown When the timer reaches 0 00 the timer will BEEP three times and then once every 10 seconds for 10 minutes or until TIMER button is pressed To set the MINUTE TIMER 1 Press the TIMER button 2 Press the UP DOWN...

Page 14: ...r the UP DOWN ARROW buttons have been pressed for the last time the countdown will begin and the hour glass will stop flashing 4 When the countdown time reaches 00 the timer will beep and END will be displayed 5 Press the CLOCK TIMER button to cancel the beeping and return to the clock display 6 To cancel the timer before the set time is up press the DOWN ARROW button until 0 00 is displayed After...

Page 15: ...ll be displayed and a BAKE INDICATOR will flash 2 Press the UP DOWN ARROW buttons until the bake temperature of 375 is displayed 3 Press the COOK TIME START TIME button 0 00 and a TIMED BAKE INDICATOR will flash 4 Press the UP DOWN ARROW buttons until the desired bake time 3 00 is displayed 5 Press the COOK TIME START TIME button again The current time of 1 00 will be displayed 6 Press the UP DOWN...

Page 16: ...it or Celsius oven temperature selection Your oven control is set to display the oven temperature in degrees fahrenheit but you may change it to use degrees celsius 1 Press the BAKE button 2 Press the UP DOWN ARROW button to set any temperature other than 550 F or 290 C 3 Before the flashing BAKING INDICATOR stops flashing press and hold the BAKE button for seven seconds Either F or C will be disp...

Page 17: ...splay will revert back to the time of day Oven temperature too hot or too cold You may find that your new oven cooks differently than the one it replaced We recommend that you use you new oven for a few weeks to become familiar with it before making any changes However if you think that the oven temperature of your new oven is too hot or too cool you can increase or decrease the oven baking temper...

Page 18: ... button to cancel the beeping and return to the clock display 6 To cancel the timer before the set time is up press the DOWN ARROW button until 0 00 is displayed After five seconds the control will return to the clock display Baking The oven can be set to bake at temperatures between 170 F and 550 F 80 C and 290 C When the oven reaches the selected temperature the control will beep indicating the ...

Page 19: ...indicator will flash 4 Press the UP DOWN ARROW buttons until the desired bake time 3 00 is displayed 5 Press the START TIME button The current time of 1 00 will be displayed and the START TIME indicator light will flash 6 Press the UP DOWN ARROW buttons until the start time of 4 00 is reached 7 Five seconds after the UP DOWN ARROW button has been pressed for the last time the START TIME indicator ...

Page 20: ...ill be saved and the display will revert back to the time of day Automatic shut off after 12 hours of baking The control has been programmed to continue to bake without automatic shut off once the baking operation has started It can be programmed to bake for a maximum of 12 hours and then automatically shut off 1 Press BROIL button 2 Press the DOWN ARROW button 3 Before the BOIL INDICATOR stop fla...

Page 21: ...aning oven However if left in the oven they will darken lose their luster and become hard to slide Shelves will slide more easily if the shelf supports are wiped with cooking oil after the self clean cycle 2 Wipe up heavy soil on the oven bottom If soap is used rinse thoroughly before self cleaning to prevent staining 3 Clean spatters or spills with a dampened cloth on the oven front frame and on ...

Page 22: ...dle to the left back to the un locked position NOTE Press the OFF button if you want to cancel the self clean cycle after it has started Allow the oven to cool down before unlatching the door How to set the control to start the self cleaning at some later time The control can be set to start the self clean cycle at some time within the next 12 hours For example Say that it is 7 00 am now and you w...

Page 23: ...23 ...

Page 24: ...Care and Cleaning of the Stove con t 24 ...

Page 25: ...25 ...

Page 26: ...ainers can be reinstalled To install position retainer so that rear locking tabs fully penetrate openings in the end caps With the retainer in position rotate retainer towards the centre of the control panel to snap into place Do not use excessive force or try to install the second retainer before the first retainer has been installed successfully Remove Replace LIFTTOP Plus Cooktop Electric Coil ...

Page 27: ...rip bowl and into the receptacle Guide the cooktop elements into place so it rests evenly Drip Bowl Cleaning Remove the cooktop elements Then lift out the drip bowls For best results clean the drip bowls by hand Place them in a covered container or a plastic bag with 1 4 cup ammonia to loosen the soil Then scrub with a soap filled scouring pad if necessary Rinse with clean water and polish with a ...

Page 28: ... damage may occur Avoid getting on elements Self Clean Oven 1 Soap and Water 2 Self Cleaning Oven 2 Follow Self Clean Safety and Timer Instructions Do not use commercial oven cleaner on Self Cleaning oven Avoid getting any cleaning materials on oven gasket Oven Shelves 1 Soap and Water 2 Oven Cleaner 2 Follow manufacturer s instructions 3 Self Cleaning Oven 3 Finish will discolour but not affect p...

Page 29: ...orescent Lamp Light Fluorescent light bulb replacement in Appliance Outlet the Careand Cleaning section does not work 2 The switch operating the lightis broken 2 Call forservice 3 Stove fuse located in the backguard has 3 Replace the stove backguard fuse SeeFuse blown Replacement in the Careand Cleaning section Poor Cooking 1 Stove is not level 1 Level your stove as outlined in the Leveling Baking...

Page 30: ...ly 2 Read the How to start aself clean cycle section Oven door will not 1 Self clean latch is locking the oven door 1 Slide self clean latch to the left to unlock the open oven door 2 Oven temperature istoo hot 2 Wait for oven to cool below Locking Temperature Thirty minutes aftertheself clean cycle the oven door may be opened Wait an additional thirty minutes before using oven since oven will bev...

Page 31: ...ppliance needs both parts and labour You are protected for the life of your contract Even when costs go up you pay nothing more Want more information There s no obligation You can obtain information on Service Contracts any time Just call 1 800 461 3636 If you need service To obtain service please call our toll free CAMCO CUSTOMER SERVICE number at 1 800 361 3400 We re proud of our service and wan...

Page 32: ...32 NOTES ...

Reviews: