118
Chapter 7: Adding or Replacing Components
www.gateway.com
4
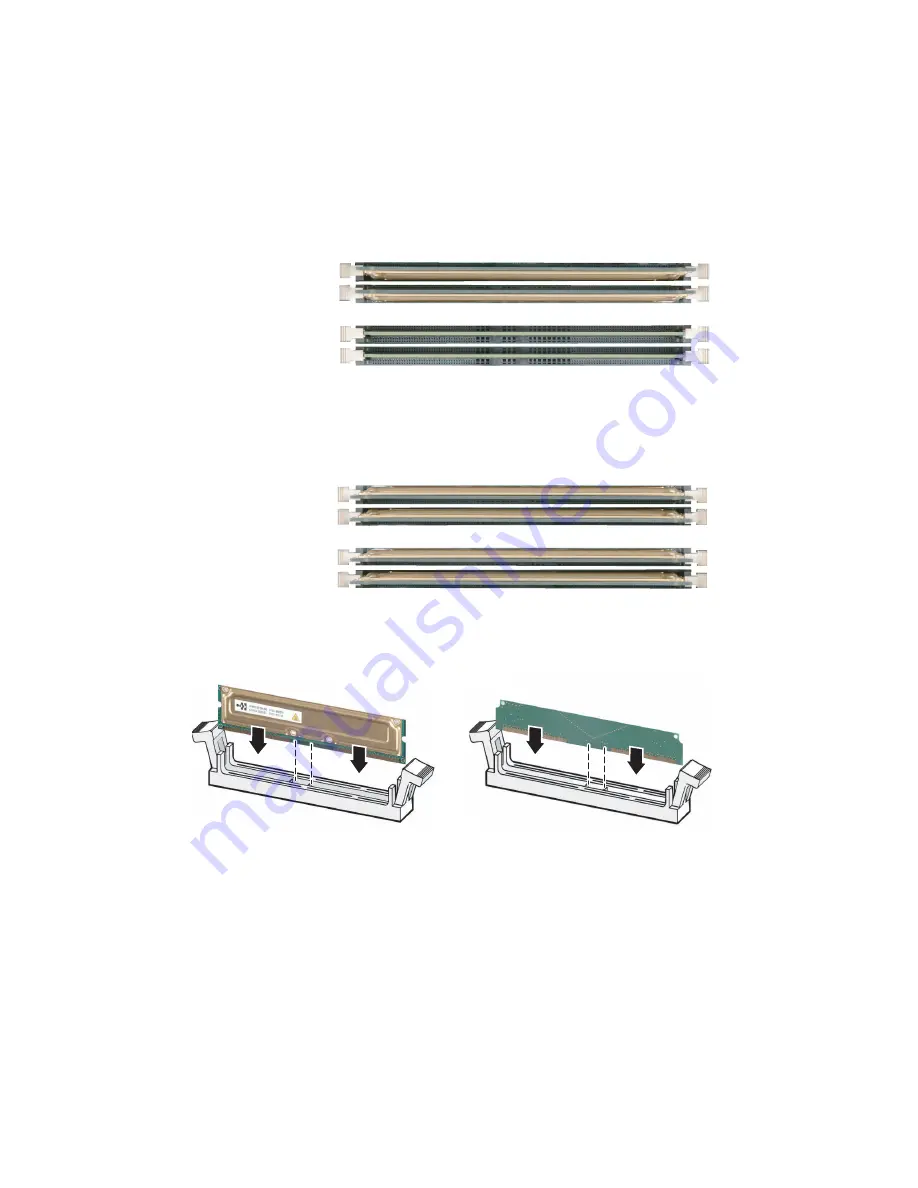
If you are installing two memory modules into one
dual-channel
(two-slot) bank (RIMM BANK 0), install two
identical
RIMMs in
RIMM BANK 0 and two C-RIMMS in RIMM BANK 1 on the system board.
5
If you are installing four memory modules into two
dual-channel
(two-slot) banks (RIMM BANK 0 and RIMM BANK 1), install two
identical
RIMMs in RIMM BANK 0 and two
identical
RIMMs in RIMM BANK 1 on the
system board.
6
Make sure that you align the notches on the RIMM and C-RIMM with the
notches on the memory module bank and press firmly into the bank.
7
Make sure that the tabs on the sides of the RIMM and C-RIMM secure the
memory module in the slot. When the module is secure, you will hear a
click.
8
Close the case by following the instructions in “Closing the case” on
page 95.
RIMMs installed in
RIMM BANK O
C-RIMMs installed in
RIMM BANK 1
RIMMs installed in
RIMM BANK O
RIMMs installed in
RIMM BANK 1
Summary of Contents for E SERIES E-6000
Page 1: ...your computer e 6000 user sguide...
Page 2: ......
Page 94: ...88 Chapter 6 Restoring Software www gateway com...
Page 99: ...93 Opening the case www gateway com 5 Push in on the cover release handle...
Page 115: ...109 Replacing the power supply www gateway com 4 Flip the power supply retention clip out...
Page 132: ...126 Chapter 8 Using the BIOS Setup Utility www gateway com...
Page 162: ...156 Chapter 9 Troubleshooting support gateway com...
Page 166: ...160 Chapter A www gateway com Section 1 D E F G H I K L M N O P Q J R A B C...
Page 172: ...166 Chapter A www gateway com...
Page 188: ...182...
Page 189: ......
Page 190: ...MAN US E6000 SYS GDE R1 10 02...


