


UAV Hardware Tracker | User’s Manual
Setting Up the Tracker
Step 1: Initial Hardware Setup
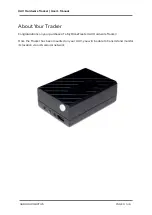
The initial hardware setup steps for your tracker will depend on where you purchased it.
For
Retail Trackers
, please follow the following steps for initial hardware setup.
For
CFMS Trackers
, initial hardware setup will be done on-site during tracker collection by
Garuda Robotics in front of you.
Initial Hardware Setup
1
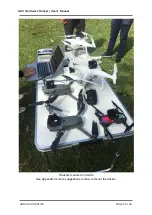
Take the tracker outdoors to a location where it has an unobstructed view of the
sky (to receive GNSS signals) and a good 4G network signal.
2
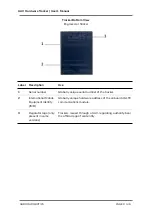
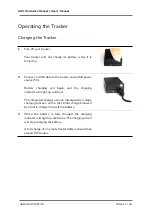
Turn on the tracker. The power indicator should light up solid green, while the
status indicator light flashes orange.
3
The startup process is complete once the power indicator changes from being
continuously lit to flashing. At this point, the tracker is transmitting data to
MyDroneFleets.
The startup process should take no more than 30 seconds. If you are unable to
connect after 30 seconds, you may be in a location with poor 4G connectivity. Turn
off the tracker and repeat Step 3 in another location with better 4G connectivity.
CFMS Trackers
At this point, the tracker is transmitting data to CAAS.
4
The status indicator should be flashing orange once every 3 seconds, meaning the
tracker has locked onto a GNSS signal and is transmitting location data back to
MyDroneFleets.
If the status indicator is flashing twice per second or more, the tracker has yet to
lock onto a GNSS signal. The GNSS lock procedure usually takes around 1 minute.
If you’re unable to receive the location information after 1 minute, consider moving
to a different location.
If you see any other combination of flashes from the status indicator, see the
Troubleshooting section of this document.
5
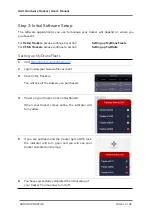
You have completed the initial hardware setup of your tracker. Do not turn it off
yet. Next, you will set up the software applications needed to use your tracker.
GARUDA ROBOTICS PAGE 11 / 36