400/500 Series Display Interfaces
SECTION 3
SKYWATCH INTERFACE
3-4
Traffic Page Display Range
The display range on the Traffic Page can be changed
at any time.
Changing the display range on the Traffic
Page:
Press the
RNG
Key to zoom through the following
range options:
• 2 nm
• 2 and 6 nm
• 6 and 12 nm
• 12 and 24 nm for the SKY 899 only
Configuring Traffic Data on the Map Page
The display of traffic information is designed to closely
resemble the display symbology used by Goodrich on the
SKYWATCH.
Traffic is only displayed on the Map Page if aircraft
heading data is available. When heading is not available,
Traffic Advisories are displayed as non-bearing banners on
the Map Page. See the Garmin 400/500 Series Installation
Manual available at authorized Garmin service centers for
details.
Configuring traffic on the Map Page:
1) Turn the small
right
knob to select the Map
Page.
2) Press the
MENU
Key to display the Page
Menu.
3) Turn the small
right
knob to select ‘Setup
Map?’.
4) Press the
ENT
Key. The flashing cursor
highlights the GROUP field.
5) Turn the small
right
knob to select ‘Traffic’.
6) Press the
ENT
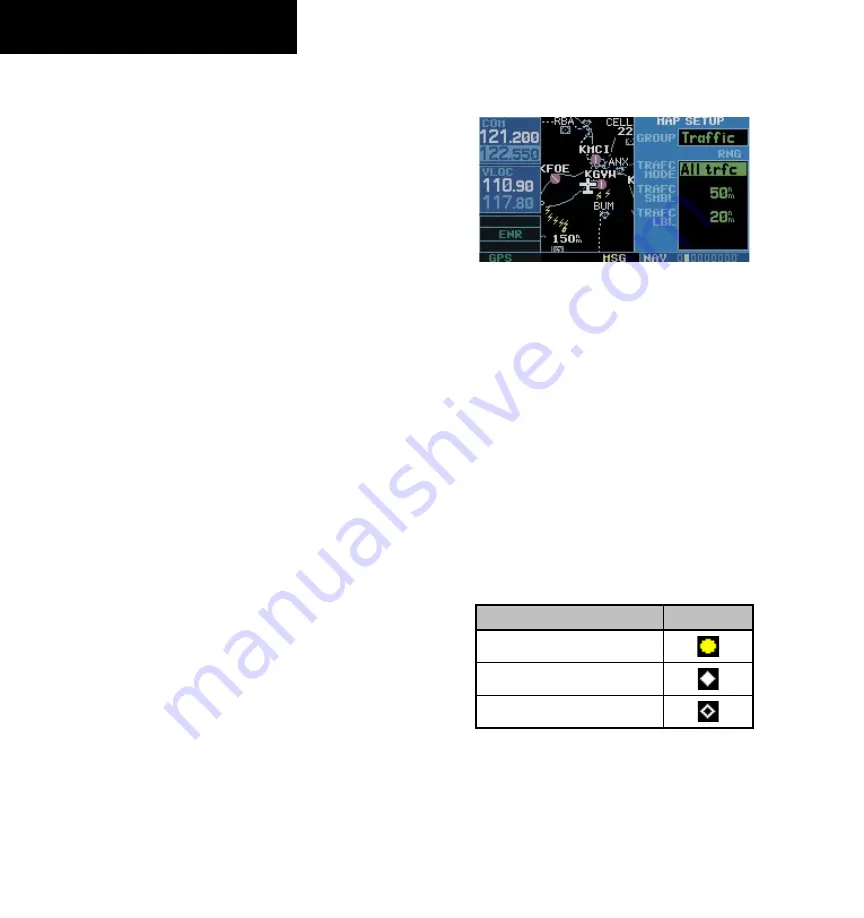
Key (Figure 3-5).
Figure 3-5 Map Setup Menu
7) Turn the large
right
knob to select the desired
Traffic Mode option.
8) Turn the small
right
knob to select the desired
option
9) Press the
ENT
Key. Repeat steps 7-9 for Traffic
Symbol and Traffic Label.
10) Return to the Map Page by pressing the
CLR
Key.
Traffic mode allows the operator to choose which traffic
is displayed (all traffic, traffic and proximity advisories,
or traffic advisories only). The traffic symbol (Table 3-1)
is used to depict the type of traffic (400/500 Series and
Goodrich use the same symbology):
Type of Traffic
Symbol
Traffic Advisories (TA)
Proximity Advisories (PA)
Other
Table 3-1
190-00140-10 Rev. E


