18
LI0083 – Revision 22 June 2017
Installing the USB-driver and Control Software
The 12AU is operated remotely via its USB interface. Before connecting the 12AU to your
computer, you need to install the USB driver and the control software for the 12AU.
Important:
Do not connect the 12AU to the PC before installing the device driver.
If you already have done so, you need to update the driver from the Device Manager with the one
found on the USB stick in the directory
usb_driver
! Refer to “Updating the USB driver” on page
30 for information on how to do this.
Installing the USB Driver
Prior to connecting the 12AU, you must install the dedicated USB device driver on the PC that
you will use to operate the 12AU.
Important.
The installation requires that you are logged in as administrator on the PC.
1. Insert the 12AU USB stick delivered with the 12AU in your PC.
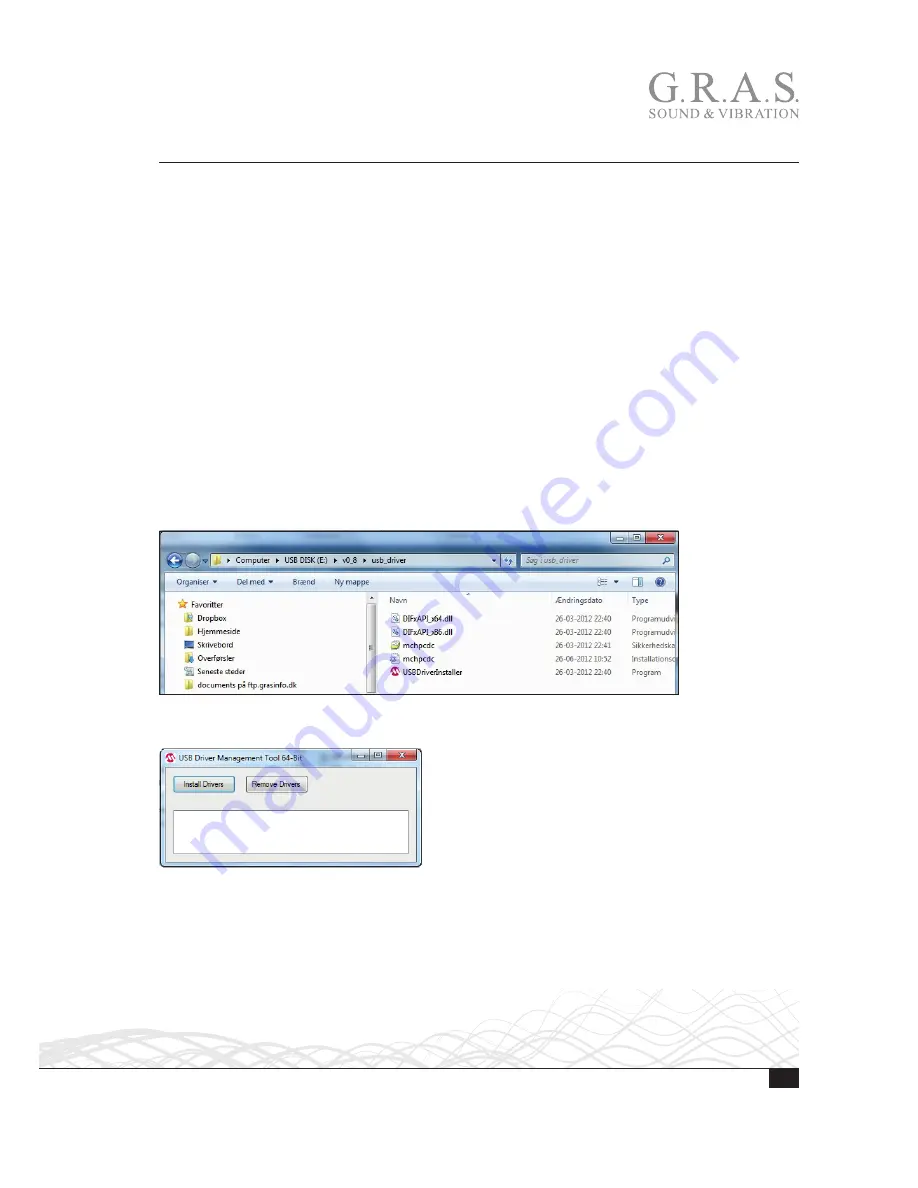
2. In Windows Pathfinder, open the 12AU Installation USB.
3. Open the
usb_driver
directory containing the USB driverinstaller.
4. Click on the
USBDriverinstaller
Icon.
5. Click on the
Install Drivers
button and wait for confirmation.
If you have already connected the 12AU, the installation will fail and you need to remove the
Windows USB driver manually by updating the USB driver using the Windows Device Manager.
For instructions on how to do this, see “Updating the USB driver” on page 30.


