


2. INSTALLATION AND INITIAL SETTINGS
2-12
2.3.2
Initial settings for the IP camera
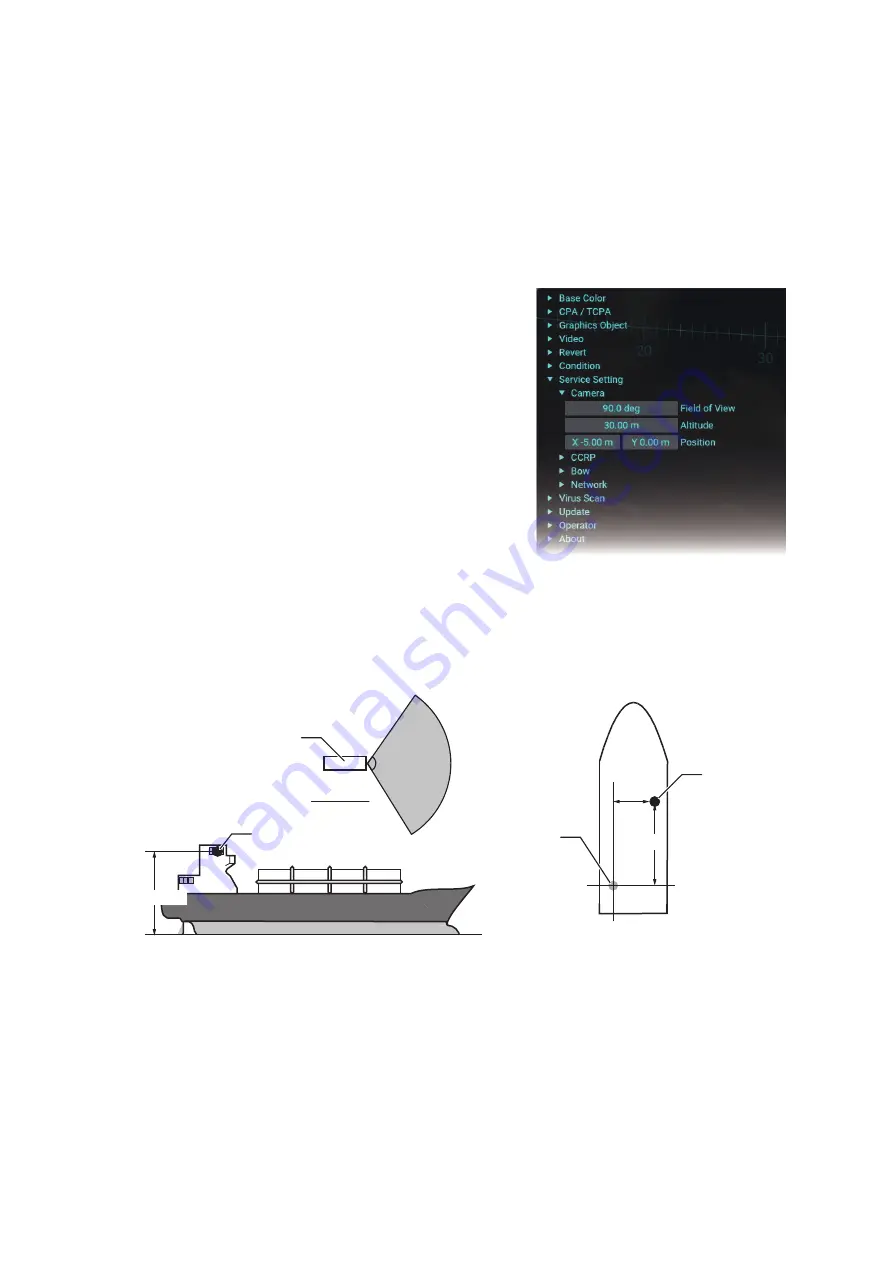
Adjust the field of view of the video image and enter the position of the IP camera.
Note:
Before adjusting the field of view of the IP camera, confirm that the IP camera
faces the bow direction and adjust the video image position, referring to section 1.11.
If the limit line of the video image appears on the screen after adjusting the video im-
age position, adjust the field of view so that the limit line is not shown on the display.
When you adjust the field of view for the IP camera, the viewing range decreases.
Therefore, keep the default field of view when feasible.
1. Login as a service technician, referring to
2. Click [Service Setting].
3. Click [Camera].
4. Adjust the slider bar for [Field of View] to ad-
just the field of view for the IP camera.
5. Adjust the slider bar for [Altitude] to adjust
the distance between average water line and
IP camera location.
6. Adjust the slider bar for [Position] to set the
IP camera location calculated from the loca-
tion of the EPFS device to use as a refer-
ence.
• [X]: Set the port-starboard (lateral) location of the IP camera, which is calculated
from the location of the EPFS device.
• [Y]: Set the bow-stern (longitudinal) location of the IP camera, which is calculat-
ed from the location of the EPFS device.
7. Close the main menu.
Water line
Altitude
(0, 0)
+
-
X
Y
IP camera
IP camera
EPFS
device
IP camera
Top view
Field of view
Field of view
+
-


