


Technical Support is available from 8am to 5pm (PST) M - F at [email protected].
47
SECTION VI. SOFTWARE
Using RetinaEngrave v3.0 Software
In this section you will be introduced to the major interface features of RetinaEngrave
v3.0.
Figure 6.1
RetinaEngrave v3.0 Software
Technical Support is available 8am-5pm PST. Monday - Friday
•
702-802-3103
35
Technical Support is available from 8am to 5pm (PST) M - F at [email protected].
72
Designing with RetinaEngrave v3.0
RetinaEngrave v3.0 contains design tools to allow for custom designs within the software
itself. Here you can design and create objects without accessing third-party design software.
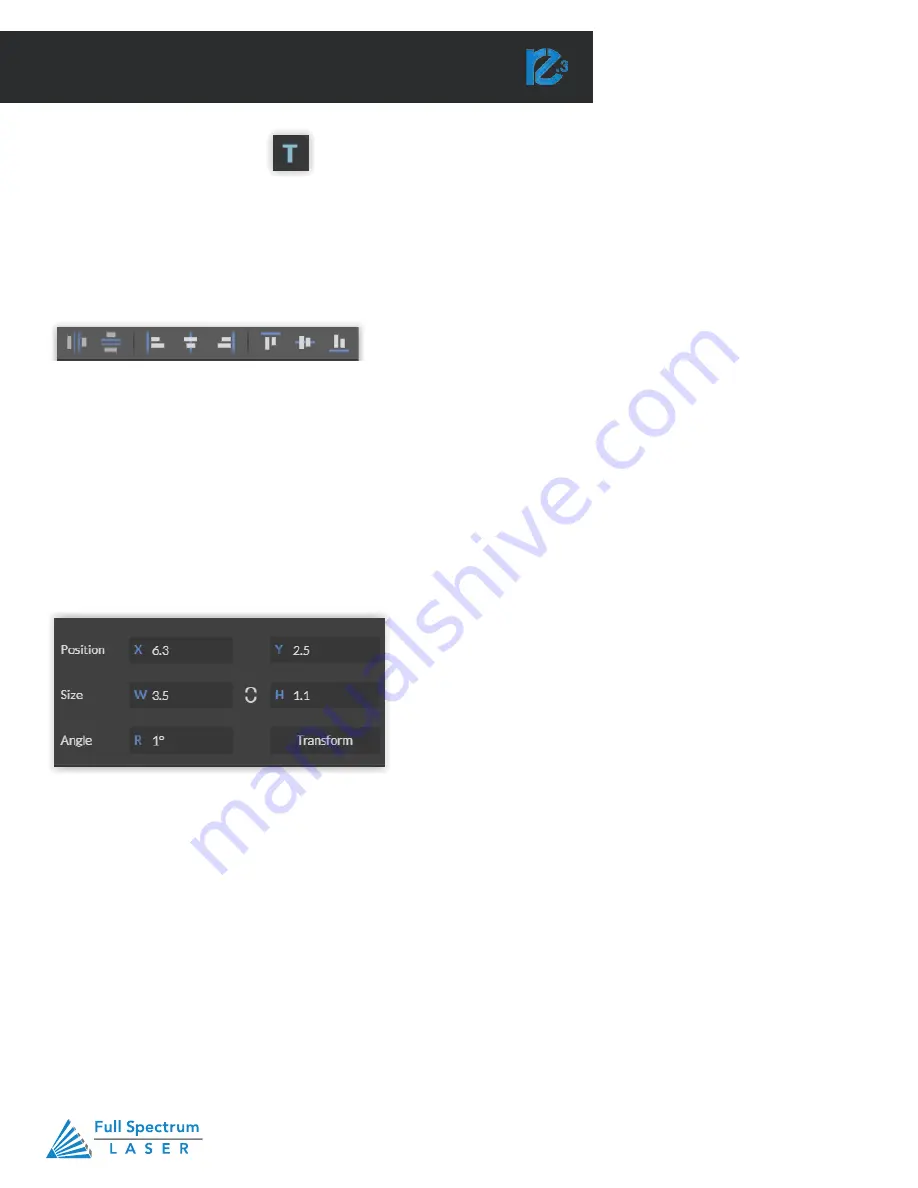
Adding Text
Click the “T” icon and then click anywhere in the view window. You can now write your text. To
customize your text, click on the text object you created and a new window will appear with options
to adjust the positioning, size and font of your text.
Full Text Options Window
Adding Text
Click the “T” icon and then click anywhere in the view window. You can now write your text. To customize your
text, click on the text object you created and a new window will appear with options to adjust the positioning,
size and font of your text.
Text Positioning
Text position can be quickly adjusted by clicking on one of the following options:
Distribute Horizontally: Evenly arrange selected text horizontally.
Distribute Vertically: Evenly arrange selected text vertically.
Align Left: Align text to the left.
Align Center: Align text to center.
Align Right: Align text to right.
Align Top: Align text to top.
Align Middle: Align text to middle.
Align Bottom: Align text to bottom
Text Positioning Coordinates
Technical Support is available from 8am to 5pm (PST) M - F at [email protected].
72
Designing with RetinaEngrave v3.0
RetinaEngrave v3.0 contains design tools to allow for custom designs within the software
itself. Here you can design and create objects without accessing third-party design software.
Adding Text
Click the “T” icon and then click anywhere in the view window. You can now write your text. To
customize your text, click on the text object you created and a new window will appear with options
to adjust the positioning, size and font of your text.
Full Text Options Window
Technical Support is available from 8am to 5pm (PST) M - F at [email protected].
73
Text Positioning
Text position can be quickly adjusted by clicking on one of the following options.
Distribute Horizontally:
Evenly arrange selected Text horizontally.
Distribute Vertically:
Evenly arrange selected text vertically.
Align Left:
Align text to the left.
Align Center:
Align text to center.
Align Right:
Align text to right.
Align Top:
Align text to top.
Align Middle:
Align text to middle.
Align Bottom:
Align text to bottom.
Text Positioning Coordinates
This window displays the coordinates and other specs of the selected text. Coordinates can be
changed manually by entering the desired specifics directly into the software.
Position:
Displays position of text in X/Y coordinates in the workspace. Click box to directly input X/Y
coordinates.
Size:
Displays size of text according to width and height. Click box to directly input desired width and
height of text.
Angle:
Displays angle of text as a degree. Click box to directly input angle degree of text.
Transform:
Clicking the transform button brings up the Transform Window options.
This window displays the coordinates and other specs of the selected text. Coordinates can be changed
manually by entering the desired specifics directly into the software.
Position: Displays position of text in X/Y coordinates in the workspace. Click box to directly input X/Y
coordinates.
Size: Displays size of text according to width and height. Click box to directly input desired width and
height of text.
Angle: Displays angle of text as a degree. Click box to directly input angle degree of text.
Transform: Clicking the transform button brings up the Transform Window options.
Summary of Contents for Muse Galvo
Page 1: ......


