


Technical Support is available from 8am to 5pm (PST) M - F at [email protected].
47
SECTION VI. SOFTWARE
Using RetinaEngrave v3.0 Software
In this section you will be introduced to the major interface features of RetinaEngrave
v3.0.
Figure 6.1
RetinaEngrave v3.0 Software
Technical Support is available 8am-5pm PST. Monday - Friday
•
702-802-3103
32
Engraving, also called Rastering, is the process of creating a surface image on material without cutting through
the material entirely.
Setting DPI
DPI can be adjusted using the slider or entering a number into
the adjacent box. It ranges from 1 to 1000. A higher DPI means
better precision and quality of your images, while a lower DPI
will proved faster processing and engraving speeds.
Engraving / Rastering
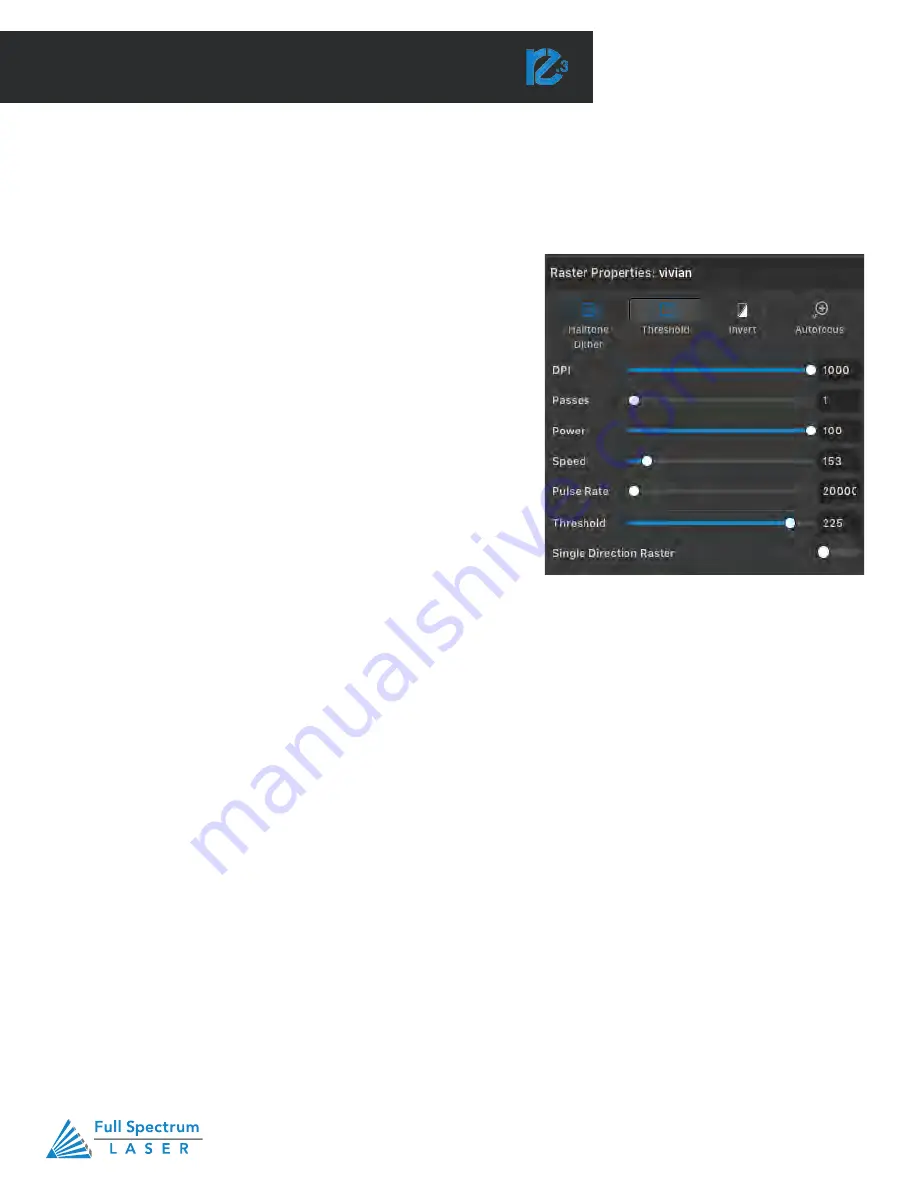
Setting Engraving Properties
Clicking an object (design image) in the workspace will allow
you to access that object properties tab. The Raster Properties
will automatically open. For vector objects (basic shapes), it will
open up the Vector Fill & Rasterize tab. Select the icon next to
Rasterize to open the Raster Properties.
Setting Passes
The passes setting dictates the amount of times the selected
shape is engraved. The passes range from 1 to 999. Increasing
the number of passes will increase the amount of times the
shape is rastered.
Setting Pulse Rate
This allows you to set the pulse rate of the laser which is the number of emitted pulses per second. The
pulse rate ranges from 20000 to 80000. Lower pulse rates result in deeper engravings while higher pulse
rates result in shallower marks.
Applying B/W Threshold
At this moment, the image is still displayed in threshold. The black and white raster feature is great for tracing
logos, text, or simple high contrast images that only appear in a single color. You can adjust the threshold of
what’s considered black, and what’s considered white by selecting your image and clicking “Threshold”. This
will bring up a B/W Threshold slide bar, from which you can adjust B/W threshold to your liking.
Setting Raster Power
Power will determine how much power the laser delivers. As with speed, power will vary depending on the
wattage of the laser tube and the material itself.
Setting Raster Speed
Speed settings determine how quickly the object will be engraved. Lowering speed allows you to create deeper
engravings, as it allows the laser beam to be in contact with the material for a longer period of time.
Summary of Contents for Muse Galvo
Page 1: ......


