


43
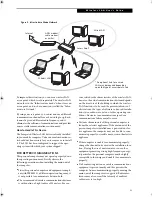
U s e r I n s t a l l a b l e F e a t u r e s
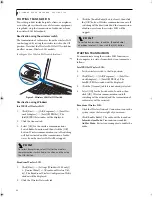
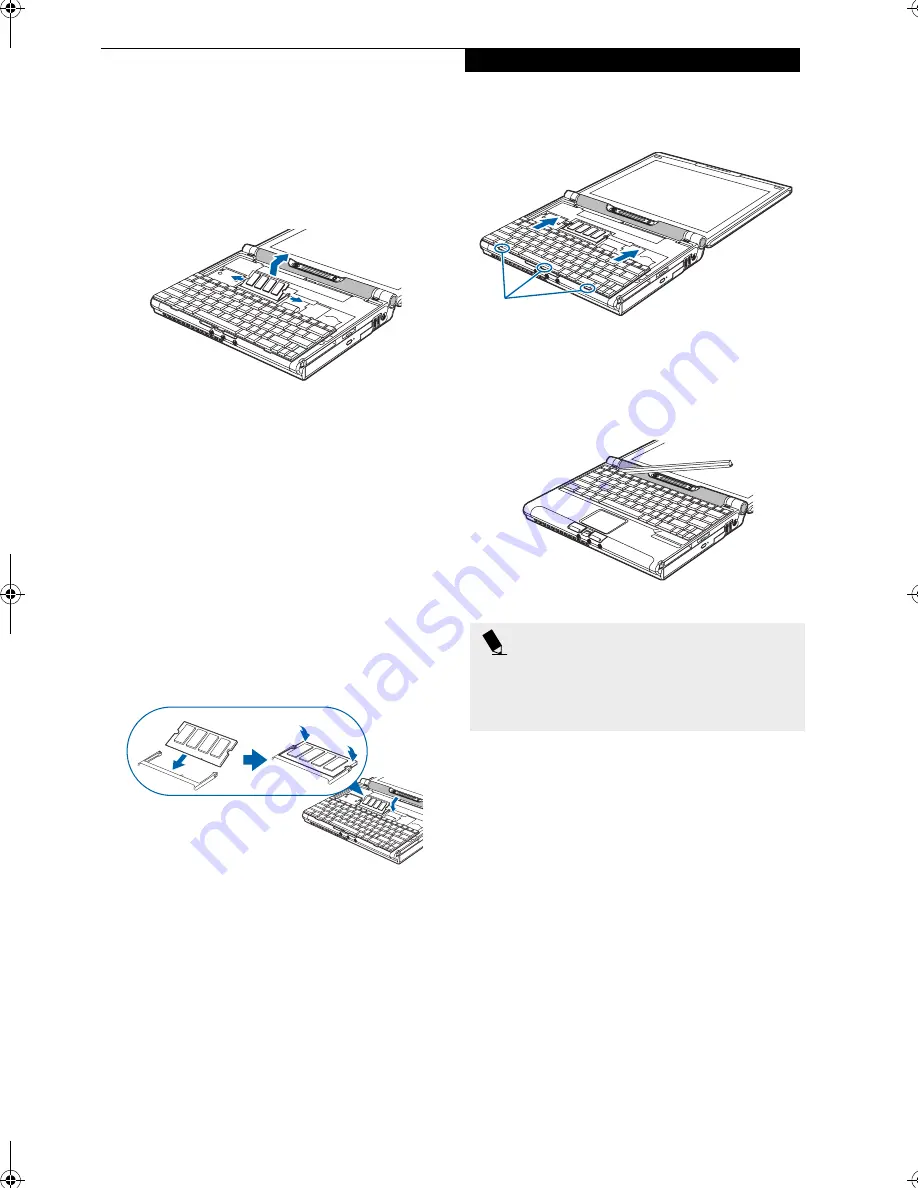
REMOVING A MEMORY MODULE
1. Perform steps 1 through 7 of Accessing the Memory
Compartment.
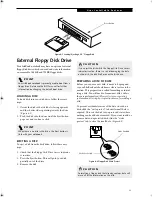
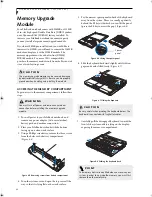
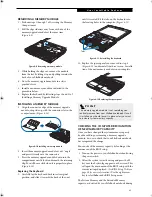
2. Pull the clips sideways away from each side of the
memory upgrade module at the same time.
(Figure 4-9)
Figure 4-9 Removing a memory module
3. While holding the clips out, remove the module
from the slot by lifting it up and pulling towards the
back of your LifeBook notebook.
4. Store the memory upgrade module in a static
guarded sleeve.
5. Install a new memory module as detailed in the
procedure below.
6. Replace the keyboard by following steps 10 and 11 of
Installing a Memory Upgrade Module.
INSTALLING A MEMORY MODULE
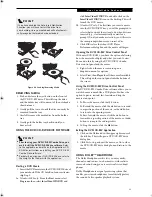
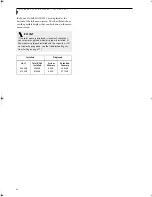
1. Align the connector edge of the memory upgrade
module, chip side up, with the connector slot in the
compartment. (Figure 4-10)
Figure 4-10 Installing a memory module
2 . Insert the memory upgrade module at a 45
o
angle
and press it firmly onto the connector.
3. Press the memory upgrade module down into the
compartment until it locks underneath the retaining
clip. You will hear a click when it is properly in place.
(Figure 4-10)
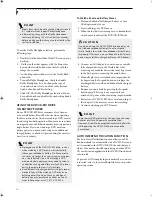
Replacing the Keyboard
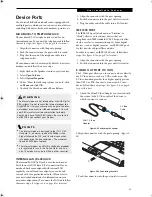
1. Carefully lay the keyboard back into its original
position, and slide it towards the back of the unit
until it is seated. Fit the tabs on the keyboard into
the locating holes in the computer. (Figure 4-11)
Figure 4-11 Reinstalling the keyboard
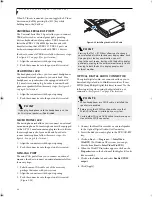
12. Replace the spacer panel you removed in step 4.
(Figure 4-12) and reinstall the three screws. Installa-
tion of the new memory module is now complete.
Figure 4-12 Replacing the spacer panel
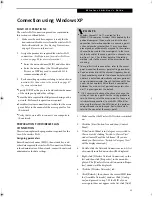
CHECKING THE COMPUTER RECOGNITION
OF NEW MEMORY CAPACITY
Once you have changed the system memory capacity
by either adding or removing a memory upgrade
module, be sure to check that your LifeBook notebook
has recognized the change.
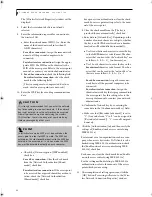
You can check the memory capacity by looking at the
main menu of the BIOS setup:
1. Turn on the power to your LifeBook notebook using
the power switch.
2. Allow the system to start booting and press the F2
key once the Fujitsu logo appears on the screen. This
will open the main menu of the BIOS setup with the
current settings displayed. (See BIOS Setup Utility on
page 25 for more information) Use the right arrow
key to select
Info
in the BIOS Setup menu.
The System Memory and the Extended Memory
capacity, as detected by your LifeBook notebook during
P O I N T
The memory upgrade module is not something you
routinely remove from your LifeBook notebook. Once it
is installed, you should leave it in place unless you want
to increase system memory capacity.
Tabs
P5010.book Page 43 Monday, April 7, 2003 6:39 PM
Summary of Contents for FPCM11642 - LB T5010 C2D/2.4 13.3 2GB-160GB DVDR WLS CAM W7P
Page 2: ...L i f e B o o k P 5 0 0 0 N o t e b o o k ...
Page 6: ...L i f e B o o k P 5 0 0 0 N o t e b o o k ...
Page 7: ...1 Preface ...
Page 8: ...L i f e B o o k P 5 0 0 0 N o t e b o o k ...
Page 10: ...2 L i f e B o o k P 5 0 0 0 N o t e b o o k S e c t i o n O n e ...
Page 11: ...3 2 Getting to Know Your LifeBook Notebook ...
Page 12: ...4 L i f e B o o k P 5 0 0 0 N o t e b o o k S e c t i o n T w o ...
Page 28: ...20 L i f e B o o k P 5 0 0 0 N o t e b o o k S e c t i o n T w o ...
Page 29: ...21 3 Getting Started ...
Page 30: ...22 L i f e B o o k P 5 0 0 0 N o t e b o o k S e c t i o n T h r e e ...
Page 37: ...29 4 User Installable Features ...
Page 38: ...30 L i f e B o o k P 5 0 0 0 N o t e b o o k S e c t i o n F o u r ...
Page 56: ...48 L i f e B o o k P 5 0 0 0 N o t e b o o k S e c t i o n F o u r ...
Page 57: ...49 5 Using the Integrated Wireless LAN Optional device ...
Page 58: ...50 L i f e B o o k P 5 0 0 0 N o t e b o o k S e c t i o n F I v e ...
Page 83: ...75 6 Troubleshooting ...
Page 84: ...76 L i f e B o o k P 5 0 0 0 N o t e b o o k S e c t i o n S i x ...
Page 98: ...90 L i f e B o o k P 5 0 0 0 N o t e b o o k S e c t i o n S i x ...
Page 99: ...91 7 Care and Maintenance ...
Page 100: ...92 L i f e B o o k P 5 0 0 0 N o t e b o o k S e c t i o n S e v e n ...
Page 104: ...96 L i f e B o o k P 5 0 0 0 N o t e b o o k S e c t i o n S e v e n ...
Page 105: ...97 8 Specifications ...
Page 106: ...98 L i f e B o o k P 5 0 0 0 N o t e b o o k S e c t i o n E i g h t ...
Page 110: ...102 L i f e B o o k P 5 0 0 0 N o t e b o o k S e c t i o n E i g h t ...
Page 114: ...106 L i f e B o o k P 5 0 0 0 N o t e b o o k S e c t i o n E i g h t ...
Page 115: ...107 9 Glossary ...
Page 116: ...108 L i f e B o o k P 5 0 0 0 N o t e b o o k S e c t i o n N i n e ...