User Manual 6008 1286 / Rev. 8
4:23
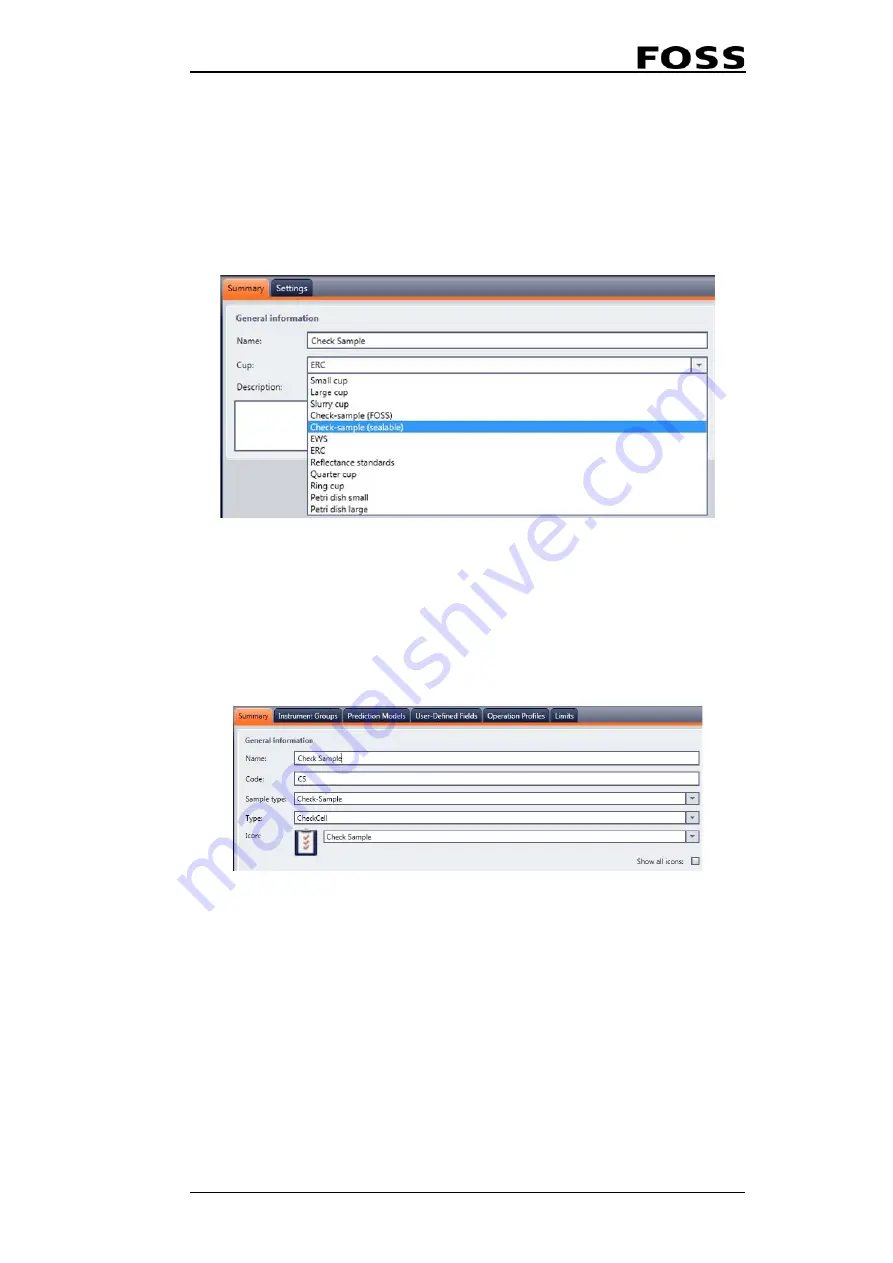
Before running the check sample you must create a check sample Product in
FossManager.
1. Import the prediction model(s) you intend to use for your check sample and link
a Parameter profile. (Create a new Parameter profile if needed.)
2. Create an Operation profile with Cup Type = “Check sample (sealable)” and
name it e.g. "Check Sample"
Fig. 4:40
3. Create a Product and call it e.g. Check Sample. In the different tabs you:
• Link the operation profile you just created above
• Link the prediction model(s) you imported above
• Add the Instrument Group where the instrument in question is registered.
• Set check sample limits for this new product. (See separate section below for
information.)
Fig. 4:41
4. If you are on a FossManager Network you can now set up an Update session in
order to download the check sample Product to the instrument(s). If you are on
Mosaic Solo then the check sample Product is available in ISIscan Nova after
you have saved the new product.
Setting Check Sample limits (FossManager)
Analysing the check sample predicts the result on the constituents which are linked
to the check sample product and compares these to the limits as defined in
FossManager.
Limits can be defined in three different ways in FossManager:
Summary of Contents for NIRS DA1650
Page 20: ...NIRS DA1650 2 12 User Manual 6008 1286 Rev 8 ...
Page 26: ...NIRS DA1650 3 6 User Manual 6008 1286 Rev 8 Fig 3 7 9 Press Install to start installation ...
Page 30: ...NIRS DA1650 3 10 User Manual 6008 1286 Rev 8 ...
Page 44: ...NIRS DA1650 4 14 User Manual 6008 1286 Rev 8 Fig 4 25 Fig 4 26 Fig 4 27 ...
Page 64: ...NIRS DA1650 5 4 User Manual 6008 1286 Rev 8 ...
Page 68: ...NIRS DA1650 6 4 User Manual 6008 1286 Rev 8 ...


