66
2-2. How to Replace a CPU1 Card
IMPORTANT
Do not touch the components on the MFR-CPU to protect it from electrostatic damage.
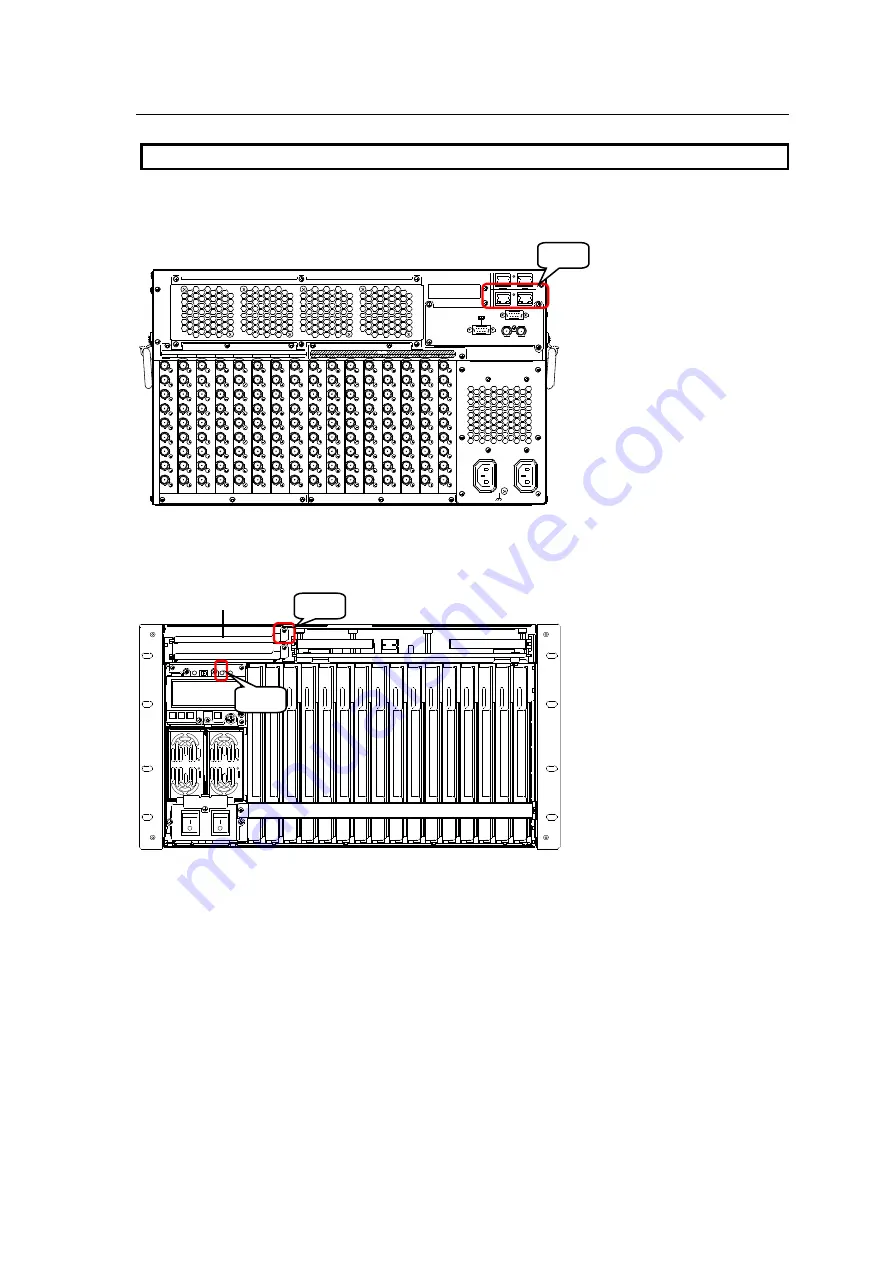
The following procedure shows how to replace an MFR-CPU card.
1.
Detach the cables from CPU1 MFR-LAN and PC-LAN.
C
P
U
2
C
P
U
1
ALARM
SER IAL
232C
422
REF IN
A
C
1
0
0
-
2
4
0
V
5
0
/6
0
H
z
IN
A
C
1
0
0
-
2
4
0
V
5
0
/6
0
H
z
IN
1
2
OUTPUT
1
2
3
4
5
6
7
8
INPUT
1
2
3
4
5
6
7
8
1
2
3
4
5
6
7
8
9
1
2
3
4
5
6
7
8
9
1
2
3
4
5
6
7
8
9
1
2
3
4
5
6
7
8
9
1
2
3
4
5
6
7
8
9
1
2
3
4
5
6
7
8
9
1
2
3
4
5
6
7
8
9
1
2
3
4
5
6
7
8
9
1
1
1
1
1
1
1
1
2
2
2
2
2
2
2
2
3
3
3
3
3
3
3
3
4
4
4
4
4
4
4
4
5
5
5
5
5
5
5
5
6
6
6
6
6
6
6
6
7
7
7
7
7
7
7
7
8
8
8
8
8
8
8
8
9
9
9
9
9
9
9
9
2.
Unfasten to remove four fixing screws along the front panel and detach the front panel.
3.
Unfasten the fixing screw of CPU1.
4.
Grab the CPU1 card handle and slowly remove (pull out) the card.
‚c
‚b
‚`‚
b
‚`‚
b
‚c
‚b
5.
Insert a new MFR-CPUA card firmly into the slot.
6.
Fasten the fixing screw on the right side of the card.
7.
Verify that the LED on the CPU1 is unlit.
8.
Re-install the front panel.
9.
Re-connect LAN cables detached in Step 1. into the CPU1 MFR-LAN and PC-LAN connection
ports.
CPU1 replacement is now complete.
1.
3.
CPU1 card
7.


