


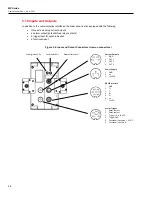


MP
Series
Users Manual, Rev. 1.0, Apr 2021
34
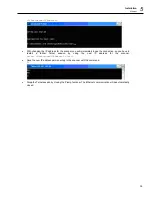
The current settings for the IP address and the netmask of the PC can be asked with the command <ipconfig> in
a Command Prompt window!
Figure 5-3: Command Prompt
For the example above, the IP address of the PC is 193.221.142.103. The subnet address is 193.221.142, the
host address is 103. The scanner’s subnet address must be 193.221.142 as well. The host address of the scanner
must be in the range from 1 to 254 with the exception of 103 which is already used for the PC.
5.9.3 Scanner Address Changing
When using the linescanner on an Ethernet network you may need to change the IP address of the scanner so
that the factory default address does not conflict with another device on the network. Change the IP address
following the procedure described below:
•
Make sure that the PC network adapter is configured as required, see section 5.9.4
page 36.
•
Make sure that the scanner runtime DTDP software is stopped!
•
Switch off the scanner!
•
Switch on the scanner!
•
Open the Command Prompt window and start a Telnet session by using the command:
telnet <IPAddressScanner> <Port>
Note
Windows 7 does not have Telnet enabled by default. Enable the Telnet Client by using the command:
pkgmgr /iu:”TelnetClient”
•
Under Telnet you have access to the scanner command level. Give the new IP address for the scanner
with the command:


