<IT>
<GB>
<DE>
<FR>
<ES>
<PT>
<RUS>
< J >
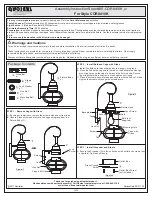
Fig.7
Chiudere la copertura (C);
Fig.8
Introdurre la struttura (S) fino a fondo corsa. Rimuovere la fettuccia di
sicurezza.
Fig.7
Close the covering (C);
Fig.8
Insert the structure (S) right to the end stroke. Remove the safety band.
Abb.7
Schließen Sie die Abdeckung (C );
Abb.8
Führen Sie die Struktur (S) bis zum Anschlag ein. Entfernen Sie
die Sicherheitsvorrichtung.
Fig.7
Fermer la couverture (C);
Fig.8
Introduire la structure (S) jusqu’au fond de course.Enlever le ruban de
sécurité.
Fig.7
Cerrar la cobertura (C);
Fig.8
Introducir la estructura (S) hasta el final del recorrido. Eliminar la cinta de
seguridad.
Fig.7
Fechar a cobertura (C);
Fig.8
Introduzir a estrutura (S) até o fundo do curso. Remover a fita de segurança.
Рис.7
Закрыть покрытие (C);
Рис.8
Ввести структуру (S) до упора. Снять защитную ленту.
図7.
カバー(C)を被せます。
図8.
照明器具の支柱部分(S)を土台の穴にカチッとなるまで挿
し、安全テープを取り除きます。
Fig. 7
Fig. 8
Fig.6
Introdurre il cavo di alimentazione (W) nel foro (G) della copertura e nel foro (E) della base.
Fig.6
Insert the feeding cable (W) into the covering hole (G) and into hole of the base (E).
Abb.6
Führen Sie das Speisungskabel (W) in das Loch (G) der Abdeckung und in das Loch (E) der Basis ein.
Fig.6
Introduire le câble d’alimentation (W) dans le trou (G) de la couverture et dans le trou (E) de la base.
Fig.6
Introducir el cable de alimentación (W) en el agujero (G) de la cobertura y en el agujero (E) de la base.
Fig.6
Introduzir o cabo de alimentação (W) no furo (G) da cobertura e no furo (E) da base.
Рис.6
Ввести кабель питания (W) в отверстие (G) покрытия и в отверстие (E) основания.
図6.
土台カバーの所定の穴(G)と土台中央にある穴(E)に電気ケーブルを通して下さい。
<IT>
<GB>
<DE>
<FR>
<ES>
<PT>
<RUS>
< J >
Fig. 6
E
W
G
C
S
CLAC


