1
T2518
BMG82
fisher-price.com
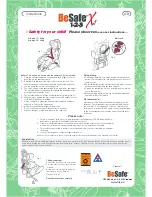
Newborn Baby
Bebé recién nacido
Toddler
Niño pequeño
Older Baby
Bebé mayor
IMPORTANT!
Please keep these instructions
for future reference.
• Please read these instructions before
assembly and use of this product.
• Adult assembly is required. Tool needed
for assembly: Phillips screwdriver
(not included).
• Requires one D (LR20)
alkaline
battery
(not included) for soother operation.
• Use the recline position until child is able
to sit up unassisted (approximately 20 lbs
or 9 kg).
• Use the upright position only when child
has developed enough upper body control
to sit without leaning forward (maximum
40 lbs or 18 kg).
• Product features and decorations may vary
from photographs.
¡IMPORTANTE!
Guardar estas instrucciones
para futura eferencia.
• Leer estas instrucciones antes de
ensamblar y usar este producto.
• Requiere montaje por un adulto.
Herramienta necesaria para el montaje:
desatornillador de cruz (no incluido).
• El mecanismo relajante funciona con 1 pila
alcalina
D (LR20) x 1,5V (no incluida).
• Usar la posición reclinada hasta que el
bebé pueda incorporarse por sí solo (peso
aproximado 9 kg).
• Únicamente usar la posición vertical cuando
el niño haya desarrollado el suficiente
control de la parte de arriba del cuerpo para
sentarse sin hacerse hacia adelante (peso
máximo 18 kg).
• Las características y decoración del
producto pueden variar de las mostradas.