10
AP User Guide
February 2009
Chapter 5 Setting Up Your Equipment - Model 4600 Outdoor Installation
Unpacking and setup are straightforward. Included with your HotPoint 4600 are:
Mounting bracket and hardware, designed to attach the 4600 to a HotPort 6200 family node. If
•
you are using an outdoor access point as a Standalone unit, a different mounting kit for this
purpose is available from Firetide.
Two indoor-rated 2.4 GHz omnidirectional staging antennas.
•
Weatherproof Ethernet cable, 10-pin to 10-pin, PoE-compatible.
•
You should configure your HotPoint before installation. Refer to Chapter 6, or the HotView Pro
Reference Guide, for details.
Pole Installation
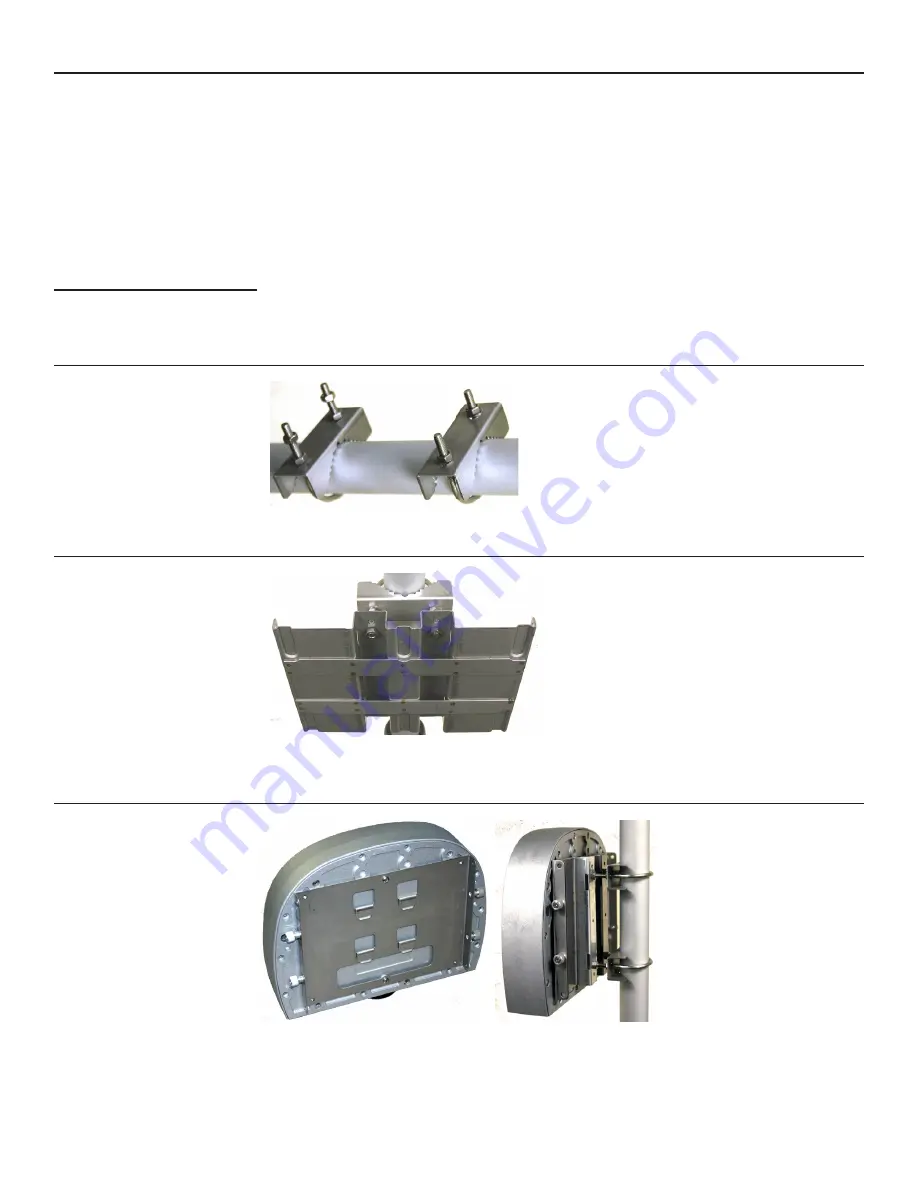
Installation on any pole up to 2 inches is easy. Begin by mounting the supplied U-bolts and ‘claw’
pieces to the pole, using two nuts, as shown in Figure 11. Make the nuts just finger-tight. Depend-
ing on the pole diameter, you may need additional nuts, as shown on the lower clamp of Figure 11.
The purpose of the spacer nuts is to prevent the U-bolt legs from protruding too far out beyond the
plate. This will interfere with the AP. If required, place two more spacer nuts on the U-bolts.
Figure 11. Pole Clamps
Next, attach the plate, using two nuts, as shown in Figure 12. Adjust the nuts to insure that the U-
bolts do not protrude past the fold in the plate. The exact adjustment depends on pole diameter.
Figure 12. Mounting Plate
When the plate is mounted and aligned, tighten all the nuts with a 7/16-inch wrench. Next, slide
the HotPoint onto and downward slightly, so that its tabs on its backing plate (Figure 13) engage
the mounting plate, as shown in Figure 13. Tighten the four knurled nuts on the sides.
Figure 13. AP Bracket Mounting Tabs & Mounted AP
The supplied antennas can be used for initial deployment, but should be replaced after initial
testing with outdoor-rated units of suitable gain and pattern. Complete your installation by con-
necting the access point to its companion mesh node using the supplied cable, or if you are using
it as a Standalone unit, connect it to your Ethernet backbone.


