


SUN P7
9
EN
cod. 3540I811 - 04/2011 (Rev. 00)
EN
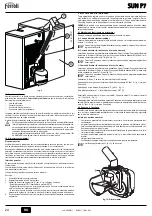
1. GENERAL INSTRUCTIONS
•
Carefully read the instructions contained in this instruction booklet.
•
After boiler installation, inform the user regarding its operation and give him this
manual, which is an integral and essential part of the product and must be kept with
care for future reference.
•
Installation and maintenance must be carried out by professionally qualified person-
nel, according to current regulations and the manufacturer's instructions. Do not car-
ry out any operation on the sealed control parts.
•
Incorrect installation or inadequate maintenance can result in damage or injury. The
Manufacturer declines any liability for damage due to errors in installation and use
or failure to follow the instructions.
•
Before carrying out any cleaning or maintenance operation, disconnect the unit from
the power supply using the system switch and/or the special cut-off devices.
•
In case of a fault and/or poor operation, deactivate the unit and do not attempt to
repair it or directly intervene. Contact professionally qualified personnel. Repair/re-
placement of the products must only be carried out by professionally qualified using
original spare parts. Failure to comply with the above could affect the safety of the
unit.
•
This unit must only be used for its intended purpose. Any other use is considered
improper and therefore dangerous.
•
The packing materials are potentially hazardous and must not be left within the
reach of children.
•
The images given in this manual are a simplified representation of the product. In
this representation there may be slight and insignificant differences with respect to
the product supplied.
2. OPERATING INSTRUCTIONS
2.1 Introduction
Dear Customer,
Thank you for choosing
SUN P7
, a
FERROLI
burner featuring advanced design, cutting-
edge technology, high reliability and quality construction.
SUN P7
is a pellet burner whose compact size and original design make it suitable for
use with the majority of solid fuel-burning boilers available on the market. The care taken
in its design and industrial production has resulted in a well-balanced product offering
high efficiencies, low CO and NOx emissions and a very quiet flame.
2.2 Control panel
fig. 1 - Control panel
Key
1
Day/time setting button
2
Operation mode selection button
3
Override button
4
Button -
5
Programming button
6
7
Display
8
Automatic mode symbol
9
Programming Menu symbol
10
Burner lighting request symbol
11
Not used
12
Multifunction symbol:
•
in Automatic mode, it indicates when the programmer clock is in the re-
quest band
•
if Automatic mode was not selected, it indicates Manual On mode
13
Override symbol
14
Day symbol
15
Setting symbol
16
Current hour
17
Current minutes
18
Day of the week
19
Burner On
Indications during operation
fig. 2 - Indications during operation
The lighting request (generated on closing of the contact on terminals 7-8 (see fig. 14),
in default setting conditions) is indicated by activation of the radiator symbol (detail 10 -
fig. 1).
2.3 Lighting
fig. 3 - Lighting
Switch on the power to the unit:
•
During the first 10 seconds the display shows "NO CU"
•
If a flame is detected, the burner carries out combustion chamber pre-ventilation.
•
At the end of this time, the burner will be ready to operate.
2.4 Adjustments
Clock setting
1.
Press the day/time setting button (detail 1 - fig. 1).
2.
The CLOCK and DAY icons flash on the display (detail 7 - fig. 1): set the current day
of the week with the + and - buttons (details 4 and 6 - fig. 1), considering that 1=Mon-
day, 7=Sunday. Confirm the day by pressing the day/time setting button (detail 1 -
fig. 1).
3.
The two digits of the CURRENT HOUR and the CLOCK icon flash on the display
(detail 7 - fig. 1): set the exact hour with the + and - buttons (details 4 and 6 - fig. 1),
from 00 to 23. Confirm the hour by pressing the day/time setting button (detail 1 -
fig. 1).
4.
The two digits of the CURRENT MINUTES and the CLOCK icon flash on the display
(detail 7 - fig. 1): set the exact minutes with the + and - buttons (details 4 and 6 -
fig. 1), from 00 to 59. Confirm the minutes by pressing the day/time setting button
(detail 1 - fig. 1). Automatic Heating, Manual On, Manual Off mode
Press the operation mode selection button (detail 2 - fig. 1) to set:
1.
In Automatic mode, the display (detail 7 - fig. 1), shows the CLOCK icon. The burner
activation and deactivation request depends on the set weekly programme. In the
request time band, the display (detail 7 - fig. 1) also shows the ON icon.
2.
In Manual On mode, the display (detail 7 - fig. 1) only shows the ON icon. The burner
is always in request status.
A
The set weekly programme is bypassed.
3.
In Manual Off mode, the display (detail 7 - fig. 1) does not show the ON icon or
CLOCK icon. The burner is off.
A
The set weekly programme is bypassed.
Preset weekly programme
The weekly programme is preset with 3 ON time bands and 3 OFF time bands: equal for
each day of the week. In the request time band, the display (detail 7 - fig. 1) shows the
ON icon.
A
Important: Check burner operation methods (see sec. 4.1)
8 9
16
17
18
19
10
11 12
13
14
15
1
2
3
4
5
6 7
06:30
08:30
12:00
12:00
16:30
22:30


