


Warm Up
Standby Mode
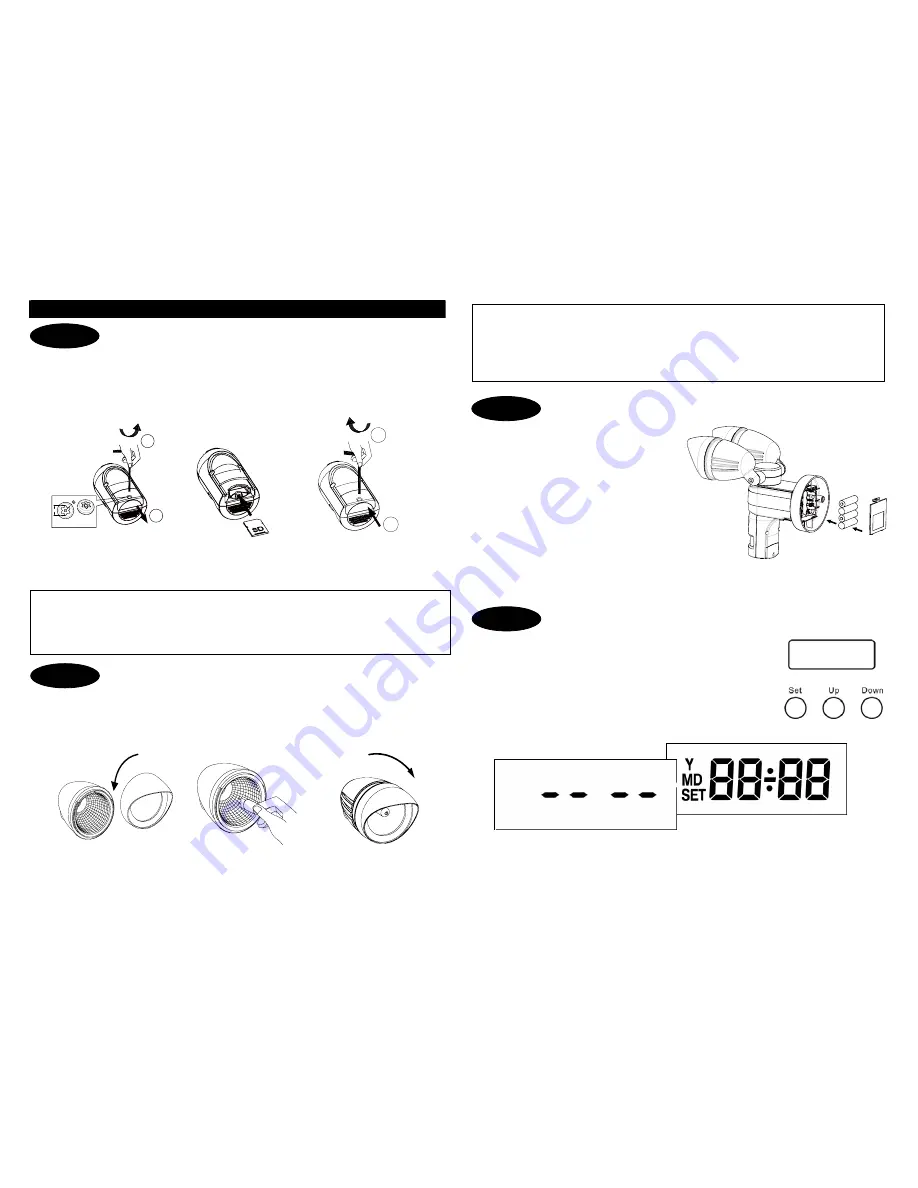
Installation
Insert/remove
SD
card
z
Unscrew the cover using provided Allen key (FIG. 1a)
z
Insert provided 2GB SD card or SD card with memory up to 32GB by your choice
into the card slot (FIG. 1b).
z
Refit the cover, and fasten the screw clockwise (FIG. 1c).
FIG. 1a
FIG. 1b
FIG. 1c
Note:
If SD card is not inserted properly or not found, SmartGuard will beep 10
seconds once an hour as indication after powering up.
Bulb Installation
z
Disconnect the power cord or wall switch
z
Turn the lampshade anti-clockwise to take off the lampshade (FIG. 2a).
z
Install G9 halogen bulb to its lamp holder (FIG. 2b).
z
Reposition the lampshade by turning it clockwise (FIG. 2c).
FIG.
2a
FIG.
2b
FIG.
2c
4
Install Back Up Batteries
z
Unscrew and remove the screw of
Battery Cover.
z
Press and release the cover of
battery compartment
z
Insert 4 AA size 1.5V alkaline
batteries to the battery spring and
make sure polarity (- +) is aligned
correctly.
z
Refit the battery cover.
Note:
The batteries power supports most
functions of SmartGuard except lighting.
Local Time Setting
The SmartGuard has a LCD panel with three control knobs:
Set
,
Up
and
Down
.
Once SmartGuard is powered up, it enters PIR warm up time.
After 3 seconds, the unit enters standby mode. It implies the
unit is ready for function setting.
5
1
2
3
0.
8
SCREW HEAD DIMENSION
UNIT:MM
1
2
CAUTION
:
For security reason, please do not remove the SD card frequently unless an
irregular condition has occurred (e.g. detection of an intruder or breaking attempts).
To view video, please refer to “Viewing Video” at p12.
CAUTION
:
(1) Always handle quartz halogen bulb with a soft cloth. Do not touch the bulb
with your bare hand as it will shorten the bulb life.
(2) Do not touch the light while it is in use or still hot. Cool off (about 5 minutes)
before touching it.
Step 1
Step 2
Step 3
Step 4