background image

8

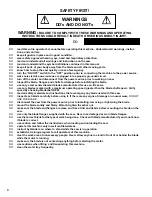
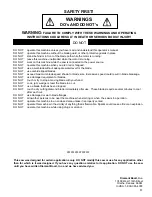
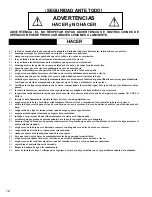
SAFETY FIRST!

WARNINGS

DO’s AND DO NOT’s

WARNING:

 FAILURE TO COMPLY WITH THESE WARNINGS AND OPERATING

INSTRUCTIONS COULD RESULT IN DEATH OR SERIOUS BODILY INJURY.

DO

DO

read this entire operator’s manual before operating this machine.  Understand all warnings, instruc
tions, and controls
.

DO

keep all guards in place and in good condition.

DO

wear safety approved hearing, eye, head and respiratory protection.

DO

read and understand all warnings and instructions on the saw.

DO

read and understand the symbol definitions contained in this manual.

DO

keep all parts of your body away from the blade and all other moving parts.

DO

know how to stop the saw quickly in case of emergency.

DO

turn the “ON/OFF” switch to the “OFF” position prior to connecting the machine to the power source.

DO

make sure electric powered saws are plugged into a properly grounded circuit

DO

turn off the motor and disconnect from the power source prior to working on saw.

DO

inspect the blade, flanges and shafts for damage before installing the blade.

DO

use only  steel center diamond blades manufactured for use on tile saws.

DO

use only blades marked with a maximum operating speed greater than the blade shaft speed.  Verify
speed by checking bladeshaft RPM.

DO

read all safety materials and instructions that accompany any blade used with this saw.

DO

inspect each blade carefully before using it. If there are any signs of damage or unusual wear, DO NOT
USE THE BLADE.

DO

disconnect the saw from the power source prior to installing, removing or tightening the blade.

DO

mount the blade solidly and firmly, Wrench tighten the arbor nut.

DO

make sure the blade and flanges are clean and free of dirt and debris before mounting the blade on the
saw.

DO

use only the blade flanges supplied with the saw.  Never use damaged or worn blade flanges.

DO

use the correct blade for the type of work being done.  Check with blade manufacturer if you do not know
if blade is correct.

DO

use caution and follow the instructions when loading and unloading the saw.

DO

operate this machine only in well ventilated areas.

DO

instruct bystanders on where to stand while the saw is in operation.

DO

establish a training program for all operators of this machine.

DO

clear the work area of unnecessary people.  Never allow anyone to stand in front of or behind the blade
while the motor is running.

DO

make sure the blade is not contacting anything before starting the motor.

DO

use cautions when lifting  and transporting this machine.

DO

clean the water tray frequently.

Summary of Contents for TILE MAGIC TMG-851

Page 1: ...e 800 365 4003 Corp Office 913 928 1000 Cust Service FAX 800 825 0028 Corp Office FAX 913 438 7951 0AF04048 Copyright October 1999 DBInc Printed in U S A OPERATING INSTRUCTIONS AND PARTS LIST INSTRUCC...

Page 2: ...n De Simbolos 3 5 Descripci n De Calcamonias y ubicaciones 6 Advertencias De Seguridad HACER NO HACER 12 13 Figura De Referencia 1 Caracteristica 14 2 Instalaci n De La Cortadora 14 3 Instalaci n Del...

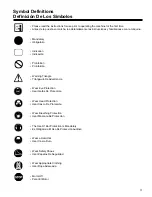
Page 3: ...ng Triangle Tri ngwulo De Advertencia Wear Eye Protection Usar Gafas De Protecci n Wear Head Protection Usar Casco De Protecci n Wear Breathing Protection Usar M scara De Protecci n The Use Of Ear Pro...

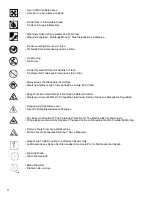
Page 4: ...La Hoja En Su Sitio Keep Work Area Clean Well Lit Remove All Safety Hazards Mantenga Limpio El Sitio De Trabajo Bien Iluminado Elimine Todos Los Riesgos De Seguridad Dangerously High Noise Level Nivel...

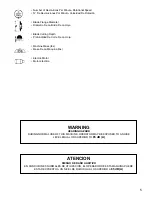
Page 5: ...E UTILIZACI N EL OPERADOR DE ESTA M QUINA PUEDE ESTAR EXPUESTO A UN NIVEL DE RUIDO IGUAL O SUPERIOR A 85 dB A Number of Revolutions Per Minute Rotational Speed N De Revoluciones Por Minuto Velocidad D...

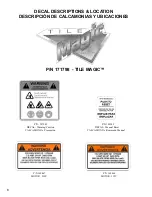
Page 6: ...ATION DESCRIPCI N DE CALCAMONIAS Y UBICACIONES P N 171798 TILE MAGIC P N 187043 P N 169345 DECAL Warning Caution DECAL Manual Reset CALCAMONIA Precauci n CALCAMONIA Rearmado Manual P N 169467 P N 1694...

Page 7: ...7...

Page 8: ...reater than the blade shaft speed Verify speed by checking bladeshaft RPM DO read all safety materials and instructions that accompany any blade used with this saw DO inspect each blade carefully befo...

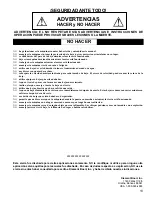
Page 9: ...running DO NOT work on this machine while the saw is connected to the power source DO NOT operate this machine when you are tired or fatigued DO NOT use a wet blade without adequate water level for th...

Page 10: ...factory assembled prior to shipment to ensure accurate cuts when the saw is delivered However since FELKER cannot control rough handling during shipping it is suggested that the following procedures b...

Page 11: ...before performing any maintenance 2 Keep the table top clean and free of cuttings Flush with water 3 Drain clean and refill the tank frequently flush with plenty of water then drain and refill the tan...

Page 12: ...a an a la hoja utilizada con esta sierra SI inspeccione cuidadosamente cada hoja antes de usarla Si se observan se ales de da o o desgaste poco com n NO USE LA HOJA SI instale la hoja firmemente Aprie...

Page 13: ...el motor est funcionando NO maneje esta m quina si est cansado o fatigado NO utilice una hoja de corte h medo sin tener el suministro adecuado de agua NO use discos con puntas de carburo NO sobrepase...

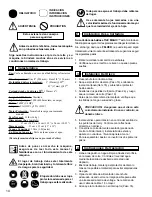
Page 14: ...informaci n dir jase a su proveedor Felker Su cortadora de baldosa TILE MAGIC est montada en f brica para asegurar cortes precisos al entregar la cortadora Sin embargo dado que FELKER no puede impedi...

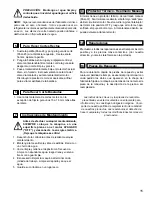
Page 15: ...iento 2 Mantenga la mesa limpia y libre de astillas Barra con un chorro de agua 3 Vacie limpie y rellene el dep sito con frecuencia Limpie con abundante agua luego drene y vuelva a llenar con agua lim...

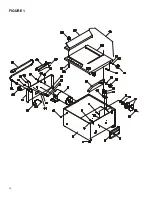
Page 16: ...16 FIGURE 1...

Page 17: ...rew Pan Head M3 x 16 13 169455 1 Bracket Splash Guard 43 197293 1 Machine Screw Pan Head M4 x 16 14 139746 2 Washer Flat M6 44 197291 1 Nut Hex M4 15 197226 2 Capscrew Hex Head M6 x 10 45 167485 1 Loc...

Page 18: ...18...

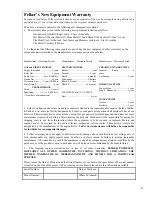
Page 19: ...is expressly limited to the replacement or repair at Felker Olathe KS 66061 or at a service facility designated by Felker of such parts as inspection shall disclose to have been defective This warrant...

Page 20: ...20...

Reviews: