


2.
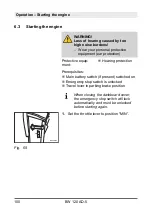
Turn the ignition key to position “I”.
ð
All control and warning lights in the
instrument cluster light up for a moment.
3.
With cold ambient temperatures hold the
ignition key up to 10 seconds in position
“II”.
ð
The preheating control light lights up.
4.
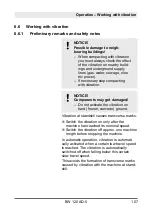
The starter switch is designed
with a re-start lock. The ignition
key must first be turned back to
position “0” before a new
starting attempt can be made.
NOTICE!
Components may get dam-
aged!
– Run the starting process for
maximum 20 seconds
without interruption and
pause for a minute between
starting attempts.
– If the engine has not started
after two attempts, determine
the cause.
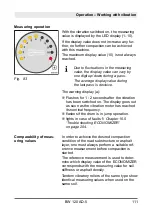
Turn the ignition key through position “II” to
position “III”.
ð
The starter cranks the engine.
B-ELE-0070
Fig. 66
B-SYM-0010
Fig. 67
B-ELE-0072
Fig. 68
Operation – Starting the engine
BW 120 AD-5
101
Summary of Contents for BOMAG BW 120 AD-5
Page 9: ...1 Introduction Introduction BW 120 AD 5 9 ...
Page 13: ...2 Technical data Technical data BW 120 AD 5 13 ...
Page 19: ...3 Concerning your safety Concerning your safety BW 120 AD 5 19 ...
Page 62: ...Machine type plate example Fig 29 Concerning your safety Signage BW 120 AD 5 62 ...
Page 64: ...Concerning your safety Danger zones BW 120 AD 5 64 ...
Page 65: ...4 Indicators and control elements Indicators and control elements BW 120 AD 5 65 ...
Page 80: ...Indicators and control elements Engine compartment BW 120 AD 5 80 ...
Page 81: ...5 Checks prior to start up Checks prior to start up BW 120 AD 5 81 ...
Page 96: ...Checks prior to start up Checking the hydraulic oil filter BW 120 AD 5 96 ...
Page 97: ...6 Operation Operation BW 120 AD 5 97 ...
Page 122: ...Operation Emergency procedures BW 120 AD 5 122 ...
Page 123: ...7 Loading transporting the machine Loading transporting the machine BW 120 AD 5 123 ...
Page 132: ...Loading transporting the machine Folding down and erecting the foldable ROPS BW 120 AD 5 132 ...
Page 133: ...8 Maintenance Maintenance BW 120 AD 5 133 ...
Page 190: ...Maintenance As required BW 120 AD 5 190 ...
Page 191: ...9 Setting up refitting Setting up refitting BW 120 AD 5 191 ...
Page 194: ...Setting up refitting Manually adjusting the crabwalk BW 120 AD 5 194 ...
Page 195: ...10 Troubleshooting Troubleshooting BW 120 AD 5 195 ...
Page 206: ...Troubleshooting Trouble shooting ECONOMIZER BW 120 AD 5 206 ...
Page 207: ...11 Disposal Disposal BW 120 AD 5 207 ...
Page 209: ......
Page 210: ......


