


For more product information visit |
www.FatShark.com
| All Rights Reserved
SIMULATOR
1.
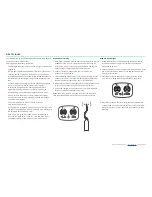
To get free DRL Simulator access, first register your product
at
fatshark.com/register
. Follow the instructions to
download and install the simulator.
2.
Connect the USB cable between the computer and the
controller and allow it to install the driver if necessary. The
Fat Shark Radio does not need batteries to operate on the
USB connection.
3. Open the DRL Simulator.
4.
Configure the radio by clicking on SETTINGS then CHOOSE
CONTROLLER.
5. Follow the on-screen prompts to calibrate the controller.
6.
At the final setup screen, click the box for RAW input.
7.
Fat Shark recommends acquiring a level of comfort with the
controls on the simulator before moving onto the full
training program..
BASIC OPERATION OF CONTROLLER
IMPORTANT:
All RC controls are proportional. Moving the
control stick a small amount will result in a slow response.
Moving the stick a large amount will result in a fast response.
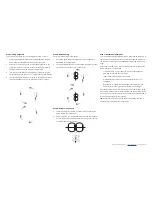
FLIGHT MODES
Beginner:
With the radio in your hands, move the flight mode
switch in the top left corner to the top position (away from
you) for Beginner mode. In this mode, the quadcopter will
automatically level and flight controls will be eased. When the
pitch and roll sticks are centered, the aircraft will maintain a
level attitude*. Moving the pitch and roll stick will cause the
quadcopter to tilt in the desired direction. This mode is also
called Angle mode because the control stick position dictates a
bank angle.
Intermediate:
Move the flight mode switch to the middle
position for Intermediate mode. In this mode, the quadcopter will
automatically level when the stick is centered but if the control
stick is moved near full deflection the model will be allowed to
flip or roll. This mode is also called Horizon mode because the
model will return automatically to level flight from any aerobatic
position.
Advanced:
Move the flight mode switch to the lower position
for Advanced mode. When flying in this mode, the aircraft does
what the pilot commands with no automatic stabilization. In
general, the quadcopter will hold an attitude when the stick is
released, and when then stick is moved again the aircraft will
continue to flip or roll as long as the stick is held. This mode is
also called Rate command because the aircraft will rotate at a
constant rate equal to how far the control stick is moved.
*
NOTE: The 101 system flies without GPS stabilization; some
DRIFT during flight is normal.
MOTOR START/STOP SWITCH
Begin with the motor start/stop switch in the upward position.
After powering on the radio and Shark quad, flip the switch down
to turn the motors on. The throttle must be in the low position
for the motors to arm. The propellers will turn when the switch
is flipped, flip the switch off as soon as possible in the event of a
crash.
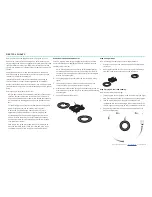
CHARGING BATTERIES
To charge the quadcopter battery, plug the charger into a USB
power supply and connect the battery. A red LED indicates
the charger has power. During charging, the green LED flashes;
once charging is complete, the green LED stays illuminated.
To charge the Recon headset, plug the included micro USB
cable into the port on the side of the goggles. The LED is
green when charging and changes to red when the charge is
complete.
LiPO BATTERY WARNINGS:
• Only charge batteries with the included USB charger.
•
Lithium batteries can become a safety and fire hazard and must
be handled properly
• Only use chargers intended for LiPo batteries
• Never attempt to charge a damaged LiPo battery
• Never attempt to charge a hot LiPo battery
• Never cut, puncture, bend or otherwise damage a LiPo battery
•
Never expose the battery to fire or other sources of heat
• Do not expose the batteries to water
• Do not discharge the battery cells below 3.0 volts
• Do not modify the batteries
• Do not dispose of battries in the garbage; proper disposal required
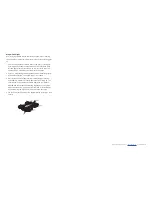
TURNING THE QUADCOPTER ON AND OFF
There is no power switch on the quadcopter; it will turn on
when the battery is connected. Fully charge the battery first.
1. Connect the battery to the quad by placing the battery on
the bottom of the Shark Quad and sliding back to engage
the tabs at the front of the battery. Press the rear of the
battery into the quad to snap the rear tabs into place.
2.
Plug the connector into the battery.
3.
Unplug the battery after use to turn the aircraft off.
IMPORTANT:
In the event of a crash, stop the motors with the
arm switch on the radio. Always stop the motors before picking
up the quadcopter. Do not turn the motors on while holding the
aircraft. Failure to unplug the battery after a flight will drive the
battery too low to recharge.
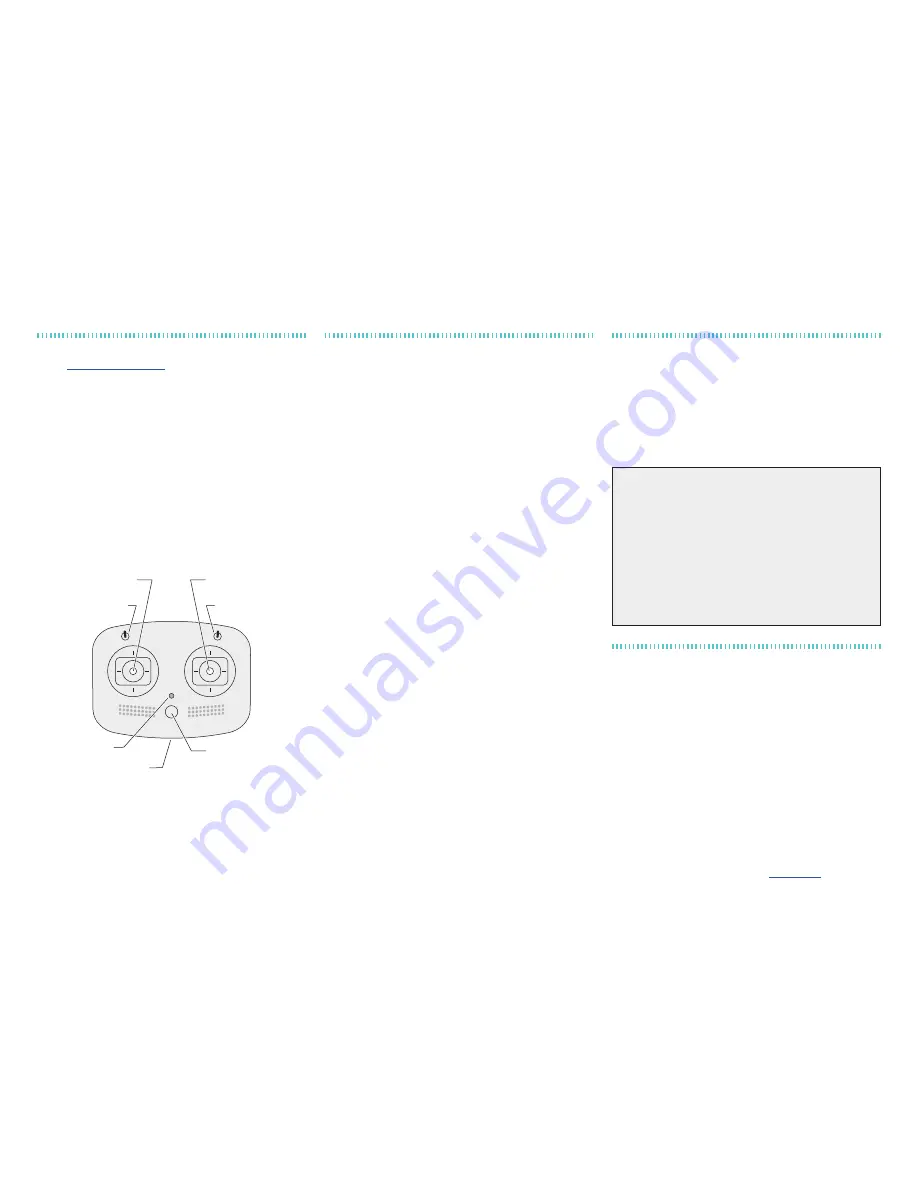
Flight Mode Switch
Motor Start/Stop Switch
Throttle/Yaw Control Stick
Pitch/Roll Control Stick
Battery
Power Indicator
Power Button
USB Port


