background image

For Technical Support Please Contact:
EZPnP USA
E-Mail

: [email protected]

(888)393-9960

EZPnP Taiwan
E-Mail

: [email protected]

Summary of Contents for DM220-D08E

Page 1: ...Portable Photo Video Backup DVD Burner For Model DM220 D08E User s Manual...

Page 2: ......

Page 3: ...P 8 3 1 LCD Display P 8 3 2 Icon List P 8 3 3 Menu List P 9 4 Operating Instructions P 10 4 1 Standalone Copy P 10 4 2 File Manager P 13 4 3 Verify Session P 14 4 4 Compare P 14 4 5 Setup P 15 5 Produ...

Page 4: ...he memory card The manufacturer and resellers of EZDigiMagic are not responsible for any data lost from the memory card 1 1 Basic Con guration Please review contents to ensure your EZDigiMagic is comp...

Page 5: ...lace blank DVD or CD disc in tray and close tray by sliding it back into operating position 2 CF Card Slot CF Type I II slot you may insert CF card or MD 1 HDD directly into slot 3 Multi Card Slot Mul...

Page 6: ...Set Copy key Allows special selections and setting of items also works as QuickCopy key Up key Navigate up a menu or increase a value when setting a selection Down key Navigate down a menu or decreas...

Page 7: ...F Flash G Green R Red 2 3 Rear Panel 1 USB Port Plug the USB 2 0 cable into this socket and connect the other end to your PC 2 Power Connector Insert the power connector from the AC adapter or the op...

Page 8: ...t of 1800 mAh Dry cell or alkaline batteries do not meet this requirement Typical estimated usage times for fully charged recharge able batteries with the following mAh ratings are Battery Capacity 23...

Page 9: ...harged or when the EZDigiMagic is not being used 7 NOTE Batteries are not charged by the DM220 D08E When powering the unit using NiMH rechargeable batteries only the user must consider the added power...

Page 10: ...in Menu Selection 2 Line 2 3 Menu Selection List use key to navigate up down 3 Line 4 4 way navigation button menu 3 2 Icon List Description Icons Arrow Key AC Power Battery High Low CF 5 in 1 DISC Fi...

Page 11: ...Time Zone Set Time Zone GMT 12 GMT 13 Disc Burn Method Set DISC Burn Method to Multi session or Single Session Folder Name Display default folder name string on the copied disc Disc Label Display defa...

Page 12: ...Insert devices into only one slot at a time 5 From the menu selection use the UP and DOWN arrow keys to move to the menu item Copy NOTE only three menu options will be displayed at one time Use the u...

Page 13: ...o begin the disc burning 10 During disc burning the progress will be indicated by the percentage of completion 11 Once the burning is completed the status will be shown on the display If the Auto Tray...

Page 14: ...start and then the display will show Copy Done after completion 14 If total data size is greater than remaining space of writable disc DM220 U will request Disc Spanning function To continue the COPY...

Page 15: ...as the source If 2 slots are occupied the user must select the desired source for the Copy operation 3 Once the source is selected press the RIGHT arrow to execute the command The display will show th...

Page 16: ...status of verif cation File Count indicates the number of files in the last session and Check indicates the number of files that have been verified 3 After the Verify Session is completed successfull...

Page 17: ...row to enter the selected menu option NOTE some settings require the use of the COPY SET button The functions are explained below 4 5 1 Time Zone NOTE The time zone should always be set BEFORE establi...

Page 18: ...confirm the selection Only one language may be available for your unit 4 5 8 Auto Tray Out Press the RIGHT arrow key to enter this function The display will show choice for On and Off Use the UP DOWN...

Page 19: ...rmware update NOTE This operation should be performed only if there is a need to update the firmware 4 5 16 Compare After Burn Press the RIGHT arrow key to enter this function The display will show ch...

Page 20: ...cts only The actual speed or time may vary de pending on the type and quality of media We do not offer any warranty that the speed or performance will be identical in a similar backup copying cycle Du...

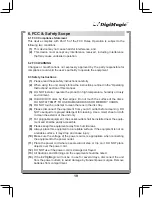
Page 21: ...MEMORY CARDS 5 DO NOT touch or attempt to clean the lens in the disc tray 6 Please disconnect the equipment from your AC outlet before cleaning DO NOT use liquid or sprayed detergent for cleaning Use...

Page 22: ...pplied with the product Caution Performing unauthorized modi cations and adjustments to the unit or using this product in a manner other than speci ed herein may result in hazardous radiation exposure...

Page 23: ......

Page 24: ...For Technical Support Please Contact EZPnP USA E Mail tech ezpnp usa com 888 393 9960 EZPnP Taiwan E Mail service ezpnp com...

Page 25: ...Portable Photo Video Music Backup DVD or Blu ray Burner with Viewer For Models DM220 P08 DM220 BD User s Manual...

Page 26: ......

Page 27: ...ay P 9 3 2 Icon List P 9 3 3 Menu List P 10 4 Operating Instructions P 12 4 1 Standalone Copy P 12 4 2 View P 16 4 3 File Manager P 19 4 4 Compare P 21 4 5 Setup P 21 4 6 1 TV out P 27 4 6 2 Remote Co...

Page 28: ...erasing the contents of the memory card The manufacturer and resellers of EZDigiMagic are not responsible for any data lost from the memory card 1 1 Basic Con guration Please review contents to ensure...

Page 29: ...Supports most major memory card formats including high speed and high capacity memory cards CF High Speed UDMA SDHC SDXC Advanced professional features including Disc Spanning and Time Date Stamping 2...

Page 30: ...SB Host for external USB Mass Storage class devices such as USB pen drive or USB HDD must have self power or digital still cameras and HDD Based camcorders 4 IR Receiving Indicator a When using the re...

Page 31: ...etting of items also works as QuickCopy key Increase Zoom in picture or increase audio volume Decrease Zoom out picture or decrease audio volume Up key Navigate up a menu or increase a value when sett...

Page 32: ...th mini jack or earphones neither are included can be connected to the unit 2 Video Out Can be connected to TV set for viewing image les and video les playback 3 USB Port Plug the USB 2 0 cable into t...

Page 33: ...nt of 1800 mAh Dry cell or alkaline batteries do not meet this requirement Typical estimated usage times for fully charged recharge able batteries with the following mAh ratings are Battery Capacity 2...

Page 34: ...edia players which are USB powered or recharge from the USB port will substantially reduce the operating time for a charged set of NiMH batteries 6 Please follow instructions provided by rechargeable...

Page 35: ...u Selection List use key to navigate up down 3 Section 3 4 way navigation button menu 3 2 Icon List Description Icons Setup Mode Battery High Battery Low Volume 0 10 CF M Card DISC USB File File SEL F...

Page 36: ...device M Card Display SD MMC MS xD card total capacity and used capacity delete le copy le to other device USB Device Display USB storage total capacity and used capacity delete le copy le to other d...

Page 37: ...hed Show Backup Count Display backup counter information Show Burner Info Show burner model version Show System Info Show system model version Compare after Burn Set compare after burn to After Succes...

Page 38: ...pri ate slot NOTE Insert devices into only one slot at a time 5 From the menu selection use the UP and DOWN arrow keys to move to the menu item Copy NOTE only three menu options will be displayed at o...

Page 39: ...n of suf cient available space Press the RIGHT arrow key to begin the disc burning 10 During disc burning the progress will be indicated by the percentage of completion 11 Disc Spanning If data contai...

Page 40: ...not preferred The Compare After Burn feature will automatically proceed after 5 seconds if no selection is made 13 Once the burning is completed the status will be shown on the display If the Auto Tr...

Page 41: ...display will show the source and disc capacity for confirmation of sufficient available space The message Copy Now will appear Press the RIGHT arrow key again to start the copying 3 During copying th...

Page 42: ...ders 2 Once the selection process is completed press the RIGHT arrow key the display will show the check marked item only one of the multiple selected file will be shown Press the RIGHT arrow key agai...

Page 43: ...re Continuing to press the key will increase the zoom for magni cation levels of 1X 2X 3X etc The key can be used to zoom out in the same fashion until the picture is returned to 1X level If the key i...

Page 44: ...USB port of the printer that supports Pict bridge function After connecting cable and selecting the Print function press the Enter key The display will show Initialization message as show a in the pi...

Page 45: ...press the RIGHT arrow to execute the command The display will show the total capacity and the used capacity of the media in the source Press the RIGHT arrow key again to open the le folder and display...

Page 46: ...one time Use the up down arrow to scroll to the additional menu options 3 1 During copying the progress will be shown as percentage of completion 3 2 Once the copying process is completed the display...

Page 47: ...gh the setup options use the left arrow to return to the main menu use the right arrow to enter the selected menu option The functions are explained below 4 5 1 Time Zone NOTE The time zone should alw...

Page 48: ...tes of daylight saving time After entering this function select Enable and On then use up down arrow key to change the dates in mm dd format 1 Select Enable to enter the setup Use up down key to move...

Page 49: ...the right arrow key The date can be changed by using the up down arrow key After the end date is set press the left arrow key to complete the setup 4 5 3 Date Time Press the RIGHT arrow key to enter...

Page 50: ...how and press the RIGHT arrow key to con rm the selection 4 5 6 Repeat Mode Press the RIGHT arrow key to enter this function Use the UP DOWN key to move to the desired choice and press the RIGHT arrow...

Page 51: ...Choosing On setting will eject the disc after copy function choosing Off selection will not eject disc The On option will eject the disc tray after the disc burning operation is completed 4 5 12 Show...

Page 52: ...e displayed as percentage of completion until it is completed WARNING The formatting function will erase all data on the card 4 5 18 Erase Disc Operating Instructions Press the RIGHT arrow key to ente...

Page 53: ...rupted or damaged images found on the memory card CAUTION Re formatting the ash memory card will erase all data that was previously stored on the memory card Be sure images are saved to a HDD CD DVD o...

Page 54: ...vigated using the keypad or the remote control 3 Select the 2 View fuction in Figure 62 to enter picture display mode 4 Should the aspect ratio of 4 3 or 16 9 need to be changed this selection is made...

Page 55: ...play source 1 3 Increase audio volume 1 4 Zoom In Zoom in picture shows more detail TFT only Line 2 2 1 Set Copy Allows special selections and setting of items also works as Quick Copy key 2 2 NTSC P...

Page 56: ...ub menu or selects a function from a list 4 4 Slide Show When in play mode press this button to start the slide show Line 5 5 1 Print In the 2 View menu after a file is selected press Print button to...

Page 57: ...rmance and speci cations are subject to change without notice It is the user s responsibility to make sure the data on the memory card has been successfully backed up onto the disc before erasing the...

Page 58: ...essible 8 Please keep this equipment away from humid areas 9 Always place this equipment on a reliable surface If the equipment is not on a reliable surface it may drop and cause injury 10 Make sure t...

Page 59: ...isible laser radiation may be present when opened Avoid direct ex posure to beam This device Complies with FDA radiation performance standards 21CFR subchapter J 7 Warranty Technical Support Limited P...

Page 60: ......

Page 61: ...For Technical Support Please Contact EZPnP USA E Mail tech ezpnp usa com 888 393 9960 EZPnP Taiwan E Mail service ezpnp com...

Page 62: ...Portable Photo Video Backup DVD Burner For Models DM220 U Series User s Manual...

Page 63: ......

Page 64: ...P 9 3 1 LCD Display P 9 3 2 Icon List P 9 3 3 Menu List P 10 4 Operating Instructions P 12 4 1 Standalone Copy P 12 4 2 File Manager P 15 4 3 Verify Session P 17 4 4 Compare P 17 4 5 Setup P 18 5 Prod...

Page 65: ...ontents of the memory card The manufacturer and resellers of EZDigiMagic are not responsible for any data lost from the memory card 1 1 Basic Con guration Please review contents to ensure your EZDigiM...

Page 66: ...ble copy modes Copy by file type Photo Video Music are supported Advanced professional features including Disc Spanning and Time Date Stamping Back lit LCD display allows function settings to be read...

Page 67: ...perating position 2 CF Card Slot CF Type I II slot you may insert CF card or MD 1 HDD directly into slot 3 USB Slot Support USB Host for external USB Mass Storage class devices such as USB pen drive o...

Page 68: ...Set Copy key Allows special selections and setting of items also works as QuickCopy key Up key Navigate up a menu or increase a value when setting a selection Down key Navigate down a menu or decreas...

Page 69: ...F Flash G Green R Red 2 3 Rear Panel 1 USB Port Plug the USB 2 0 cable into this socket and connect the other end to your PC 2 Power Connector Insert the power connector from the AC adapter or the op...

Page 70: ...of 1800 mAh Dry cell or alkaline batteries do not meet this requirement Typical estimated usage times for fully charged recharge able batteries with the following mAh ratings are Battery Capacity 230...

Page 71: ...scharged or when the EZDigiMagic is not being used 7 NOTE Batteries are not charged by the DM220 U When powering the unit using NiMH rechargeable batteries only the user must consider the added power...

Page 72: ...Menu Selection 2 Line 2 3 Menu Selection List use key to navigate up down 3 Line 4 4 way navigation button menu 3 2 Icon List Description Icons Arrow Key AC Power Battery High Low CF 6 in 1 DISC USB...

Page 73: ...ete le copy le to other device Disc Display disc capacity copy le to other device Verify Session Verify the last burned session Compare Compare data of the latest backup on the disc with the original...

Page 74: ...e Hardware versions Format Format CF SD MMC XD MS cards USB storage device Erase Disc Erase CD RW DVD RW DVD RW disc Update Firmware Update system rmware Compare after Burn Set compare after burn to A...

Page 75: ...i ate slot NOTE Insert devices into only one slot at a time 5 From the menu selection use the UP and DOWN arrow keys to move to the menu item Copy NOTE only three menu options will be displayed at one...

Page 76: ...o begin the disc burning 10 During disc burning the progress will be indicated by the percentage of completion 11 Once the burning is completed the status will be shown on the display If the Auto Tray...

Page 77: ...start and then the display will show Copy Done after completion 14 If total data size is greater than remaining space of writable disc DM220 U will request Disc Spanning function To continue the COPY...

Page 78: ...press the RIGHT arrow to execute the command The display will show the total capacity and the used capacity of the media in the source Press the RIGHT arrow key again to open the le folder and display...

Page 79: ...d at one time Use the up down arrow to scroll to the additional menu options 3 1 During copying the progress will be shown as percentage of completion 3 2 Once the copying process is completed the dis...

Page 80: ...f verification File Count indicates the number of files in the last session and Check indicates the number of files that have been verified 3 After the Verify Session is completed successfully the dis...

Page 81: ...row to enter the selected menu option NOTE some settings require the use of the COPY SET button The functions are explained below 4 5 1 Time Zone NOTE The time zone should always be set BEFORE establi...

Page 82: ...aylight saving time can beentered by selecting Start Time from the DST setup menu and press the RIGHT arrow key The date can be changed by using the UP DOWN arrow key After the date is set press the L...

Page 83: ...RIGHT arrow key to enter this function The display will show the folder name used 4 5 6 Disc Label Press the RIGHT arrow key to enter this function The display will show the name label for the disc c...

Page 84: ...n serted the user must select the source card to be formatted Press the RIGHT arrow key and the Format Now message will appear Press the RIGHT arrow key again to start the format process The progress...

Page 85: ...ght arrow key to confirm PERFORMANCE NOTE To optimize the copy performance of your ash memory card with the EZDigiMagic DM220 U unit it is recommended that users backup their photos and then re format...

Page 86: ...rmance and speci cations are subject to change without notice It is the user s responsibility to make sure the data on the memory card has been successfully backed up onto the disc before erasing the...

Page 87: ...essible 8 Please keep this equipment away from humid areas 9 Always place this equipment on a reliable surface If the equipment is not on a reliable surface it may drop and cause injury 10 Make sure t...

Page 88: ...isible laser radiation may be present when opened Avoid direct ex posure to beam This device Complies with FDA radiation performance standards 21CFR subchapter J 7 Warranty Technical Support Limited P...

Page 89: ......

Page 90: ...For Technical Support Please Contact EZPnP USA E Mail tech ezpnp usa com 888 393 9960 EZPnP Taiwan E Mail service ezpnp com...

Reviews: