


19 |
P a g e
6.
Once the image is selected enter an Image Name. Then push the Add button. You can continue
adding more images if you like. Otherwise click the Cancel to exit the Add Image Details dialog
box.
7.
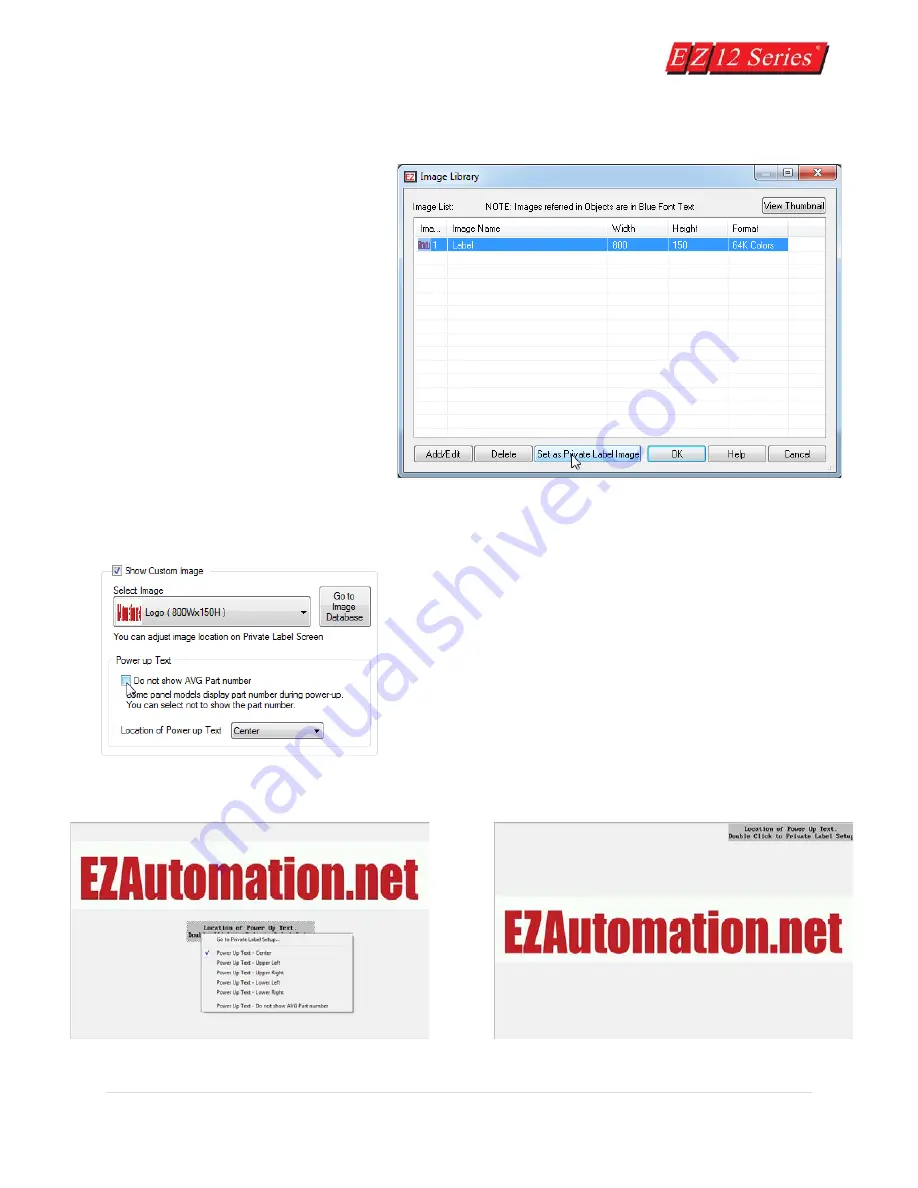
In the Image Database select
your image and then click the
Set as Private Label Image.
8.
The selected Image will appear
in the Selected Image Option. If
more than 1 Image exist in the
library the drop down can be
used to change the Private Label
Image.
9.
You also have the option to change the position of the Power up Text as well as disable the
seeing the EZAutomation Part Number upon power up of the unit. Once done click OK.
10.
Now the image will appear on the Private Label Image.
You can at this point move the image around if it is not the
same size as the screen (max size images will fill the entire
screen). You can also use the right click menu to move the
Location of Power Up Message Text to different spot.
Summary of Contents for EZ 10 Series
Page 1: ......
Page 2: ...i P a g e Getting Started EZ12 EZTouch Editor 2 0...
Page 3: ...ii P a g e Manual EZ12 USER M...
Page 13: ...7 P a g e EZ12 Dimensions Units inches millimeters...
Page 26: ...20 P a g e EZ12 Models...