background image

12 


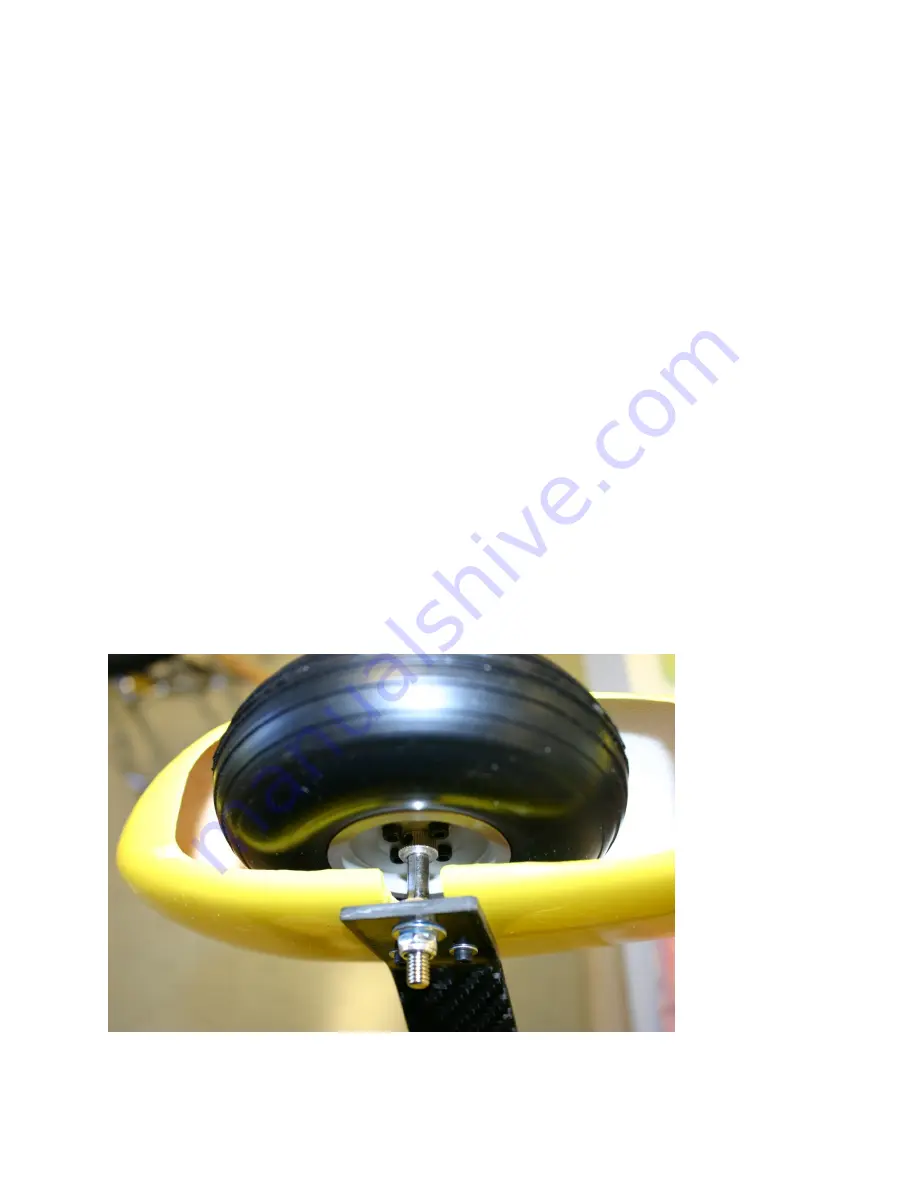
tightening the nylon insert nut to the axle, be careful to not overtighten.  If 
you ground a flat spot I find it best to position that facing the bottom so future 
wheel collar retightening is more accessible. Now install one wheel collar, the 
tire then the other wheel collar but don’t tighten. Now position the wheel pant 
onto the axle and determine the exact position of the inner and outer wheel 
collars such that the tire will not rub against the wheel pant. Once you have 
this location add blue thread lock to the set screw and tighten your wheel 
collars, do this to the tires on each side of the gear in the exact same manner. 
Now position the wheel pant(s) onto the axle/gear and tighten with the 3mm 
bolts/washers and use blue thread lock on these as well. Now use something to 
support the fuselage and install the gear onto the bottom of the fuselage with 
the remaining 4mm bolts, washers and nuts, see figures 8, 9 & 10. 
NOTE: I found it easiest to put my hand thru the pipe tunnel to support the 
nylon insert nuts during tightening of these four bolts/washers, but you can 
also use the access holes near the tank mount area. Once this is all complete 
now align your cuffs to the fuselage such that they are barely touching the 
fuselage and glue them in place, blue tape is helpful to keep them in place 
until the glue is dry. Again see figure 11. 

 
Figure 8 


Figure 9 

Summary of Contents for 104" MXS-EXP ARF

Page 1: ...1 104 MXS EXP ARF Assembly Manual Copyright 2016 Extreme Flight RC...

Page 2: ...utics in order to be properly insured and operate your model at AMA sanctioned flying fields only If you are not willing to accept ALL liability for the use of this product please return it to the pla...

Page 3: ...its ability to perform the full range of full stall high alpha maneuvers and aggressive gyroscopic tumbling maneuvers The MXS is rewriting the rule book on ultra aggressive 3D maneuvers Unrivaled in p...

Page 4: ...inum arms for the elevators 3 if using a tail mounted rudder servo and 4 for double tail rudders servos 1 x Extreme Flight 4 double offset aluminum arm for the rudder if using pull pull rudder setup 2...

Page 5: ...or imperfections on some of the surfaces An effective method to restore these imperfections to original condition is to use a very fine tipped hypodermic needle and inject a drop of water under the co...

Page 6: ...o this on just one side either the wing or aileron it does not matter which is first Mix only enough glue to work with one panel at a time Before applying any glue to the hinge itself I highly recomme...

Page 7: ...horn before gluing sometimes balsa pieces and or dust will be down in the hole and need cleaned to allow the control horn and base plate to fit down flush on the surface You should not have to trim t...

Page 8: ...8 Then hook it to your servo arm in the same manner and use blue thread lock See Figures 3 4 Figure 2 Figure 3 Scuff this portion only...

Page 9: ...orient the output shaft toward the hinge line of the horizontal stabilizer It will be easier to install the servo arms after mounting the servo Make all hookups for the pushrods ball links as we did i...

Page 10: ...selage which will require a pull pull setup hardware is included If you are running stock mufflers a rear mounted direct drive servo setup works great for CG purposes If you want to run cans or pipes...

Page 11: ...and allow this to dry Slide them onto the gear before proceeding with the tires axles I feel it is easier to mount the axles tires wheel pants before installing the gear onto the fuselage however you...

Page 12: ...n each side of the gear in the exact same manner Now position the wheel pant s onto the axle gear and tighten with the 3mm bolts washers and use blue thread lock on these as well Now use something to...

Page 13: ...13 Figure 10...

Page 14: ...eel collars such as we did with the main gear axles and another flat spot on the upper portion of the wire that will insert into the tiller housing You will notice on the tiller housing there are two...

Page 15: ...15 Figure 13 Tailweel bracket Tiller arm Tiller housing Nylon insert nut Tailwheel wire...

Page 16: ...25 overall so I used 1 125 standoffs to yield my desired spacing You could use more or even less but I recommend about 125 of spinner backplate clearance You will need to use allen head bolts of about...

Page 17: ...rottle pushrod I again chose to file a very small flat spot on the included throttle pushrod to accommodate the bolt in the easy connector When installing the easy connector be sure the round nut is n...

Page 18: ...18 Figure 16 Figure 17 Slot thru firewall Pushrod Easy swivel connector Round nut Slot thru firewall Ball link Washer Nut...

Page 19: ...here is no way I could cover every scenario so I have only included pictures of my cowling with stock mufflers In my setup you will not see any cooling holes in the cowling I cut holes in the bottom o...

Page 20: ...nd secure with velcro zip ties and put foam under tank Install any other components you plan to use at this time Figure 20 shows where I installed my electronics and accessories Figure 20 Receiver swi...

Page 21: ...t is tail heavy and if it pitches down quickly it is too nose heavy but it may pitch slightly down but only after holding that 45 line for some time then exhibit a slight descent 13 Once you have the...

Page 22: ...aircraft I use Velcro one wrap to secure all batteries receivers fuel tank s and wires I recommend you even secure loose wiring so it will not be able to move at any time All servo leads and extensio...

Page 23: ...s 65 up down expo 45 Rudder left and right is as near to elevator without touching expo 40 NOTE be sure to use a high quality throw angle meter to adjust your throws Appendix A expanded pull pull rudd...

Page 24: ...ut as we did on the other surfaces Repeat for the other side Note When routing the pull pull cables through the fuse they should cross like an X Also the tension on the wires should be taunt but not o...

Reviews: