ExRobotics B.V.
ExR-2 Robot
Operating Guide
Document No.:
20220412IP1
Version No.: 2
Owner:
Ian Peerless
Date:
2022-04-30
Page 26 of 39
This document is considered an uncontrolled copy when printed. Always ensure that you print and use a current version.
Copyright 2022 ExRobotics B.V.
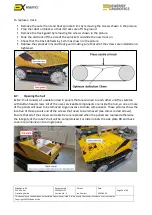
To replace a track:
▪
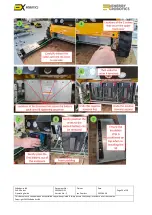
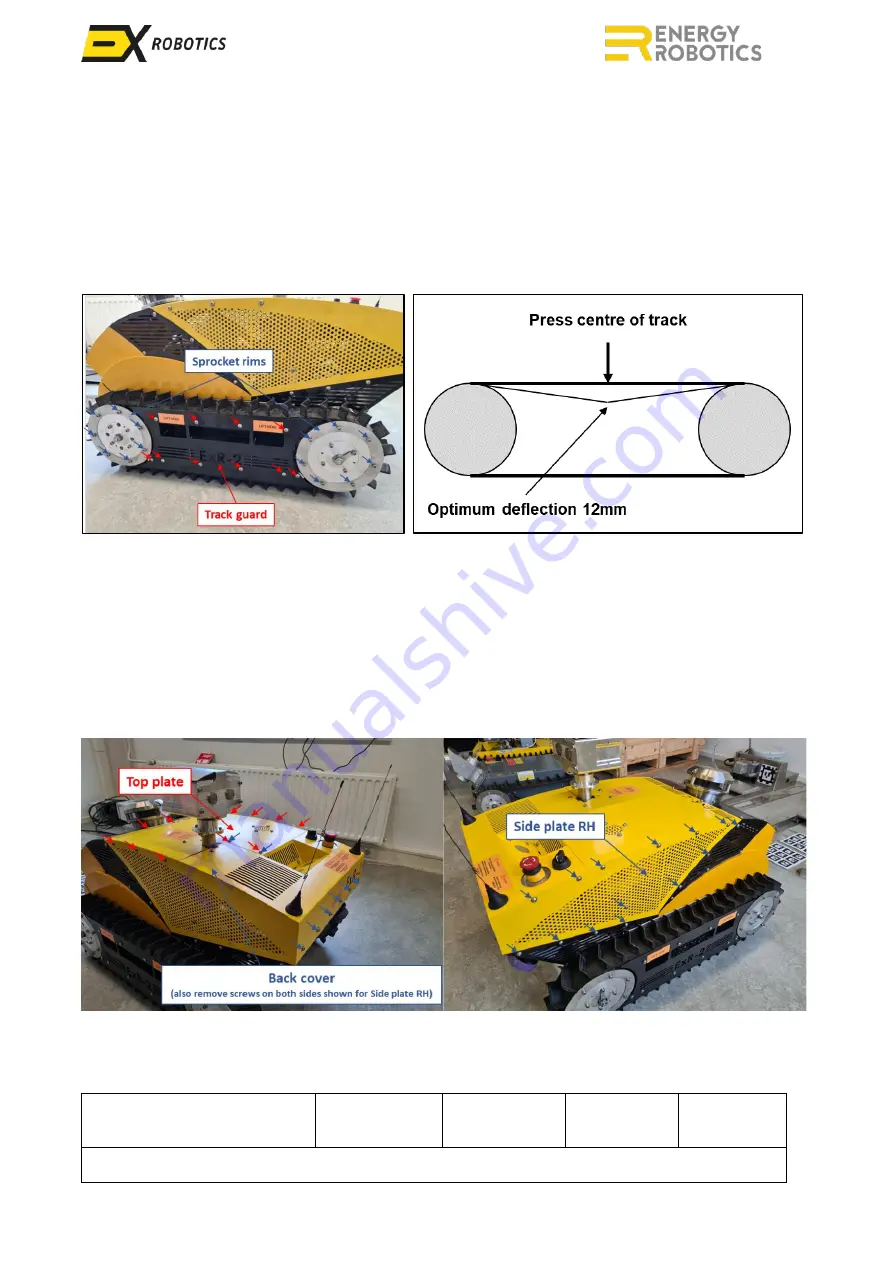
Remove the outer front and back sprocket rims by removing the screws shown in the picture.
▪
Prop the robot on blocks so that its tracks are off the ground.
▪
Remove the track guard by removing the screws shown in the picture.
▪
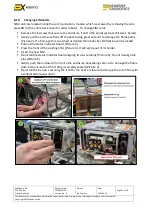
Slide the old track off the side of the sprockets and slide the new track on.
▪
Check that the track deflects by 12mm as shown in the picture.
▪
Replace the sprocket rims and track guard making sure that all of the screws are installed and
tightened.
8.7.
Opening the hull
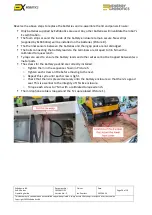
ExR-
2’s hull consist
s of a skeleton clad in panels that are secured to each other and the skeleton
with button head screws. All of the user-serviceable components are inside the hull, so one or more
of the panels will need to be removed to gain access to those components. These pictures show the
location of those panels and of the screws that need to be removed (see colour coded arrows).
Ensure that all of the screws and cable ties are replaced when the panels are replaced otherwise
the integrity of the robot’s hull will be compromised.
For older robots the side plate RH and back
cover are combined into a single panel.


