38
6.
Press the up or down arrow button to select the name of your wireless network and press the
OK
button. If you do not see your wireless network's name, you can enter it manually.
Note:
To enter the wireless network name manually, select
Other SSIDs
and press the
OK
button.
Enter your network name as described in the next step.
7.
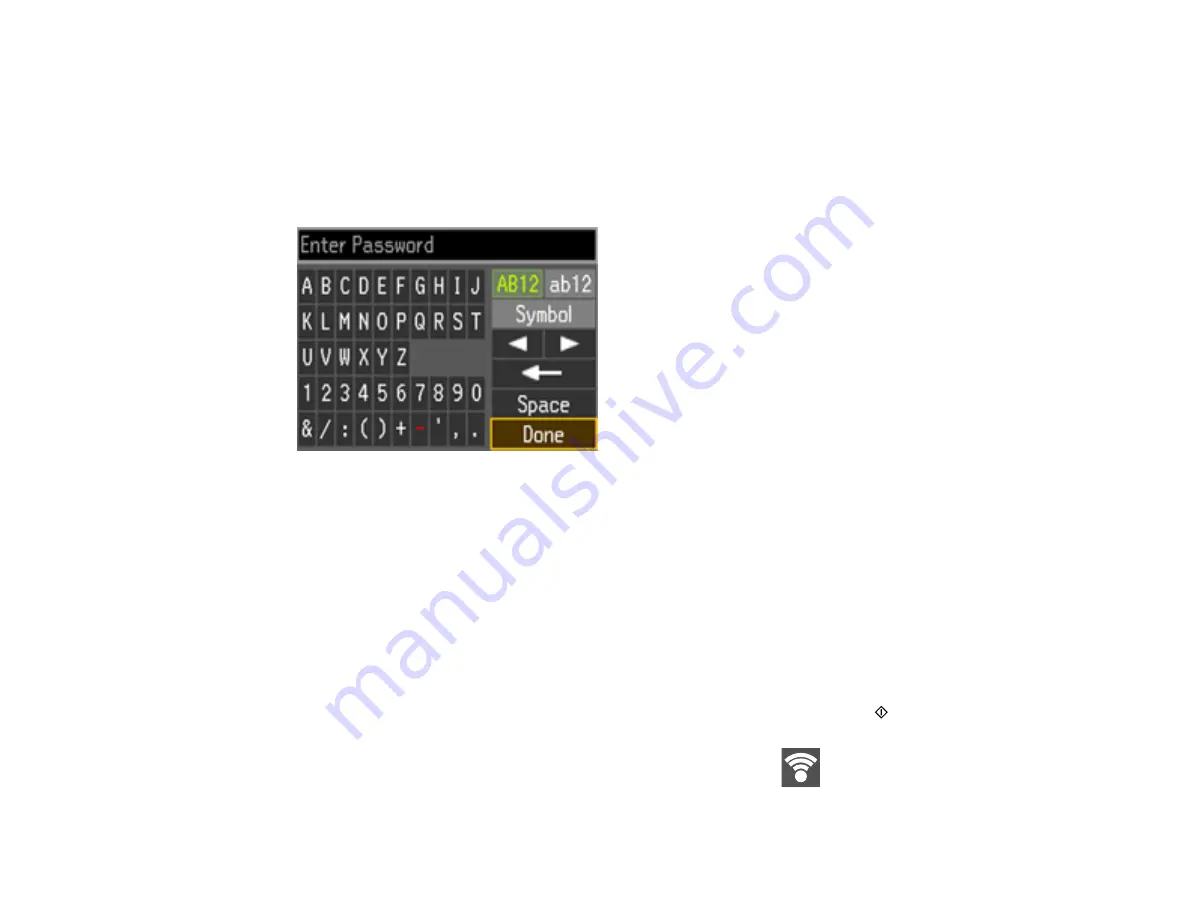
Enter your wireless password (or network name and then password).
• Press the arrow buttons to highlight a character or a function button displayed on the keypad.
Then press the
OK
button to select it.
• To change the case of letters or select symbols, select
AB12
(uppercase),
ab12
(lowercase), or
Symbol
and press the
OK
button. Then highlight a number or symbol and press the
OK
button to
select it.
• To enter a space, select
Space
and press the
OK
button.
• To delete characters, select the back arrow and press the
OK
button.
• When you finish entering characters, select
Done
and press the
OK
button.
8.
Press the
OK
button to confirm Wi-Fi settings.
9.
To print a network status report, select
Yes
, press the
OK
button, and press the
start button.
(Otherwise, select
No
and press the
OK
button.)
Your product should now display a Wi-Fi icon with connection bars
in the upper right corner of
the LCD screen.
Summary of Contents for XP-440
Page 1: ...XP 440 XP 446 User s Guide ...
Page 2: ......
Page 51: ...51 Related tasks Setting Up Epson Connect Services ...
Page 72: ...72 Related topics Loading Paper ...
Page 108: ...108 ...
Page 110: ...110 You see an Epson Scan 2 window like this ...
Page 112: ...112 You see this window ...


