background image

Parent topic:

Image Aspect Ratio

Color Mode

The projector offers different Color Modes to provide optimum brightness, contrast, and color for a
variety of viewing environments and image types. You can select a mode designed to match your image
and environment, or experiment with the available modes.

Changing the Color Mode
Available Color Modes
Turning On Auto Iris

Parent topic:

Using Basic Projector Features

Related references

Image Quality Settings - Image Menu

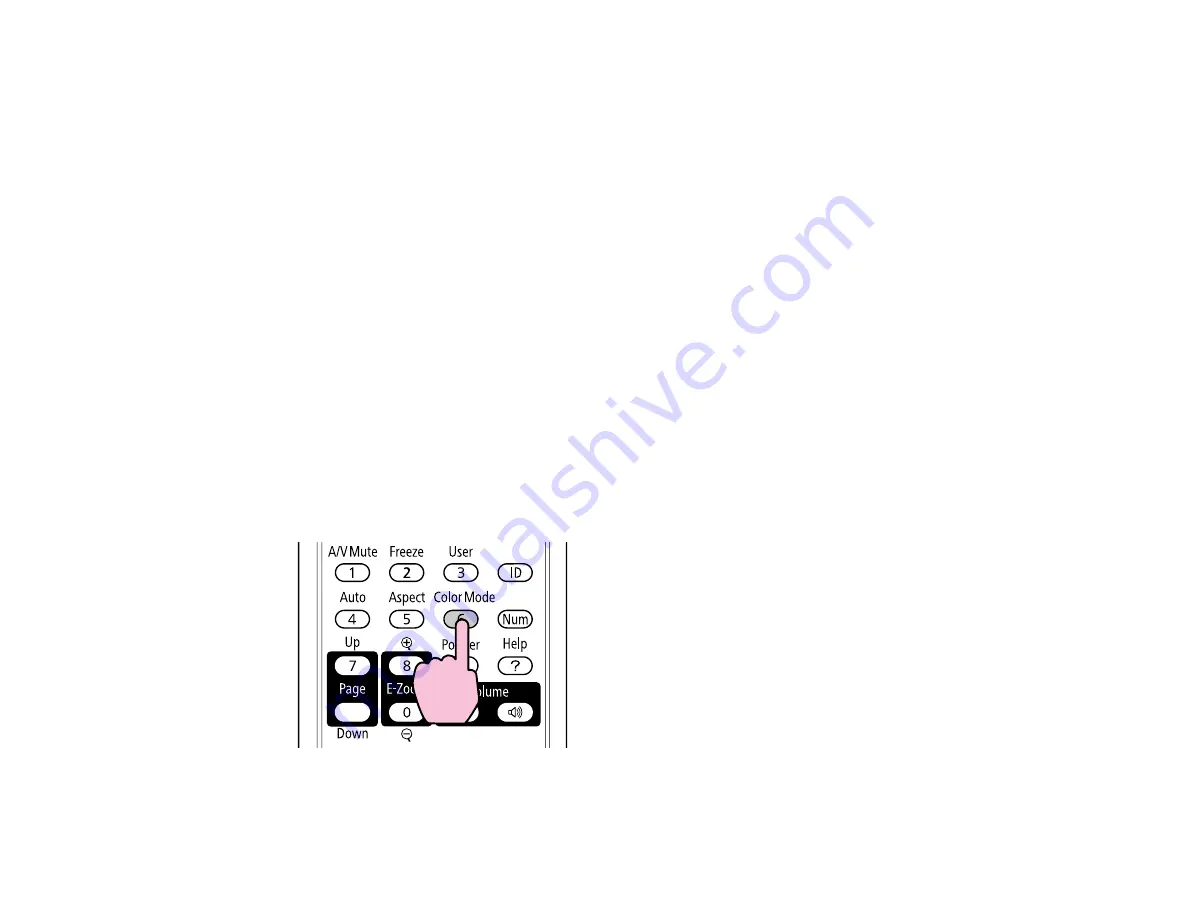
Changing the Color Mode

You can change the projector's Color Mode using the remote control to optimize the image for your
viewing environment.

1.

Turn on the projector and switch to the image source you want to use.

2.

If you are projecting from a DVD player or other video source, insert a disc or other video media and
press the Play button, if necessary.

3.

Press the Color Mode button on the remote control to change the Color Mode.

The image quality changes and the name of the Color Mode appears briefly on the screen.

49

Summary of Contents for VS400

Page 1: ...VS400 Projector User s Guide ...

Page 2: ......

Page 3: ...jector Parts Remote Control 15 Setting Up the Projector 17 Projector Placement 17 Projector Setup and Installation Options 17 Projection Distance 19 Projector Connections 22 Connecting to Computer Sources 22 Connecting to a Computer for USB Video 23 Connecting to a Computer for VGA Video 24 Connecting to a Computer for USB Mouse Control 25 Connecting to Video Sources 26 Connecting to a Component t...

Page 4: ...Image Source 43 Projection Modes 45 Changing the Projection Mode Using the Remote Control 46 Changing the Projection Mode Using the Menus 46 Image Aspect Ratio 47 Changing the Image Aspect Ratio 48 Available Image Aspect Ratios 48 Color Mode 49 Changing the Color Mode 49 Available Color Modes 50 Turning On Auto Iris 50 Adjusting Projector Features 52 Shutting Off the Picture Temporarily 52 Stoppin...

Page 5: ...or Setup Settings Extended Menu 75 Projector Information Display Info Menu 78 Projector Reset Options Reset Menu 81 Maintaining and Transporting the Projector 82 Projector Maintenance 82 Cleaning the Lens 82 Cleaning the Projector Case 83 Air Filter and Vent Maintenance 83 Cleaning the Air Filter and Vents 83 Replacing the Air Filter 84 Projector Lamp Maintenance 87 Replacing the Lamp 88 Resetting...

Page 6: ...106 Solutions to Projector Power or Shut Off Problems 106 Solutions to Problems With the Remote Control 107 Solutions to Password Problems 107 Where to Get Help 108 Technical Specifications 110 General Projector Specifications 110 Projector Lamp Specifications 111 Remote Control Specifications 112 Projector Dimension Specifications 112 Projector Electrical Specifications 112 Projector Environmenta...

Page 7: ...8 pixels XGA Plug and play USB projection 2000 1 contrast ratio and Auto Iris control for crisply detailed images Epson Instant Off and Direct Power On features for quick setup and shut down Product Box Contents Additional Components Optional Equipment and Replacement Parts Registration and Warranty Information Parent topic Introduction to Your Projector Related concepts Projector Parts Locations ...

Page 8: ...you plan to use the projector you may need to obtain the following additional components To receive an S Video signal you need an S Video cable This may be provided with your video device or you can purchase one from Epson or an authorized Epson reseller To receive a component video signal you need a D sub 15 pin component to VGA video cable You can purchase one from Epson or an authorized Epson r...

Page 9: ...ckpack ELPKS63 Universal projector ceiling mount ELPMBPJF Advanced projector ceiling mount ELPMBPRG High Security projector ceiling mount ELPMBATA Adjustable suspended ceiling channel kit ELPMBP01 False ceiling plate kit ELPMBP02 Structural Round ceiling plate ELPMBP03 Adjustable Extension Column pipe 8 11 20 3 to 27 9 cm ELPMBC01 Kensington security lock ELPSL01 Accolade Duet portable projector s...

Page 10: ...hese notations as you read your documentation Warnings must be followed carefully to avoid bodily injury Cautions must be observed to avoid damage to your equipment Notes contain important information about your projector Tips contain additional projection information Parent topic Introduction to Your Projector Where to Go for Additional Information Need quick help on using your projector during a...

Page 11: ...Projector Parts Front Top Projector Parts Rear Projector Parts Base Projector Parts Control Panel Projector Parts Remote Control Parent topic Introduction to Your Projector Projector Parts Front Top 1 Exhaust vent 2 Remote receiver 3 A V Mute slide lever 4 A V Mute slide lens cover 5 Front adjustable foot 11 ...

Page 12: ...atch 8 Air filter cover 9 Focus ring 10 Zoom ring 11 Control panel 12 Lamp cover Parent topic Projector Parts Locations Projector Parts Rear 1 Video and S Video ports 2 A C input port 3 Remote receiver 4 Security lock port 5 Air intake vent 12 ...

Page 13: ...6 Lamp cover screw 7 USB TypeB port 8 Computer port 9 RS 232C port Parent topic Projector Parts Locations Projector Parts Base 1 Mounting bracket holes 2 Rear feet 3 Security lock slot 13 ...

Page 14: ...tton searches for connected video sources 4 Enter button selects options 5 Vertical keystone adjustment buttons adjust screen shape and arrow buttons 6 Help button accesses projector help information 7 Esc button cancels exits functions 8 Arrow buttons 9 Menu button accesses projector menu system Parent topic Projector Parts Locations 14 ...

Page 15: ...Related references Projector Light Status Projector Parts Remote Control 15 ...

Page 16: ...rol wireless mouse functions 14 Enter button selects options and controls wireless mouse functions 15 Esc button cancels exits functions and controls wireless mouse functions 16 Volume up and down buttons buttons are not functional 17 Help button accesses projector help information 18 Pointer button activates on screen pointer 19 Num button switches buttons to number function for entering numbers ...

Page 17: ... these considerations in mind as you select a projector location Place the projector on a sturdy level surface or install it using a compatible mount Leave plenty of space around and under the projector for ventilation and do not place it on top of or next to anything that could block the vents Position the projector within 6 feet 2 m of a grounded electrical outlet or extension cord Projector Set...

Page 18: ...Front Rear Ceiling 18 ...

Page 19: ... references Projector Setup Settings Extended Menu Projection Distance The distance at which you place the projector from the screen determines the approximate size of the image The image size increases the farther the projector is from the screen but can vary depending on the zoom factor aspect ratio and other settings Use the tables here to determine approximately how far to place the projector ...

Page 20: ...s 6 cm 130 to 212 cm 50 inches 127 cm 64 to 105 inches 2 7 inches 7 cm 164 to 267 cm 60 inches 152 4 cm 78 to 126 inches 3 3 inches 8 cm 197 to 321 cm 80 inches 203 2 cm 104 to 169 inches 4 4 inches 11 cm 265 to 430 cm 100 inches 254 cm 131 to 212 inches 5 5 inches 14 cm 332 to 538 cm 150 inches 381 cm 197 to 319 inches 8 2 inches 21 cm 501 to 810 cm 200 inches 508 cm 264 to 426 inches 10 9 inches...

Page 21: ...to Tele 29 inches 73 7 cm 40 to 66 inches 0 6 inch 2 cm 102 to 167 cm 40 inches 101 6 cm 56 to 91 inches 0 9 inch 2 cm 142 to 232 cm 50 inches 127 cm 70 to 115 inches 1 1 inches 3 cm 179 to 291 cm 60 inches 152 4 cm 85 to 138 inches 1 3 inches 3 cm 216 to 350 cm 70 inches 177 8 cm 99 to 161 inches 1 6 inches 4 cm 252 to 409 cm 80 inches 203 2 cm 114 to 184 inches 1 8 inches 5 cm 289 to 468 cm 100 ...

Page 22: ...r standard video output monitor port For video projection connect devices such as DVD players gaming consoles digital cameras and camera phones with compatible video output ports Caution If you will use the projector at altitudes above 4921 feet 1500 m turn on High Altitude Mode to ensure the projector s internal temperature is regulated properly Connecting to Computer Sources Connecting to Video ...

Page 23: ...t the projector to your computer using a USB cable Note The computer display resolution must be between 640 480 and 1680 1200 to project using USB You cannot use the remote control s wireless mouse function when you use your projector s USB Type B port for presentation display 1 In the projector s Extended menu set the USB Type B setting to USB Display 2 Turn on your computer 3 Connect the cable t...

Page 24: ...d references Projector Setup Settings Extended Menu Connecting to a Computer for VGA Video You can connect the projector to your computer using a VGA computer cable Note To connect a Macintosh that includes only a Mini DisplayPort or Mini DVI port for video output you need to obtain an adapter that allows you to connect to the projector s VGA video port Contact Apple for compatible adapter options...

Page 25: ... on the projector you can set up the remote control to act as a wireless mouse This lets you control computer presentations at a distance from your computer To do this connect the projector to your computer using a USB cable Note You cannot use the remote control s wireless mouse function when you use your projector s USB Type B port to project from a computer 1 In the projector s Extended menu se...

Page 26: ...omputer documentation for details Parent topic Connecting to Computer Sources Related references Projector Setup Settings Extended Menu Connecting to Video Sources Follow the instructions in these sections to connect video devices to the projector Connecting to a Component to VGA Video Source Connecting to an RGB VGA Video Source Connecting to an S Video Video Source Connecting to a Composite Vide...

Page 27: ...ange the Input Signal setting in the projector s Signal menu Parent topic Connecting to Video Sources Related references Projector Parts Rear Connecting to an RGB VGA Video Source You can connect the projector to a video source that has an RGB video output port using a VGA computer cable 1 Make sure the projector and your video source are turned off 2 Connect the VGA computer cable to your video s...

Page 28: ...ource has a composite video port you can connect it to the projector using an optional RCA style video or A V cable 1 Make sure the projector and your video source are turned off 2 Connect the cable with the yellow connector to your video source s yellow video output port 3 Connect the other end to the projector s Video port Parent topic Connecting to Video Sources Related references Projector Par...

Page 29: ...1 Open the battery cover as shown 2 Insert the batteries with the and ends facing as shown 29 ...

Page 30: ... clicks into place Parent topic Setting Up the Projector Opening the Lens Cover 1 To open the projector s lens cover slide the A V Mute slide lever 2 To cover the lens or temporarily turn off the projected picture slide the A V Mute slide cover closed 30 ...

Page 31: ...Parent topic Setting Up the Projector 31 ...

Page 32: ...Menus Adjusting the Image Height Image Shape Resizing the Image With the Zoom Ring Focusing the Image Using the Focus Ring Remote Control Operation Selecting an Image Source Projection Modes Image Aspect Ratio Color Mode Turning On the Projector Turn on the computer or video equipment you want to use before you turn on the projector so it can display the image source 1 Open the projector s lens co...

Page 33: ...projector beeps and the power light flashes green as the projector warms up After about five seconds the power light stops flashing and turns green WARNING Never look into the projector lens when the lamp is on This can damage your eyes and is especially dangerous for children If you do not see a projected image right away try the following Turn on the connected computer or video device Insert a D...

Page 34: ...will vary depending upon mode selected environmental conditions and usage Brightness decreases over time 1 Press the power button on the projector or the remote control The projector displays a shutdown confirmation screen 2 Press the power button again To leave it on press any other button The projector beeps twice the lamp turns off and the power light turns orange Note With Epson s Instant Off ...

Page 35: ...ht is orange but not flashing then unplug the power cord Caution To avoid damaging the projector or lamp never unplug the power cord when the power light is green or flashing orange 4 Close the projector s lens cover Parent topic Using Basic Projector Features 35 ...

Page 36: ...select the Extended menu and press Enter 4 Press the down arrow button to select the Language setting and press Enter 5 Select the language you want to use and press Enter 6 Press Menu to exit the menus Parent topic Using Basic Projector Features Adjusting the Image Height If you are projecting from a table or other flat surface and the image is too high or low you can adjust the image height usin...

Page 37: ...s Related concepts Image Shape Related references Projector Feature Settings Settings Menu Image Shape You can project an evenly rectangular image by placing the projector directly in front of the center of the screen and keeping it level If you place the projector at an angle to the screen or tilted up or down or off to the side you may need to correct the image shape for the best display quality...

Page 38: ...that is unevenly rectangular on the sides 1 Turn on the projector and display an image 2 Press a keystone button on the projector s control panel After correction your image is slightly smaller Note If the projector is installed out of reach you can also correct the image shape using the Keystone settings in the projector menus Parent topic Image Shape Resizing the Image With the Zoom Ring 1 Turn ...

Page 39: ...ctor s zoom ring Parent topic Using Basic Projector Features Focusing the Image Using the Focus Ring 1 Turn on the projector and display an image 2 To sharpen the image focus rotate the projector s focus ring Parent topic Using Basic Projector Features 39 ...

Page 40: ...st anywhere in the room up to 26 feet 8 m away You can point it at the screen or the front or back of the projector Make sure that you aim the remote control at the projector s receivers within the angles listed below Horizontal angles Vertical angles 1 26 feet 8 m 2 45º 3 30º 4 15º 40 ...

Page 41: ...emote control as a wireless mouse so you can control your computer presentation from a distance Note You cannot use the remote control s wireless mouse function when you use your projector s USB Type B port to project video 1 Connect the projector to a computer using the projector s Computer port 2 Using a USB cable connect the projector s USB TypeB port to a USB port on your computer for wireless...

Page 42: ... release Enter at the destination Parent topic Remote Control Operation Related references Projector Setup Settings Extended Menu Using the Remote Control as a Presentation Pointer You can use the projector s remote control as a pointer to help you call out important information during a presentation The default pointer shape is an arrow but you can select an alternative shape using the Settings m...

Page 43: ...rences Projector Feature Settings Settings Menu Selecting an Image Source If you connected multiple image sources to the projector such as a computer and DVD player you may want to switch from one image source to the other 1 Make sure the connected image source you want to use is turned on 2 For video image sources insert a DVD or other video media and press Play if necessary 43 ...

Page 44: ...3 Do one of the following Press the Source Search button on the projector or remote control until you see the image from the source you want 44 ...

Page 45: ...s cover is open For laptop computers make sure you have set up your laptop to output its display properly Parent topic Using Basic Projector Features Projection Modes Depending on how you positioned the projector you may need to change the projection mode so your images project correctly Front default setting lets you project from a table in front of the screen Front Ceiling flips the image over t...

Page 46: ...ottom 1 Turn on the projector and display an image 2 Hold down the A V Mute button on the remote control for five seconds The image disappears briefly and reappears flipped top to bottom 3 To change projection back to the original mode hold down the A V Mute button for five seconds again Parent topic Projection Modes Changing the Projection Mode Using the Menus You can change the projection mode t...

Page 47: ...e input signal from your video source determines the image s aspect ratio However for certain images you can change the aspect ratio to fit your screen by pressing a button on the remote control If you always want to use a particular aspect ratio for a certain video input source you can select it using the projector s menus Changing the Image Aspect Ratio Available Image Aspect Ratios Parent topic...

Page 48: ...nal press the Aspect button repeatedly Parent topic Image Aspect Ratio Available Image Aspect Ratios You can select the following image aspect ratios depending on the input signal from your image source Note Black bands and cropped images may project in certain aspect ratios depending on the aspect ratio and resolution of your input signal Aspect ratio setting Description Normal Displays images us...

Page 49: ...Projector Features Related references Image Quality Settings Image Menu Changing the Color Mode You can change the projector s Color Mode using the remote control to optimize the image for your viewing environment 1 Turn on the projector and switch to the image source you want to use 2 If you are projecting from a DVD player or other video source insert a disc or other video media and press the Pl...

Page 50: ...n a bright room video S Video or composite video input only sRGB Best for standard sRGB computer displays Blackboard Best for presentations onto a green chalkboard adjusts the colors accordingly Whiteboard Best for presentations onto a whiteboard adjusts the colors accordingly Photo Best for still images projected in a bright room Customized Best for customizing a color mode using manual Color Adj...

Page 51: ...3 Select the Image menu 4 Press Enter 5 Select the Auto Iris setting 6 Select On 7 Press Menu to exit Parent topic Color Mode 51 ...

Page 52: ...re if you want to redirect your audience s attention during a presentation Any video action continues to run however so you cannot resume projection at the point that you stopped it If you want to display an image such as a company logo or picture when the presentation is stopped you can set up this feature using the projector s menus 1 Press the A V Mute button on the remote control to temporaril...

Page 53: ...n continues to run however so you cannot resume projection at the point that you stopped it 1 Press the Freeze button on the remote control to stop the video action 2 To restart the video action in progress press Freeze again Parent topic Adjusting Projector Features Zooming Into and Out of Images You can draw attention to parts of a presentation by zooming into a portion of the image and enlargin...

Page 54: ...as necessary 6 To return to the original image size press Esc Parent topic Adjusting Projector Features Projector Security Features You can secure your projector to prevent theft or unintended use by setting up the following security features Password security to prevent the projector from being turned on and prevent changes to the startup screen and other settings Button lock security to block op...

Page 55: ...e feature The presence of the custom screen discourages theft by identifying the projector s owner Setting a Password Selecting Password Security Types Entering a Password to Use the Projector Saving a User s Logo Image to Display Parent topic Projector Security Features Setting a Password To use password security you must set a password 1 Hold down the Freeze button on the remote control until yo...

Page 56: ...pt 5 Enter the password again You see the message Password accepted 6 Press Esc to return to the Password Protect menu 7 Make a note of the password and keep it in a safe place in case you forget it Parent topic Password Security Types Selecting Password Security Types After setting a password you see the Password Protect menu Select the password security types you want to use 56 ...

Page 57: ... select On and press Esc You can attach the Password Protect sticker to the projector as an additional theft deterrent Note Be sure to keep the remote control in a safe place if you lose it you will not be able to enter the password required to use the projector Parent topic Password Security Types Entering a Password to Use the Projector If a password is set up and a Power On Protect password is ...

Page 58: ...the projector remains locked You must contact Epson for service and provide the request code displayed with the locking message Parent topic Password Security Types Related references Where to Get Help Saving a User s Logo Image to Display You can transfer an image to the projector and then display it whenever the projector turns on You can also display the image when the projector is not receivin...

Page 59: ...ng if you want to use the displayed image as a user s logo 4 Select Yes and press Enter You see a selection box overlaying your image 5 Use the arrow buttons on the remote control to surround the image area you want to use as the User s Logo and press Enter You see a prompt asking if you want to select this image area 6 Select Yes and press Enter If you want to change the selected area select No p...

Page 60: ...message screen 10 Select the Extended menu and press Enter 11 Select Display and press Enter 12 Select when you want to display the User s Logo screen To display it whenever there is no input signal select Display Background and set it to Logo To display it whenever you turn the projector on select Startup Screen and set it to On To display it whenever you press the A V Mute button select A V Mute...

Page 61: ...Enter 3 Select one of these lock types and press Enter To lock all of the projector s buttons select Full Lock To lock all buttons except the power button select Partial Lock You see a confirmation prompt 4 Select Yes and press Enter Unlocking the Projector s Buttons Parent topic Projector Security Features Unlocking the Projector s Buttons If the projector s buttons have been locked hold the Ente...

Page 62: ...Projector Security Features Related references Projector Parts Rear Projector Identification System for Multiple Projector Control You can operate multiple projectors using one remote control for more elaborate presentations To do this you assign an identification number to each projector and to the remote control Then you can operate all the projectors at once or individually You can also match t...

Page 63: ... to use for the projector Then press Enter Repeat these steps for all the other projectors you want to operate from one remote control Parent topic Projector Identification System for Multiple Projector Control Setting the Remote Control ID The remote control s ID is set to zero by default so it can operate any compatible projector If you want to set the remote control to operate only a particular...

Page 64: ...e You must set the remote control ID to match the projector ID each time you turn on the projector you have set it to control 6 To allow the remote control to operate any compatible projectors again ID number is zero repeat the steps above and set the remote control ID number to 0 Parent topic Projector Identification System for Multiple Projector Control Matching Multiple Projector Display Qualit...

Page 65: ...splay and press Enter You may need to switch the remote control ID back and forth to make adjustments to each projector in all of these steps 11 Change the Adjustment Level setting to 5 on each projector but this time match the lighter display to the darker one 12 Adjust the Brightness Correct setting on Adjustment Level 2 3 and 4 in the same way 13 Adjust the green to red G R and blue to yellow B...

Page 66: ...ettings Image Menu Input Signal Settings Signal Menu Projector Feature Settings Settings Menu Projector Setup Settings Extended Menu Projector Information Display Info Menu Projector Reset Options Reset Menu Using the Projector s Menus You can use the projector s menus to adjust the settings that control how your projector works The projector displays the menus on the screen 66 ...

Page 67: ...1 Press the Menu button on the control panel or remote control 67 ...

Page 68: ...e through the settings 5 Change the settings using the buttons listed on the bottom of the menu screens 6 To return all the menu settings to their default values select Reset 7 When you finish changing settings on a menu press Esc 8 Press Esc or Menu to exit the menu system Parent topic Adjusting the Menu Settings Image Quality Settings Image Menu Settings on the Image menu let you adjust the qual...

Page 69: ...s for an input source make sure the source is connected and select that source Setting Options Description Color Mode See the list of available Color Adjusts the vividness of image Modes colors for various image types and environments 69 ...

Page 70: ...d on temperature color temperature Color Adjustment Slider bars for each color Adjusts the intensity of red green and blue hues in the image for Customized Color Mode also adjusts cyan magenta and yellow hues and saturation Auto Iris On Adjusts the projected luminance based on the image brightness Off when certain Color Modes are selected Note The Brightness setting does not affect lamp brightness...

Page 71: ...Computer RGB video input source Component video input source Composite video input source 71 ...

Page 72: ...ions Description Auto Setup On Automatically optimizes computer image quality when Off On Resolution Auto Sets the input signal resolution if not detected automatically using Normal the Auto option Wide Customized 1 and 2 Various resolutions Tracking Varying levels available Adjusts signal to eliminate vertical stripes in computer images Sync Varying levels available Adjusts signal to eliminate fu...

Page 73: ... and animation Input Signal Auto Specifies the signal type from input sources connected to RGB computer ports Component Auto detects signals automatically RGB corrects color for computer RGB video inputs Component corrects color for component video inputs Video Signal Auto Specifies the signal type from the input sources connected to the Various video standards composite video and S Video ports Au...

Page 74: ...tions Description Keystone Varying levels available Adjusts image shape vertically Control Panel Lock Full Lock Controls projector button locking to secure the projector Partial Lock Full Lock locks all buttons Off Partial Lock locks all buttons except Power Off no buttons locked Pointer Shape Three shapes available Changes the shape of the remote control pointer feature 74 ...

Page 75: ...vers turned on Off User Button Power Consumption default Assigns a menu option to the User button on the remote Info control for one touch access Progressive Test Pattern Closed Caption Multi screen Resolution Test Pattern On Displays a test pattern to assist in focusing and zooming the image Off and correcting image shape press Esc to cancel pattern display Parent topic Adjusting the Menu Setting...

Page 76: ...y Background selects the screen color or logo to display when no signal is received Startup Screen controls whether a special screen appears when the projector starts up A V Mute selects the screen color or logo to display when A V Mute is turned on Closed Caption Off Controls use of closed captions and selects the closed caption or CC1 CC2 CC3 CC4 text channel TEXT1 TEXT2 TEXT3 TEXT4 76 ...

Page 77: ...ing Sleep Mode Timer the Power button Lens Cover Timer Sleep Mode automatically turns High Altitude Mode off the projector after an interval of inactivity Sleep Mode Timer sets the interval for Sleep Mode Lens Cover Timer automatically turns off the projector after 30 minutes if the lens cover is closed High Altitude Mode regulates the projector s operating temperature at altitudes above 4921 feet...

Page 78: ... the projector when you use multiple projectors 1 through 9 Multi screen Adjustment Level 1 to 5 Matches display qualities and colors of multiple projectors Brightness Correct Color Correct Language Various languages available Selects the language for projector menu and message displays not changed by Reset option Parent topic Adjusting the Menu Settings Projector Information Display Info Menu You...

Page 79: ...Video input source USB input source 79 ...

Page 80: ...e of the port to which the current input source is connected Input Signal Displays the input signal setting of the current input source Resolution Displays the resolution of the current input source Video Signal Displays the video signal format of the current input source Refresh Rate Displays the refresh rate of the current input source Sync Info Displays information that may be needed by a servi...

Page 81: ...set All option on the Reset menu You can also reset the projector s lamp usage timer to zero when you replace the lamp using the Reset Lamp Hours option You cannot reset the following settings using the Reset All option Computer Input Signal User s Logo Language Lamp Hours Parent topic Adjusting the Menu Settings 81 ...

Page 82: ... any part of the projector turn it off and unplug the power cord Never open any cover on the projector except the lamp cover Dangerous electrical voltages in the projector can injure you severely WARNING Do not try to service this product yourself except as specifically explained in this manual Refer all other servicing to qualified servicers Cleaning the Lens Cleaning the Projector Case Air Filte...

Page 83: ... can damage the case Parent topic Projector Maintenance Air Filter and Vent Maintenance The projector s air filter keeps the intake air clean and its vents expel the exhaust If dust collects on the air filter or vents clean them as described in this manual Dust clogs may cause the projector to overheat due to improper ventilation Be sure to clean the air filter and vents if you see a message telli...

Page 84: ...filter Parent topic Air Filter and Vent Maintenance Replacing the Air Filter You need to replace the air filter in the following situations After cleaning the air filter you see a message telling you to clean or replace it The air filter is torn or damaged You can replace the air filter while the projector is mounted to the ceiling if necessary The illustrations below show the projector placed on ...

Page 85: ...2 Open the air filter cover 85 ...

Page 86: ...3 Pull the air filter out of the projector Note Air filters contain polycarbonate ABS resin and polyurethane foam Dispose of used air filters according to local regulations 86 ...

Page 87: ...is used and displays this information in the projector s menu system Replace the lamp as soon as possible when the following occurs The projected image gets darker or starts to deteriorate A message appears when you turn on the projector telling you to replace the lamp The projector s lamp light is flashing orange Replacing the Lamp Resetting the Lamp Timer Parent topic Projector Maintenance Relat...

Page 88: ...o avoid injury You can replace the lamp while the projector is mounted to the ceiling if necessary 1 Turn off the projector and unplug the power cord 2 Allow the projector lamp to cool down for at least one hour 3 Use the screwdriver included with the replacement lamp to loosen the screw securing the lamp cover WARNING If the lamp is broken glass fragments may be loose inside the lamp chamber Be c...

Page 89: ...4 Slide the lamp cover out and lift it off 5 Loosen the screws securing the lamp to projector The screws do not come all the way out 89 ...

Page 90: ...p the lamp as shown and pull it out of the projector Note The lamp s in this product contain mercury Please consult your state and local regulations regarding disposal or recycling Do not put in the trash 90 ...

Page 91: ...7 Gently insert the new lamp into the projector If it does not fit easily make sure it is facing the right way Caution Do not touch any glass on the lamp assembly to avoid premature lamp failure 91 ...

Page 92: ...e lamp firmly at the labelled point and tighten the screws to secure it 9 Replace the lamp cover and tighten the screw to secure it Note Be sure the lamp cover is securely installed or the lamp will not come on 92 ...

Page 93: ...t reset the lamp timer after replacing the projector s lamp to clear the lamp replacement message and to keep track of lamp usage correctly Note Do not reset the lamp timer if you have not replaced the lamp to avoid inaccurate lamp usage information 1 Turn on the projector 2 Press the Menu button 3 Select the Reset menu 4 Press Enter 5 Select Reset Lamp Hours and press Enter You see a prompt askin...

Page 94: ...emote control uses the two AA manganese or alkaline batteries Replace the batteries as soon as they run out 1 Open the battery cover as shown 2 Remove the old batteries WARNING If the battery fluid has leaked wipe it away with a soft cloth and avoid getting the fluid on your hands If it gets on your hands wash them immediately to avoid injury 94 ...

Page 95: ...eries with the and ends facing as shown 4 Close the battery cover and press it down until it clicks into place WARNING Dispose of used batteries according to local regulations Do not expose batteries to heat or flame 95 ...

Page 96: ... connected to the projector Use a carrying case to hand carry the projector When transporting the projector a long distance or as checked luggage place it in a carrying case Then pack the case in a firm box with cushioning around it and mark the box Fragile When shipping the projector for repairs place it in its original packing materials if possible or use equivalent materials with cushioning aro...

Page 97: ...ojector is not working properly try turning it off and unplugging it Then plug it back in and turn it on If this does not solve the problem check the following The lights on the projector s control panel may indicate what the problem is The projector s help system can display information about common problems if the projector is operating The solutions in this manual can help you solve many proble...

Page 98: ...on in the table below 1 Power light 2 Lamp light 3 Temperature light Power light Lamp light Temperature Status and solution light Green Off Off Normal operation Flashing green Off Off Warming up Wait for an image to appear Orange Off Off Standby or sleep mode Flashing orange Off Off Preparing network monitoring or shutting down Wait for the light to remain orange before unplugging the projector 98...

Page 99: ...altitude turn on High Altitude Mode If overheating continues replace the air filter If the problem persists unplug the projector and contact Epson for help Red Flashing red Off Lamp or lamp cover has a problem Close the lamp cover securely Check to see if the lamp is burned out broken or installed incorrectly Reseat or replace the lamp as necessary Make sure that the vents and air filter are not c...

Page 100: ... the Help menu 3 Use the up and down arrow buttons to highlight the problem you want to solve 4 Press Enter to view the solutions 5 When you are finished do one of the following To select another problem to solve press Esc To exit the help system press Help Parent topic Solving Problems Solving Image Problems Check the solutions in these sections if you have any problems with projected images Solu...

Page 101: ...l Power Consumption setting Check the Display setting to make sure Messages is set to On If the projector does not respond when you press the control panel buttons the buttons may be locked Unlock the buttons If the projector does not respond when you press buttons on the remote control make sure the remote receivers are turned on Parent topic Solving Image Problems Related references Image Qualit...

Page 102: ...o make sure the external monitor port is enabled See your computer or Windows manual for instructions Parent topic Solutions When No Signal Message Appears Displaying From a Mac Laptop If you see the No Signal message when you display from a Mac laptop you need to set up the laptop for mirrored display 1 Open the System Preferences utility and select Displays 2 Select Detect Displays 3 On the Arra...

Page 103: ...ution within the projector s limits See your computer manual for details Check the resolution assigned to your presentation files to see if they are created for a different resolution than you are projecting in See your software help for details Parent topic Solving Image Problems Related references Input Signal Settings Signal Menu Supported Video Display Formats Solutions When the Image is Not R...

Page 104: ...ect a computer video resolution that is compatible with the projector If you are projecting from a computer press the Auto button on the remote control to automatically adjust the tracking and sync settings If you adjusted the image shape using the projector controls try decreasing the Sharpness setting to improve image quality If you connected an extension cable try projecting without it to see i...

Page 105: ... the Lens Focusing the Image Using the Focus Ring Solutions When the Image Brightness or Colors are Incorrect If the projected image is too dark or light or the colors are incorrect try the following solutions Press the Color Mode button on the remote control to try different color modes for the image and environment Adjust the available settings on the Image menu for the current input source such...

Page 106: ...ly connected to the projector and to a working electrical outlet The projector s buttons may be locked for security Unlock the buttons or use the remote control to turn on the projector The power cord may be defective Disconnect the cord and contact Epson If the projector s lamp shuts off unexpectedly it may have entered sleep mode after a period of inactivity Begin a presentation to wake the proj...

Page 107: ...le turn off one of the remote receivers in the projector s menu system or check if all the remote receivers were turned off If you assigned an ID number to the remote control to operate multiple projectors you may need to check or change the ID setting If you lose the remote control you can order another one from Epson Parent topic Solving Projector or Remote Control Operation Problems Related con...

Page 108: ...lable 6 AM to 6 PM Pacific Time Monday through Friday for the duration of your warranty period You may also speak with a projector support specialist by dialing one of these numbers U S 562 276 4394 6 AM to 6 PM Pacific Time Monday through Friday Canada 905 709 3839 6 AM to 6 PM Pacific Time Monday through Friday Days and hours of support are subject to change without notice Toll or long distance ...

Page 109: ...To purchase a replacement remote control call 562 276 4394 U S or 905 709 3839 for dealer referral in Canada Parent topic Solving Problems 109 ...

Page 110: ...y Poly silicon TFT active matrix Resolution 1024 x 768 pixels XGA Lens F 1 75 to 2 42 Focal length 24 to 38 2 mm Color reproduction Full color 16 77 million colors Brightness Normal Power Consumption mode White light output 4000 lumens ISO 21118 standard Color light output 4000 lumens ECO Power Consumption mode White light output 2700 lumens ISO 21118 standard Contrast ratio 2000 1 with Auto Iris ...

Page 111: ...DNX ICs are used in this projector Parent topic Technical Specifications Projector Lamp Specifications Type UHE Ultra High Efficiency Power consumption 230 W Lamp life Normal Power Consumption mode Up to about 2500 hours ECO Power Consumption mode Up to about 3500 hours Note Turn off this product when not in use to prolong the life of the projector Lamp life will vary depending upon mode selected ...

Page 112: ...Specifications Projector Electrical Specifications Rated frequency 50 60 Hz Power supply 100 to 240 VAC 10 3 7 to 1 6 A Power consumption Operating 317 W Normal Power Consumption mode 224 W ECO Power Consumption mode 100 to 120 V Standby 0 2 W Communication Off 7 2 W Communication On Power consumption Operating 298 W Normal Power Consumption mode 216 W ECO Power Consumption mode 200 to 240 V Stand...

Page 113: ...ported Video Display Formats For best results your computer monitor or video card resolution should be set to display in the projector s native resolution However your projector includes Epson s SizeWise chip that supports other computer display resolutions so your image will be resized to fit automatically Your computer s monitor or video card refresh rate vertical frequency must be compatible wi...

Page 114: ...0 800 SXGA2 60 75 85 1280 960 SXGA3 60 75 85 1280 1024 SXGA 60 75 85 1400 1050 WXGA 60 75 85 1440 900 UXGA60 60 1600 1200 WSXGA 60 60 1680 1050 iMAC VGA 117 640 480 iMAC SVGA 95 800 600 iMAC XGA 75 1024 768 MAC13 67 640 480 MAC16 75 832 624 MAC19 75 1024 768 MAC19 60 59 1024 768 MAC21 75 1152 870 NTSC 60 NTSC4 43 60 PAL 50 M PAL 60 N PAL 50 PAL60 60 SECAM 50 114 ...

Page 115: ...sh rate in Hz Resolution in pixels TV525i 480i 60 TV625i 576i 50 SDTV525p 480p 60 SDTV625p 576p 50 HDTV750p 720p 50 60 HDTV1125i 1080i 50 60 HDTV1125p 1080p 50 60 Analog ports only Parent topic Technical Specifications 115 ...

Page 116: ...ojector and its accessories come packaged in plastic bags Keep plastic bags away from small children to avoid any risk of suffocation Caution When you replace the lamp never touch the new lamp with your bare hands the invisible residue left by the oil on your hands may shorten the lamp life Use a cloth or glove to handle the new lamp Parent topic Notices Important Safety Instructions Follow these ...

Page 117: ... be walked on This may result in fraying or damage to the plug Unplug the projector from the wall outlet before cleaning Use a dry cloth or for stubborn dirt or stains a moist cloth that has been wrung dry for cleaning Do not use liquid or aerosol cleaners Do not block the slots and openings in the projector case They provide ventilation and prevent the projector from overheating Do not operate th...

Page 118: ...y other than where you purchased it use the correct power cord for that country Do not stand on the projector or place heavy objects on it Do not use the projector outside of the required temperature range of 41 to 95 ºF 5 to 35 ºC Doing so may cause an unstable display and could lead to projector damage Do not store the projector outside of the required temperature range of 14 to 140 ºF 10 to 60 ...

Page 119: ... cause harmful interference to radio or television reception However there is no guarantee that interference will not occur in a particular installation If this equipment does cause interference to radio and television reception which can be determined by turning the equipment off and on the user is encouraged to try to correct the interference by one or more of the following measures Reorient or ...

Page 120: ...d all rights in those marks This information is subject to change without notice Parent topic Notices Copyright Notice All rights reserved No part of this publication may be reproduced stored in a retrieval system or transmitted in any form or by any means electronic mechanical photocopying recording or otherwise without the prior written permission of Seiko Epson Corporation The information conta...

Page 121: ...ising from the use of any options or any consumable products other than those designated as Original Epson Products or Epson Approved Products by Seiko Epson Corporation Copyright Attribution Parent topic Notices Copyright Attribution 2010 Epson America Inc 4 10 CPD 28023 121 ...

Reviews: