


D
Choose the nozzle arrays to be cleaned.
❏
Use the
d
/
u
buttons to choose the nozzle arrays
with faint or missing segments in the nozzle check
pattern and press the
Z
button.
❏
After selecting the arrays you wish to clean, select
Proceed
and press the
Z
button.
E
Select a cleaning level and press the
Z
button.
Select
Execute (Light)
first.
F
Head cleaning will be performed.
The menu will close when cleaning is complete.
Print a nozzle pattern and inspect the results to
determine whether the problem has been
resolved.
U
“Checking for clogged nozzles” on page 82
If you paused the printer in Step 1, printing will
resume when head cleaning is complete; check
the printout to confirm whether the problem has
been resolved.
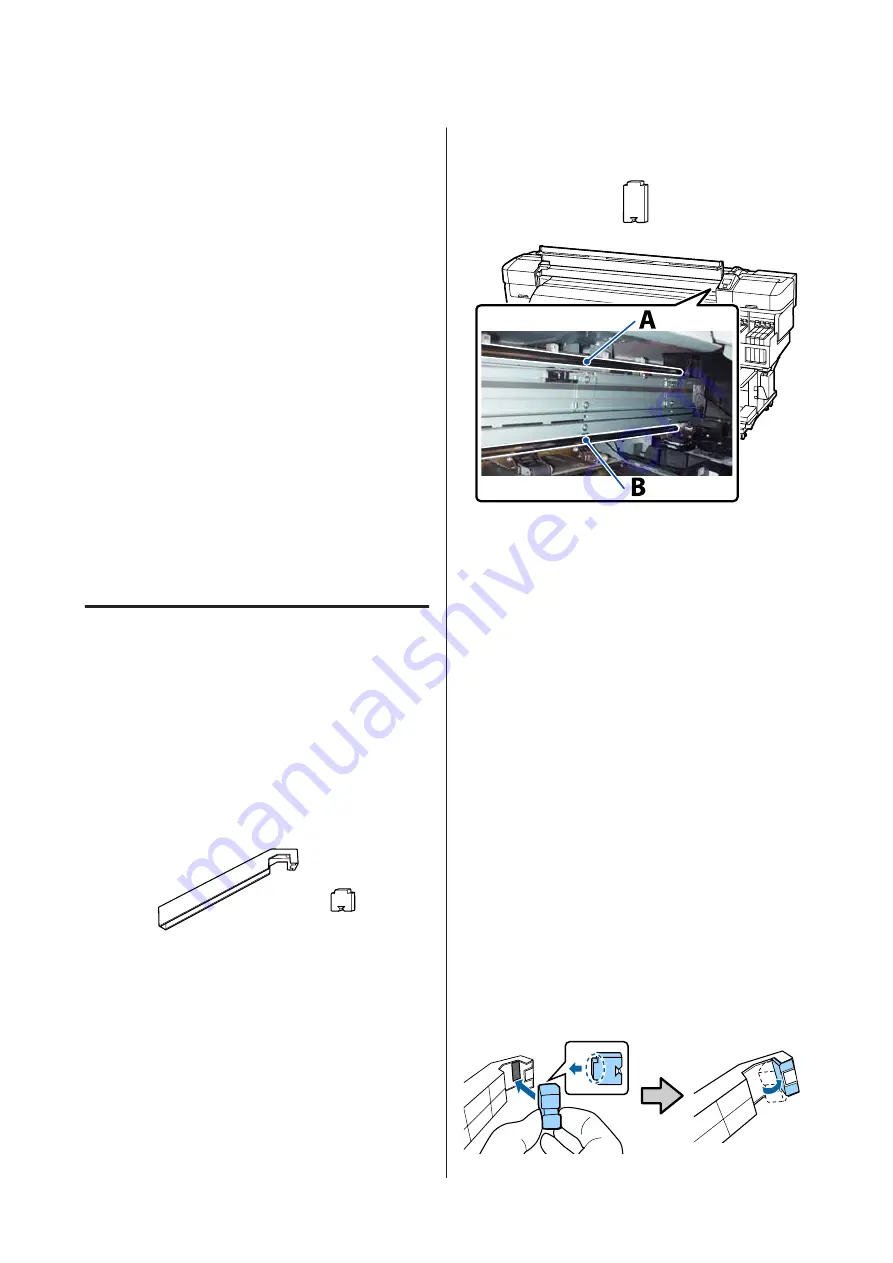
Applying Carriage Rod Grease
When the message
Apply carriage rod grease. See
manual.
is displayed on the screen of the control panel,
grease using the grease kit supplied with the printer.
Greasing areas
Carriage rod A
Use the grease tool and pad A to clean and grease rod
A.
Carriage rod B
Use the pad B to clean and grease rod B.
Greasing procedure
Before starting this procedure, be sure to read the
following:
U
“Precautions regarding maintenance” on page 57
Carriage rod A
A
Press the
#
button.
The
Maintenance
menu will be displayed.
B
Use the
d
/
u
buttons to select
Grease Carriage
Rod
, and then press the
Z
button.
C
When the message
Grease kit is needed.
Continue?
is displayed, use the
d
/
u
buttons to
select
Yes
, and then press the
Z
button.
D
Open the front cover.
E
Attach a fresh pad A to the grease tool.
Insert the tab of the pad firmly into the
rectangular slot on the grease tool and fit the pad
to the tool as shown.
SC-F9200 Series User's Guide
Maintenance
84


