2.
Load a few sheets of plain paper in the product.
3.
Hold down the
stop button and press the
power button to turn the product on.
4.
When the product turns on, release both buttons.
The product begins printing a nozzle check pattern.
5.
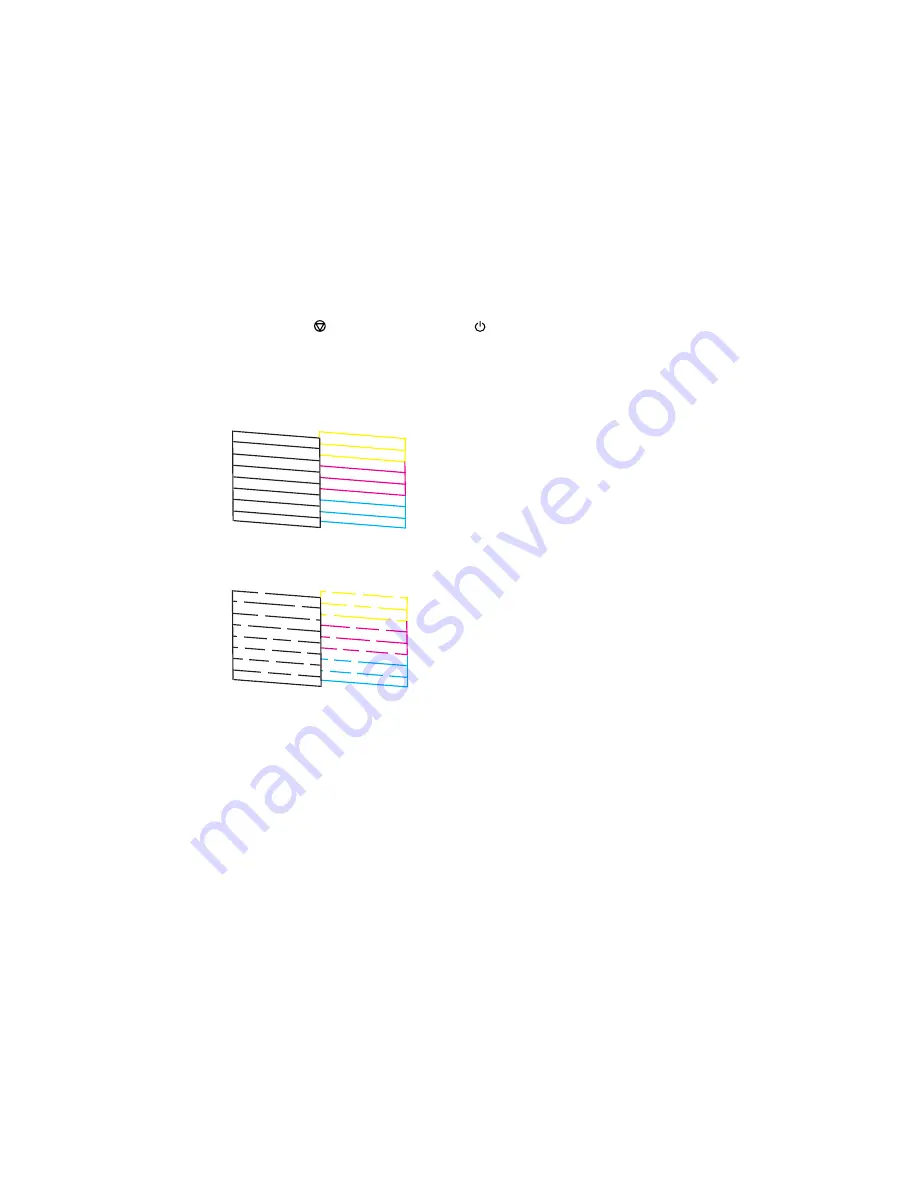
Check the printed pattern to see if there are gaps in the lines.
Print head is clean
Print head needs cleaning
6.
If there are no gaps, the print head is clean and you can continue printing.
If there are gaps or the pattern is faint, clean the print head.
Parent topic:
Print Head Nozzle Check
Related tasks
Loading Paper in the Sheet Feeder
Cleaning the Print Head Using the Product Buttons
Refilling the Ink Tanks
126
Summary of Contents for ET-2500
Page 1: ...ET 2500 User s Guide ...
Page 2: ......
Page 10: ......
Page 16: ...1 Document cover 2 Scanner glass Parent topic Product Parts Locations 16 ...
Page 77: ...You see this window 77 ...
Page 94: ...You see this window 94 ...
Page 115: ...Related topics Starting a Scan 115 ...
Page 156: ...2 Remove any jammed paper from the rear paper feed slot 3 Lift the scanner unit 156 ...


