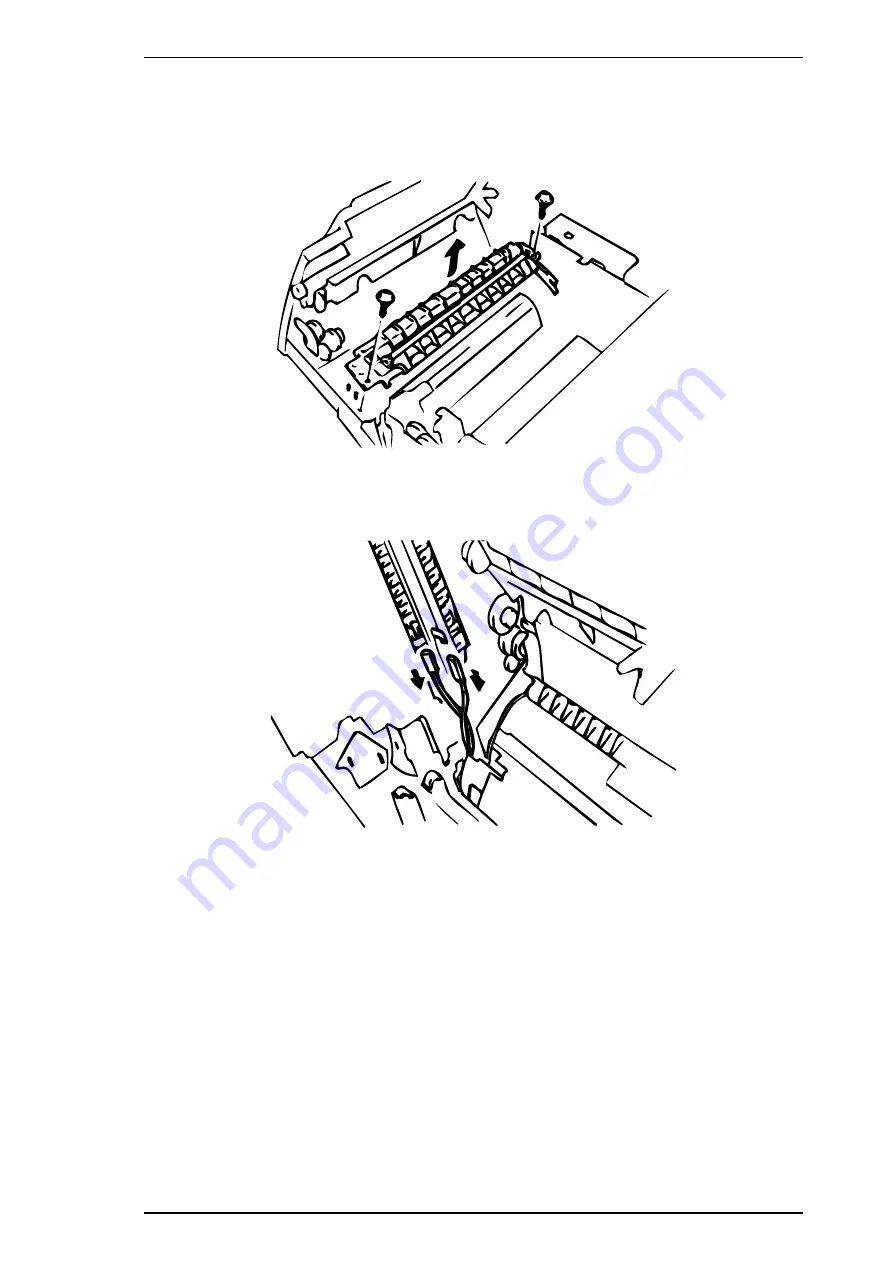
3.2.3.2 Image Transfer Unit Removal
1.
Open the top cover.
2.
Remove harness cover A. (Refer to Section 3.2.3.3.)
3.
Remove the 2 screws and holders at both ends of the image transfer unit.
4.
Disconnect the 2 connectors and remove the unit.
Figure 3-5. Removing the Image Transfer Unit - 1
Figure 3-6. Removing the Image Transfer Unit - 2
EPL-5500W Service Manual
Disassembly and Assembly
Rev. A
3-7
Summary of Contents for EPL-5500W
Page 1: ...EPSON TERMINAL PRINTER EPL 5500W SERVICE MANUAL EPSON 4005668 ...
Page 2: ... ii ...
Page 9: ...REVISION SHEET Revision Issue Date Revision Page Rev A November 24 1995 1st issue vii ...
Page 13: ...Rev A 1 iii ...
Page 31: ...List of Tables Table 2 1 Functions of C180 MAIN Board Main Elements 2 18 ...
Page 71: ...4 ii Rev A ...
Page 85: ...6 ii Rev A ...
Page 89: ...Maintenance EPL 5500W Service Manual 6 4 Rev A ...
Page 96: ...Appendix EPL 5500W Service Manual A 6 Rev A ...
Page 98: ...Appendix EPL 5500W Service Manual A 8 Rev A ...
Page 103: ...Figure A 7 C180 MAIN Component Layout Side B EPL 5500W Service Manual Appendix Rev A A 13 ...
Page 105: ...EPSON Printed in Japan 95 11 01 S ...


