


75
Problems Getting Good Print Quality
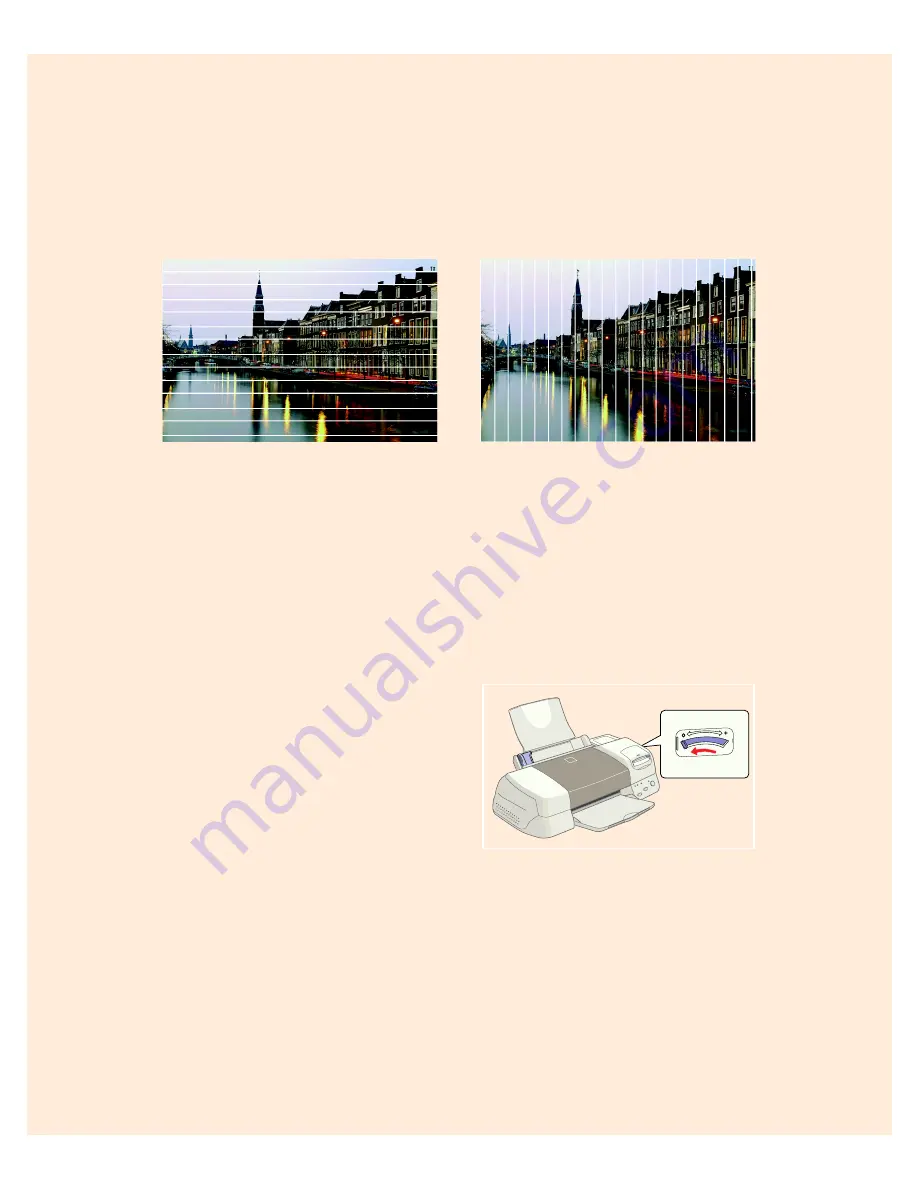
You see horizontal banding.
■
Make sure the print head nozzles are
not clogged. To clean the print head,
see page 59.
■
Make sure the Media Type setting
matches the paper you loaded. See
page 34 for guidelines.
■
Make sure the printable side of the
paper is face up. It is usually whiter
or shinier.
■
Make sure an ink cartridge isn’t low
on ink. To replace an ink cartridge,
see page 63.
■
Try using Automatic mode. See
page 16 (Windows) or page 21
(Macintosh) for instructions.
■
Make sure the paper thickness lever is
in the
0
position (shown at right). Set
it to the
+
position to print on thick
paper or envelopes. Also turn off
High Speed
in the printer software.
■
Run the Print Head Alignment
utility using EPSON ink jet paper.
See page 66 for instructions.
You see vertical banding.
■
Run the Print Head Alignment
utility using EPSON ink jet paper.
See page 66 for instructions.
■
Make sure the paper thickness lever is
in the
0
position, as shown below.
Set it to the
+
position for thick
paper or envelopes. Also turn off
High Speed
in the printer software.
■
If you’re printing an image with
Landscape orientation, you may
actually have horizontal banding. Try
the solutions described to the left.
■
When
Maximum
is selected as the
Printable Area, banding may occur in
the expanded area. Select
Standard
.
Summary of Contents for 875DC - Stylus Photo Color Inkjet Printer
Page 1: ...Printer Basics Printed on recycled paper with at least 15 post consumer content ...
Page 18: ...12 ...
Page 42: ...36 ...
Page 63: ...57 You see one of the screens below 8 Click OK Windows Macintosh ...
Page 64: ...58 ...
Page 94: ...88 ...
Page 100: ...94 ...


